If you’re looking to set up a livestream, this guide has everything you need to know.
Livestreaming can be a great medium for content creation. Platforms like Twitch and YouTube TV have made superstars out of gamers, but livestreaming is big enough to support streamers with varied interests. If gaming isn’t your thing, you can start livestreaming while you paint, react to videos, build keyboards, or do anything else you can think of.
Starting a livestream career isn’t hard to do if you have the right equipment, software know-how, and on-camera charisma. However, with so much competition across multiple streaming platforms, which now include Instagram Live and TikTok Live, it’s more important than ever to make a great first impression. That includes investing time and money in gear and brainstorming what you want your livestreams to be like. If this sounds too challenging, we’re here to tell you it’s not. Below, we’ll cover each criticall aspect of creating a livestream, from the gear you need to best practices for building an audience.
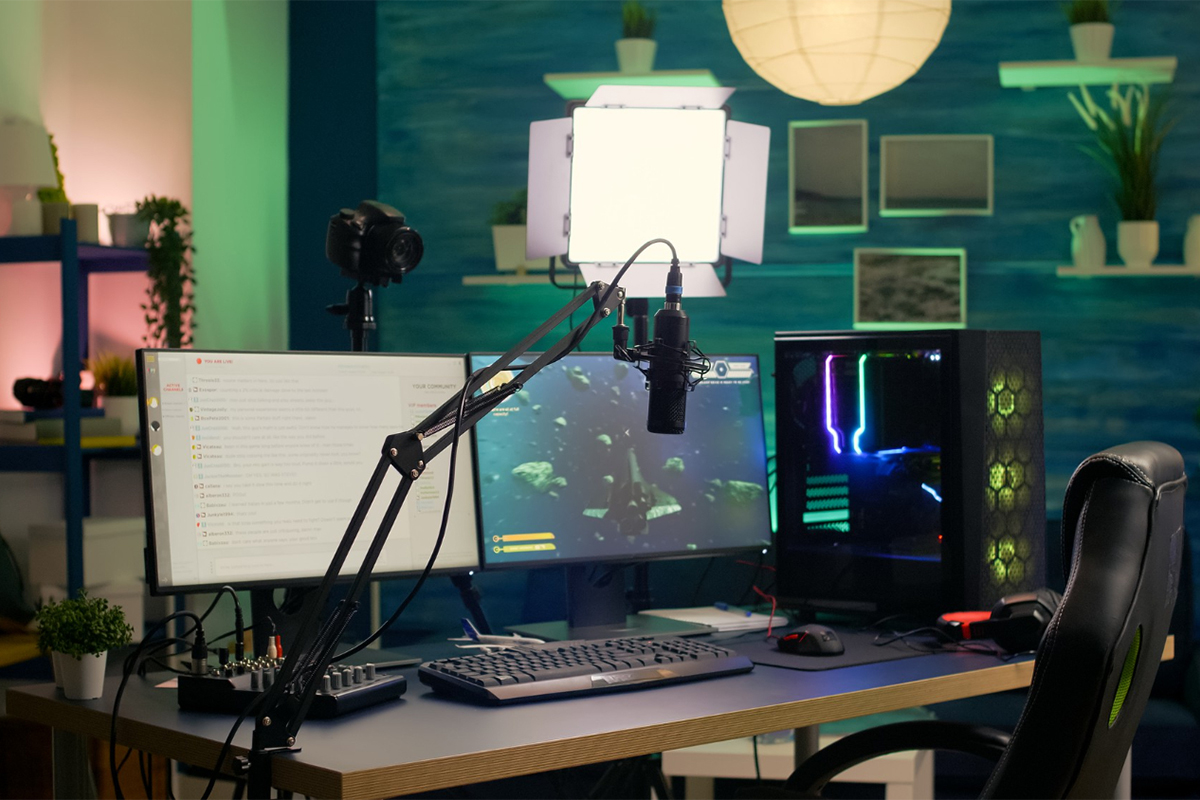
The Gear
It’s possible to host a livestream with nothing more than a phone or laptop since these devices have built-in webcams and microphones. If you’re working with a small or non-existent budget, this is a viable route that will teach you the fundamentals of livestreaming and help you build confidence in front of the camera. That being said, livestreams with low-quality audio and video get passed over easily, with impatient viewers clicking over to streams that look the part. While you can spend thousands of dollars on a high-end streaming setup, you can build a nice setup for much less. All you need is a few key pieces of equipment to start with.
PC
A PC is a must-have for streaming. While you can get away with using a laptop, you’ll miss out on the convenience that a fully equipped desktop PC will afford you. A desktop is better because you can upgrade it as time passes, improving it piece-by-piece rather than spending a big sum upfront. Also, a desktop PC-based setup has more connections for multiple monitors, peripherals, and additional streaming accessories.
GPU
While we won’t get into the specifics of building a PC, certain components are more important than others if you’re streaming. The graphics card, or GPU, is one such component. With a good GPU, you can take advantage of hardware encoding, which takes the burden of encoding video files from the CPU. This is especially useful if your CPU is struggling to simultaneously run a video game, the encoding software, and other applications like a web browser or music player. If you’ll be streaming and gaming, an Nvidia GPU is recommended because it gives you access to the Nvenc encoder. Modern Nvidia RTX GPUs can also take advantage of the Nvidia Broadcast software, which uses the GPU’s AI Tensor cores to implement machine learning-assisted features.
With Nvidia Broadcast, you can completely remove or replace your background without a green screen. You can also remove noise or echo from your microphone. A newly added feature called “Eye Contact” eerily keeps your eyes focused on the camera when you look away. For streamers interacting with the chat or shouting out new subscribers, this is a game changer.
Recommendation: Nvidia RTX 3060 Ti or 3070
CPU and RAM
You can operate a computer without a CPU or RAM, but a better CPU and more RAM can ensure a smooth stream. Newer, multi-threaded CPUs are better at handling more processes at once, which can prevent your framerate from tanking when streaming a video game. You won’t have to worry about applications crashing or freezing up if you have a beefy CPU.
Recommendation: AMD Ryzen 7 5700X
The RAM, or random access memory, is the fastest type of memory available on a computer. This type of memory is volatile, meaning any data stored on it will disappear when you reboot the computer. But RAM isn’t like a typical storage device; you won’t be storing music and image files onto the RAM. Instead, RAM is where program instructions and immediately necessary files are stored.
Having more RAM allows you to run more programs simultaneously, while faster RAM reduces task load times. With most modern video requiring 8 to 16GBs of RAM, you’ll need at least 32GBs of RAM if you’re planning to stream and game on the same computer. If you’re running a game on a separate PC or video game console, you can get away with less RAM. However, having extra RAM is never a bad thing.
Recommendation: Corsair LPX Vengeance RAM (4x8GB) 3200 MHz speed or faster
Capture Card
Consumer-grade capture cards were first used to record gameplay from an external video game console, but they’re now also used for streaming. You’ll need a capture card if you’re planning to play video games on an external device, such as a video game console or separate PC. Additionally, you can use a capture card to capture the video feed from a DSLR or mirrorless camera — the camera will need a video output port for this to work.
Recommendation for external capture card: Elgato HD60 X
Recommendation for internal capture card: Elgato 4K60 Pro
Recommendation for capturing a camera feed: Elgato Cam Link 4K
Camera
The urge to buy an expensive camera right out of the gate is tempting. It’s not uncommon for professional streamers to use mirrorless cameras that cost $2,000 or more. While the image quality of an expensive mirrorless camera is orders of magnitude better than that of a webcam, you can get very good quality with a webcam for a fraction of the price.
Investing in a key light and background lighting, and using camera effects within your encoding software, can make a webcam look amazing. Still, you’ll want to spend at least $100 on a webcam. No amount of lighting can make a 480p camera look great.
Budget Recommendation: Logitech StreamCam
Upgrade Recommendation: Dell UltraSharp 4K Webcam
Microphone
You have two options for microphones: USB or XLR. A USB microphone is a less expensive, plug-and-play option — you don’t need any additional hardware. USB microphones are convenient and feature built-in gain and volume control dials, headphone monitoring, and mute buttons. Some higher-end models can come with features like a high-pass filter, a PAD, and RGB lighting. You can get a good USB microphone for between $50 to $100, with options in the $150 delivering the best sound quality.
Alternatively, XLR microphones sound better but are more expensive and require additional hardware and maintenance. Regardless of which you choose, either kind of microphone is viable for live streaming.
USB Microphone Recommendation: HyperX QuadCast S
XLR Microphone Recommendation: Shure MV7
Streaming Peripherals and Accessories
With the items above, you have everything you need to create a live stream. But if you want to step it up, a few items are worth adding to your wishlist. For convenience, there’s no better product than a stream controller. With more than one hundred plugins and software integrations for the Stream Deck, you can do almost anything with the press of a button, including changing to different camera angles, playing music from Spotify, adjusting the volume of your stream, activating a lighting scene on your Hue lights, and more. A stream controller is like a macro keyboard on steroids.
Recommendation for stream controller: Elgato Stream Deck
To improve your video quality, you can invest in a key light or ring light that will make your face pop on camera. Background lighting won’t improve video quality, but it will make the stream look better and more professional. In some cases, your webcam may come with software that can improve the quality of the image with features like sharpening, low-light enhancement, FOV adjustment, or even AI framing. Additionally, you can apply a color grade or filter to your camera feed, which is possible to do on encoding software such as OBS.
Recommendation for key light: Logitech Litra Beam
One device that can help with dealing with multiple audio sources is a sound mixer. Apart from controlling your microphone’s gain, you can adjust the volume for other sources in your audio mix. For example, if you’re playing music in the background, you can adjust the slider to decrease the volume so that other elements in the mix can stand out. You can also mute your mic easily on a sound mixer or even hit a “bleep” button when you’re about to swear. Additionally, you can improve your audio setup by treating your room with sound panels, placing your microphone on a boom arm, and using a pop filter.
Recommendation for sound mixer: Razer Audio Mixer
The Software
With the hardware in place, next up is the software. Mainly, this means choosing a video encoding program, but there’s only one choice, really: Open Broadcast Studio.
Open Broadcast Studio (OBS)
OBS is the streaming control center. This open-source software is free to download and use. It looks unlike any other application, but it’s quite simple to use. You create scenes, add your video and audio sources, and go live. There’s more to it than that, but it’s more or less how you do it. You can control various video and audio sources with each scene and arrange them how you like. A simple stream would involve one source to capture the main event, another source for the webcam, and audio sources for your microphone and a music program.
Streams can be as elaborate as you want, with multiple camera angles and scenes increasing the production value of a stream. OBS can also be improved with plugins created by the community. While it does have a learning curve, it’s possible for anyone to pick up, thanks to an active community of creators on YouTube that provide excellent, in-depth OBS tutorials.
Streaming Platform
There are several streaming platforms to choose from, but Twitch and YouTube are the most popular. Twitch has been around the longest, offering the most features for both streamers and viewers. The Amazon-owned company is often under fire from streamers because of its changing policies, which can impact a streamer’s finances overnight with no prior warning. There’s also been a lot of controversy regarding what is or isn’t appropriate to stream on the platform, leading Twitch to ban popular streamers for weeks, months, and sometimes forever. That being said, Twitch attracts a large audience of viewers, and while competition is fierce, it also offers the best opportunity to build an audience.
YouTube Live is the other platform. Though it hasn’t been around as long as Twitch, YouTube Live has quickly become a leading livestreaming platform. Many of Twitch’s biggest stars have defected to YouTube because the Google-owned company offers bigger payouts and more room for streamers to expand into different video formats. Because YouTube Live is one facet of YouTube, streamers can create long-form videos and shorts without leaving the platform. This means YouTube streamers have a built-in audience for other types of content, which Twitch doesn’t offer.
Royalty-Free Music
With a lot of controversy over using copyrighted music on livestreams, using royalty-free music is the only way to prevent your channel from being penalized for using music. On Videvo, you can download free and paid royalty-free tracks that won’t get you in trouble — here’s how you can make sure you don’t get a copyright strike when using Videvo royalty-free music tracks.
Another option is Twitch’s Soundtrack software. This platform provides you with music that’s safe to use on a stream. It’s free to use and simple to set up. The only downside is that music from Soundtrack is only approved for livestreaming. The software prevents the music from being saved onto VODs. Also, this option is only for Twitch streamers.
Getting the most out of your stream
With the hardware and software set up, you’re ready to start live streaming. But before you go live, we have a few tips to give you a better chance of breaking out. The important thing to remember, however, is that your channel won’t become successful or profitable right away. Like anything else, building a successful channel takes time and effort. If you keep at it, you’ll be racking up the subs in no time.
Test Your Setup
You don’t want to go live on your first-ever livestream without testing your setup ahead of time. It’s not just a matter of ensuring all the hardware is connected and opening the software; you have to get your setup stream-ready by going through all the steps. The best way to do that is by actually going live.
On YouTube, you can create a private stream, giving you the freedom to test your setup without the worry of prying eyes jumping into your test stream. Twitch is different, but you can set the audience to “subscriber only,” which will prevent the wider Twitch audience from finding your stream. Another way to test a stream is by streaming to your friends on Discord. This lets you put your setup through its paces while taking some of the pressure off — your friends’ opinion is a plus.
Invest in Marketing
The livestreaming landscape is saturated. Even if your streaming setup looks and sounds great, and you’re a natural on camera, it can still be hard for viewers to find you. Reaching a wider takes time, but once someone clicks on your stream, it’s on you to keep them tuned in. At the very least, you should fill out your bio and add links to your other social media accounts. To take it a step further, you can invest in a visually appealing stream overlay.
Spice up Your Stream with Interactive Elements
You can also use something like Streamer.bot to add interactive elements to your stream. Streamer.bot allows you to create custom actions and sub-actions that can be triggered by written commands, your voice, or by viewers in the chat. Using Streamer.bot will let you create actions like playing a sound or emote whenever someone subscribes or donates Bits, for example. If you want to take your stream to the next level, this is the way to do it.
Don’t Forget About VODs
Even your biggest fans can’t make it to every stream, which is why there’s such a thing as a video on demand (VOD). A VOD is a recorded stream available to watch from your channel once the stream ends. VODs give viewers who missed your livestream a chance to get in on the fun.
Make a Schedule and Stick to It
Building an audience is a process, but consistency can help you win over viewers. Letting viewers know when you’re streaming will increase the chances that they will show up. The important part is to remain consistent. That doesn’t mean you can’t take days off, but if you say you’re streaming on Wednesday nights at 8 PM, you should be on time and ready to stream. If you keep at it, your stream will be like television, with an eager audience awaiting you to entertain them at a certain time each week.
Go Live
Now you have all the tools you need to get started on your livestreaming journey. Whether you go with a budget or high-end setup or pick YouTube Live over Twitch, the important thing is you make interesting content that people will want to watch. And you don’t have to play video games to make it as a livestreamer; you can stream your favorite hobby and build a community out of a shared interest. Whatever you choose to stream, picking something you’re passionate about will make livestreaming fun.
Cover image by DCStudio (Freepik).
Looking for filmmaking tips and tricks? Check out our YouTube channel for tutorials like this . . .
Looking for more tips and tricks? Check out these articles . . .