DIY video gear is the most practical way for filmmakers to expand their tool-kits. Here are our favorite video tutorials on how to build the equipment you need.
It doesn’t matter if you’re new to filmmaking or a seasoned veteran — everyone loves a good DIY solution when you’re on set. It’s one of the reasons accounts like sh*ttyrigs are so popular on Instagram.
Most DIY solutions are products of necessity. Sometimes we need solve problems on set creatively when things get forgotten or go missing — or when you just don’t have the right tools. However, we can also use DIY solutions to solve problems in advance with a limited budget.
Here are seven tutorials on do-it-yourself builds that can help with camera movement, lighting, and more. I know all of these solutions work because, at one time of another, we’ve used variations of each one.
So happy filmmaking and happy gearmaking. Let’s make some DIY video gear.
PVC Dolly
This build comes from Shazam! and Lights Out director David F. Sandberg. When you’re starting out, you’re always trying to figure out how to get smooth movement with little to no equipment. With just a few simple supplies, you can put together your own dolly and tracks. You can even add more PVC tracks for longer camera movements if you need to.
Supplies Needed:
- PVC pipe (x2)
- Plywood
- Skateboard wheels (x8)
- Corner brackets (x4)
- Screws, nuts, and bolts
Cost to Build: $50-100
This is one of the easiest and best tools aspiring filmmakers can put together. In fact, there are two PVC pipes right next to this very desk that are used for a DIY camera dolly. Speaking of the desk . . .
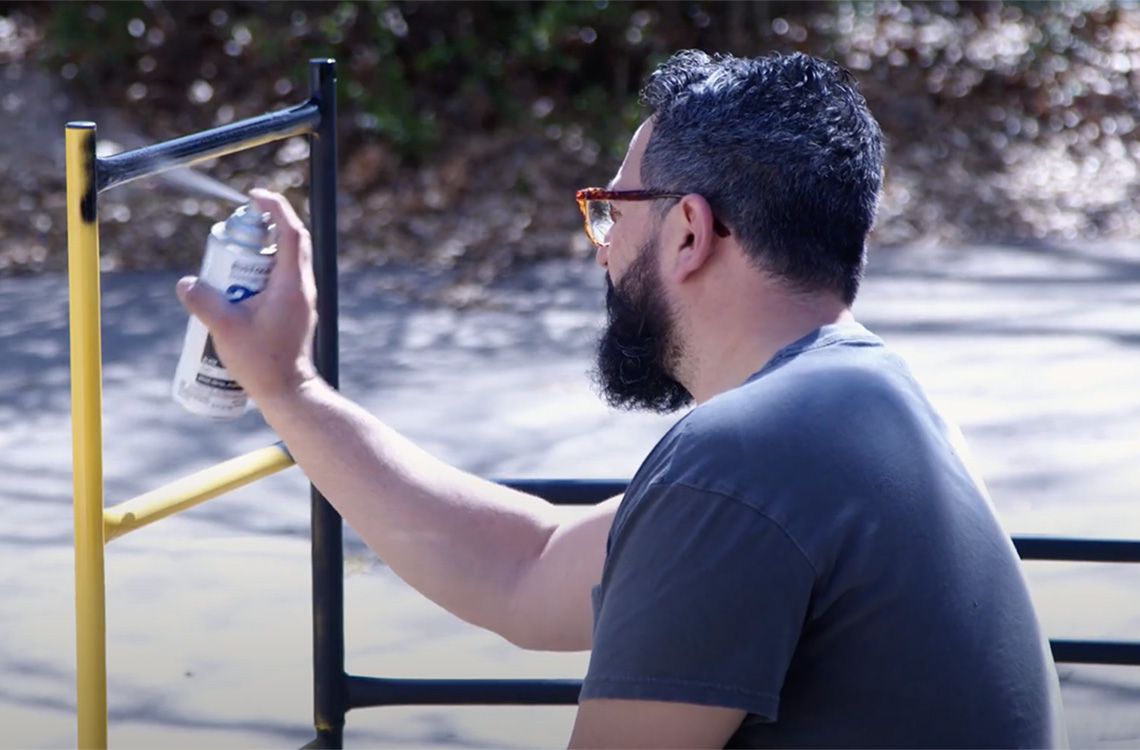
Portable and Collapsible Camera Cart / Editing Station
If you’re looking for a camera cart or portable desk to take on location, it’s easy to experience sticker shock when most standard films carts costs thousands of dollars. You may not even have room to fit one of those big carts in your vehicle.
Enter this collapsible and versatile DIY mobile workstation from Film Bodega. It works at a camera cart to carry equipment, as well as a mobile computer station for editing, photography, DIT, or VFX work. Best of all, it’s just scaffolding, so you can use it as a ladder or standing platform.
Supplies Needed:
- Collapsible scaffolding
- Plywood
- Carpet
- Spray paint
- Glue
Cost to Build: $100-$350
To upgrade your mobile cart, you can also add better wheels, some clamps, and other accessories for your monitors, as well as places for charging batteries and devices.
Rain Machine
This is a classic build just about everyone takes on at one point or another. For some filmmaking rain, sure, you can use a hose with a sprayer attachment, but what if you need a wider frame? Enter this build from filmmaker Tom Antos.
There are two different versions in the tutorial: a super-simple $15 build and a more robust and sturdy build using sprinkler heads that cost around $80.
Supplies Needed:
- Soaker garden hose
- Plumbing clamps
- Wood
or
- PVC pipe and connectors
- Sprinkler heads and adapters
- PVC glue
- Plumbers tape
- PVC to garden hose adapter
Cost to Build: $15-80
DIY Video Light
This is another DIY build that’s also in studios everywhere: an inexpensive hardware clamp light with built-in diffusion using some scraps. You can skip the cardboard and just hang the shower curtain diffusion in front of the light to get similar and better results. Check out this build from YCImaging for his build using scraps.
Supplies Needed:
- Aluminum clamp light
- Light bulb
- Shower liner
- Foil
- Cardboard
- Tape
Cost to Build: $50
Cake Pan Light
Inspired by the very light above, YouTuber Daniel Schiffer also took a stab at making his own DIY light with diffusion, this one using LED strips and a cake pan. What’s nice about this build is how compact it is, which makes it great for small spaces.
Supplies Needed:
- 14-inch cake pan
- Daylight LED strip
- Diffusion sheet
- 12V AC to DC adapter
- Smallrig clamp mount
Cost to Build: $40
DIY Light Stand
This is a classic DIY build that the older indie filmmaker crowd is sure to remember. It’s an early Film Riot tutorial on how they built a super cheap light stand. With some PVC pipe and connectors, you can build a simple light sand with just minimal tools and only a few minutes of your time.
Supplies Needed:
- PVC pipe
- 3/4″ PVC elbows (x6)
- 3/4″ PVC tee (x5)
- 3/4″ PVC coupling
- 1/2″ PVC couplings
- 3/4″ PVC cross
- All-purpose cement
- Nuts and bolts
Cost to Build: $10
DIY Light Diffusion
Now if you have some of those cheap lighting fixtures you purchased at a home improvement store, here are two easy ways to use a DIY bounce board or diffusion.
Supplies Needed:
- Shower Curtain
- Insulation Board
Cost to Build: $10-$20
Let’s say you don’t quite have the budget for any of these anamorphic options. Well, never fear! It’s no secret that filmmaking tech can be very expensive for seemingly simple pieces of gear. My favorite part about being a filmmaker is finding DIY solutions to accomplish a camera move, lighting effect, or gear to get the shot I envisioned. Let’s break down a few DIY alternatives you can accomplish right at home for far less than it would cost to do the Hollywood version.
Filter Lens Effects
Getting cool and unique effects through the lens usually means a set of filters, one for each effect. While there are “affordable,” $50-100, options for cool effects, that’s maybe $50 you can’t afford. Additionally, high-end filters can even run hundreds of dollars.
The DIY filmmaking OGs, Film Riot have some awesome ideas on how to achieve some cool lens effects in camera without all those expenses filters and accessories.
Some Items You’ll Need:
- Pantyhose
- Lighting Gels
- UV Lens Filter
- Markers
- Vasoline
- Construction Paper
Cost of Build: $5-20 for multiple effects
Film Riot’s video is really just a few suggestions. The possibilities are endless here and you can really use your imagination on how different items will affect your image. This is what creative filmmaking is really like.
Sound Blankets
If you find yourself filming in various locations, you may run into a room that has a done of reverb, with hard floors and reflective walls. On high end film sets, the audio engineer might have a big set of professional sound blankets to lay around and hang up to catch the sound. These blankets are typically filled with rock wool or another sound absorbing material. Unfortunately, these blankets can run hundreds of dollars, and the worst part? You can even sleep on ‘em
For a fraction of the price, you can purchase “Furni Pads” or furniture moving blankets. These generic blankets are meant to protect items you may be moving, so they can double as gear protection. These may not be as dense or be as effective, but they’ll get you most of the way there. For a third bonus, I’ve used these on sets to block out light from a window or negative fill in an interview setting.
Items You’ll Need:
- Various Size Moving Blankets
Cost: $5-15
Butterfly Diffusion/Bounce Frame
Shaping the light in front of your camera is a key skill in creating great looking videos. On a pro set, you’ll find 4×4’, 6×6’, 12×12’ or larger frames diffusing light and bouncing it around the set. If you’re browsing B&H to get yourself a set, you might feel some sticker shock at what the fabric and frames cost for these seemingly simple pieces of gear.
Film Riot again has you covered. Out of a few pieces of gear you can find at your hardware store and some beginner skills behind a sewing machine, you can have your butterfly diffusion frame for a fraction of the cost.
Items You’ll Need:
- PVC Corners
- PVC Tubes
- Raw Fabric
- Sewing Machine or Friend who can Sew
- Optional: Black Spray Paint
Cost: $50
While you lose the rigidity and quality of a manufactured frame, you still have the same portability and shapes the light just like the more expensive version.
Camera Slider
Sliders can go from relatively cheap ($100) to pretty expensive ($2,000). What if I said you have a slider on you right now . . . your shirt.
The channel Gadgets and Tech show you how a simple magazine or dish towel can be a good looking slider option in a pinch.
Items You’ll Need:
- Any sort of fabric or towel
Cost: $5 (hopefully free if you own a towel)
The use cases may be a little limited, and you lose a lot of control of the camera, but I can say, I’ve actually used this method on professional productions where I was not able to bring a slider and wanted a smooth camera move.
Camera Dolly
Similar to sliders, dollies create great-looking camera moves, but they can travel much further and accomplish more complicated moves.
This tip actually comes straight from us, in a Videvo tutorial video from a couple years ago. Instead of using a fancy camera dolly, we like to operate a camera atop a trusty skateboard. What I like the most about skating while filming is the fully controlled and long camera move I can make and then immediately hop off and move onto the next shot. In this video, we also break down a couple of other DIY filmmaking techniques iat no extra charge!
What you need:
- Skateboard (alternatively rollerskates)
- Amateur skateboarding skills
Cost: $40-100 (free if you already own a skateboard)
Skateboard are fairly common, so you should be able to borrow one from a friend or neighbor. The only downside is that you may not be able to keep the camera as steady as a dedicated dolly, but in my experience, it’s not usually a deal breaker. You’ll also need a little bit of skill and comfort on a board, but that can be learned.
Bonus Video:
Indy Mogul gives us some great insight into how a professional filmmaker still uses DIY techniques and takes a deep dive into how he approaches problems. There are quite a few real things you can make or use, but primarily solidifies how even at a professional level, DIY filmmaking is just filmmaking.
DIY is what filmmaking is all about. The limitations in budget and availability can really spark some great creativity, and I hope these little tips help you on your next shoot.
Looking for filmmaking tips and tricks? Check out our YouTube channel for tutorials like this . . .