Multi-cam editing brings multiple, simultaneous camera angles into your timeline for complete coverage. Here’s how it works.
Multi-cam editing in Premiere makes streaming together multiple camera angles happening at the same time easier than ever. With Multi-cam editing, you can quickly switch between camera angles and simplify your editing process.
What Is Multi-cam editing?
As the name implies, Multi-cam editing is a unique way to edit a sequence with footage from multiple cameras that were recording simultaneously. This tool allows you to see all of your possible camera angles at the same time, and choose which shot to take on the fly.
Multi-cam editing makes your editing more streamlined, and you’ll essentially be doing the job of a live Technical Director.
Why Use Multi-cam Editing?
Regular editing like you’re used to typically takes multiple related clips and forms them into a single video that flows well together, making a complete project. These are usually clips that happened over the course of a day or even multiple days, all at different times. When editing multiple camera angles that were recorded simultaneously, seeing them all at once is more beneficial and efficient to the editing process. Otherwise, you’d be watching each angle individually, wasting a ton of time. Like I’ve said many times before, being a great editor is mostly about being fast and efficient.
Multicam Editing can be used in any situation in which you need to edit a longer form or sequence in its entirety. For instance, this could be a live performance, a full presentation, a talk show, or a speaker series. In all of these situations, the end product needs to be the full recording, rather than segments or highlights trimmed down. Personally, I’ve used multi-cam editing a lot in music video recordings or live music performances. While music videos might be shot over the course of a day, you can easily sync up the backing track and choose which shot you’d like to use, rather than going through each clip on their own.
Setting up a Multi-cam Editing Sequence
Setting up a multicam editing sequence is pretty simple. Start by opening the Premiere Pro project that you’ll want to edit and import all of the clips you’ll want to use for the single timeline. Ensure that all of these clips were recorded simultaneously, otherwise, you’ll run into problems down the line.
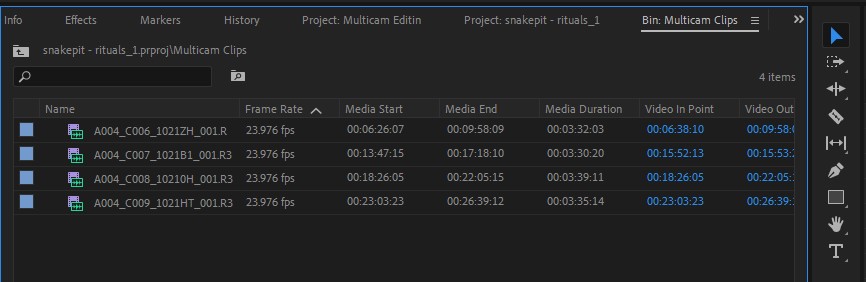
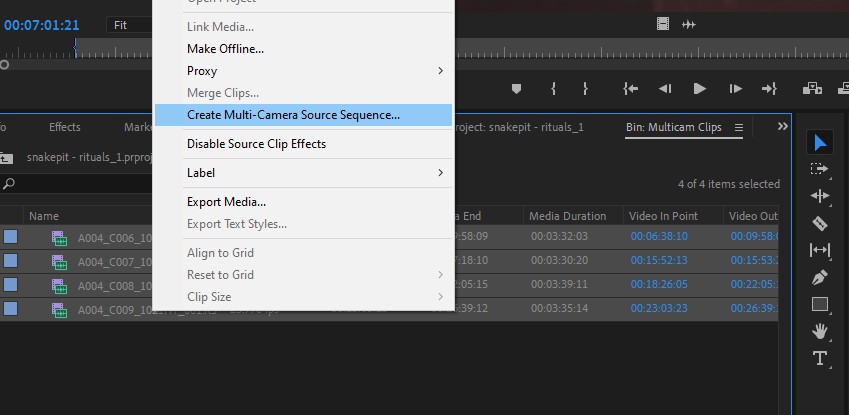
Highlight all the clips that you’d like to edit together, and right-click them while they’re all highlighted. Locate “Create Multicam Source Sequence” in the menu, about 8 from the bottom. This should bring up a dialogue box with a bunch of options.
The first option allows you to name the sequence if you’d like. The following option is probably the most important, especially considering the intention of the tool. Synchronize point tells Premiere where to start each clip. If each camera started recording at the exact same time or you’ve already chosen the “In” point on each angle, you can select “In Points.” “Out Points” does the opposite and syncs up all the cameras to when they stopped recording or the “Out” points are the same. Higher-end productions may have used “Timecode” to ensure every camera is in sync. This essentially changes the internal clocks of each camera to be exactly the same and allows for easy syncing in posts. Sound timecode is similar but uses timecode jammed into an audio channel of a camera, rather than its internal clock. What we’ll use today is Audio, and probably the easiest way to sync cameras. Be sure that every camera has a similar audio recording though. If one camera has its audio off or is not sounding the same as the others, syncing could have a problem.
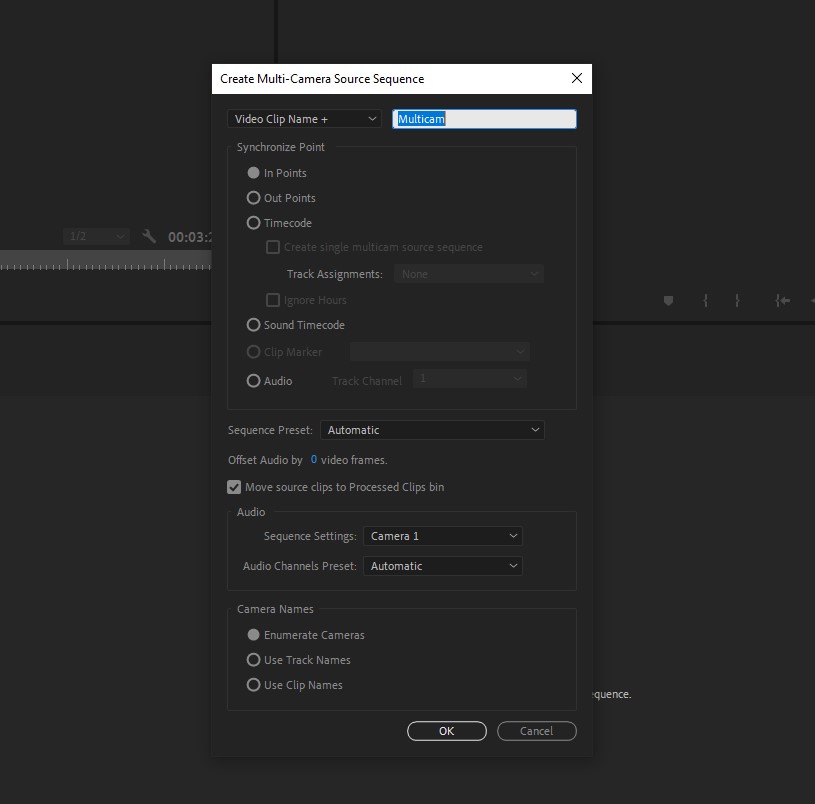
The sequence preset should be set to automatic and should cover most of your use cases. If you’re unfamiliar with Sequence settings, check out my previous article on the subject here.
Lastly, Camera Names clarifies which cameras or clips you’re using for this multi-cam editing sequence. Enumerate Cameras just allows Premiere to name them itself, rather than relying on track or clip names.
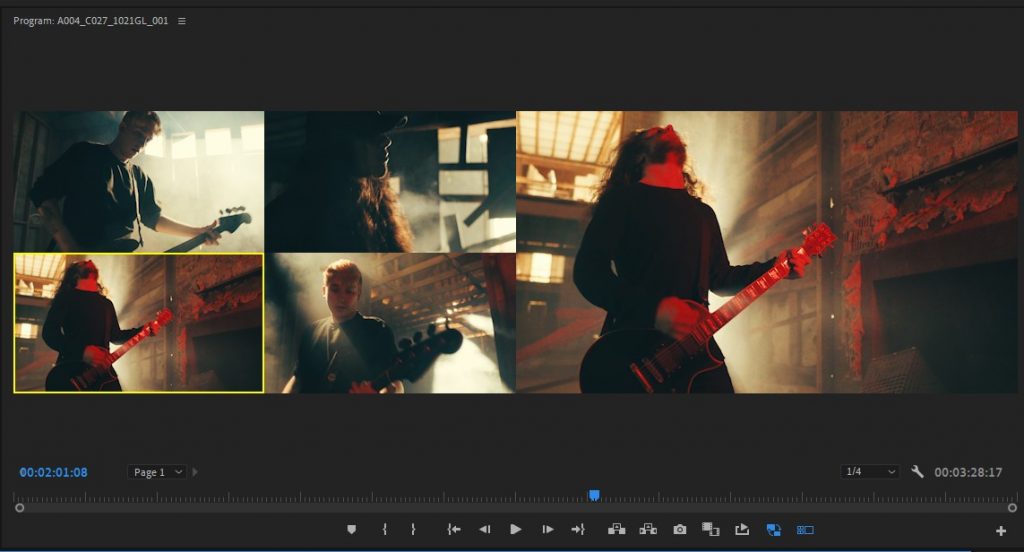
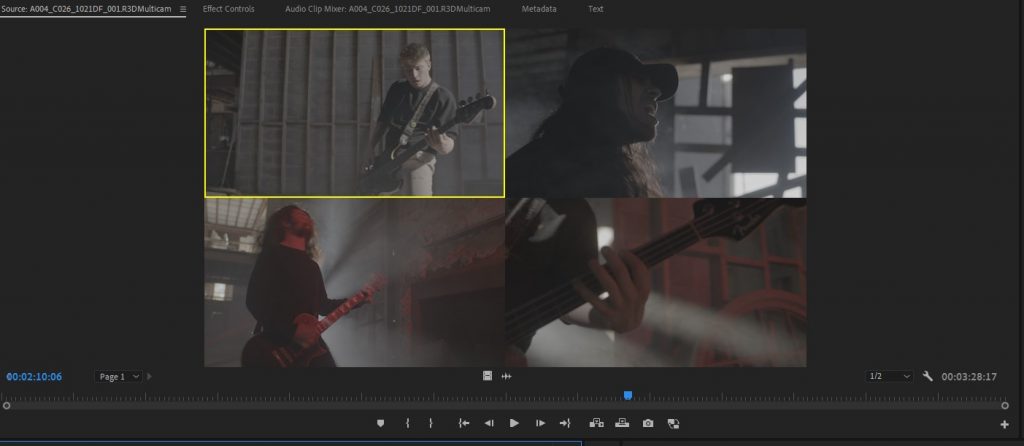
If done correctly, Premiere should take a little time to do its magic and a new Multi-cam sequence should be created. It will also create a new folder with “Processed Clips” for reference. If you open this new clip in your preview monitor, you should be able to see all the clips lined up and playing at the same time. The little yellow box indicates which camera angle is currently queued. This will automatically be Camera 1.
Take your multi-cam clip and drop it into the sequence you’d like it to be edited within. Essentially, the multi-cam clip serves as a unique type of nesting within a sequence.
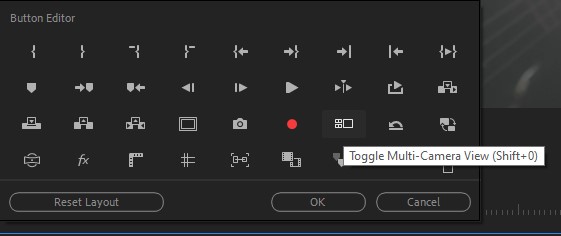
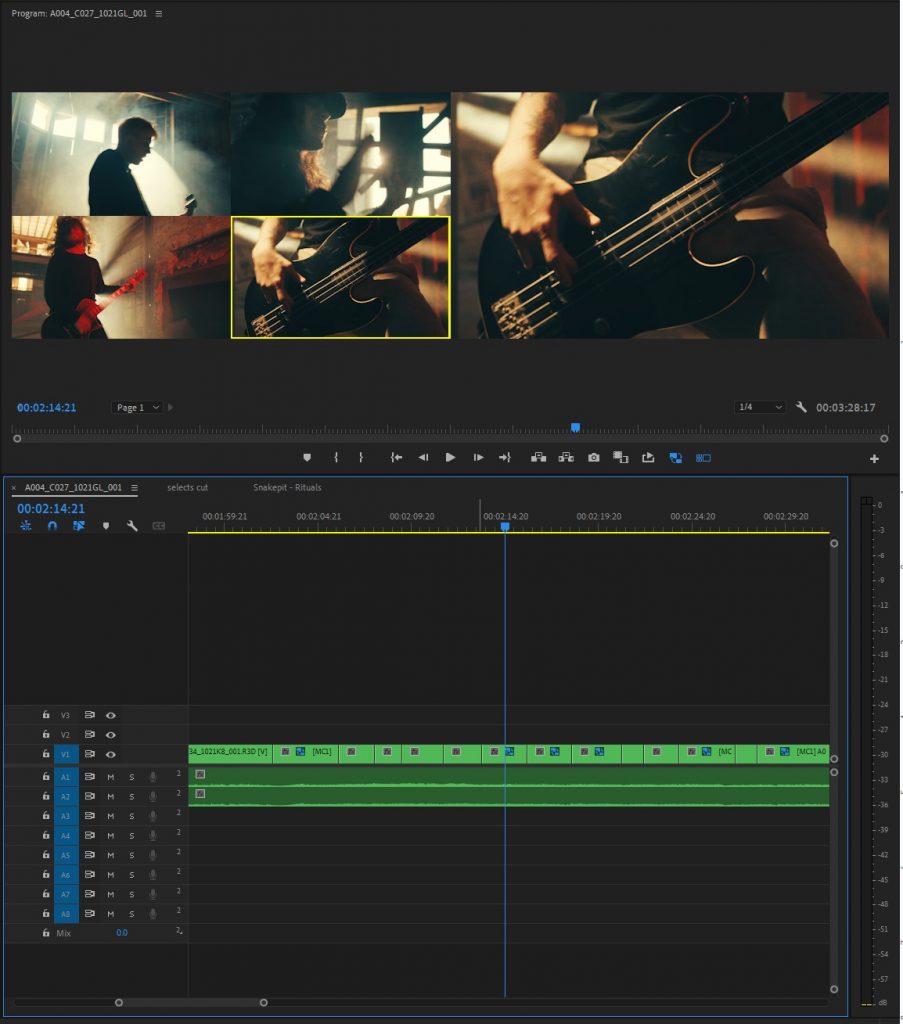
Be sure to enable the “Multi-cam View” button in your sequence monitor, so you can see all of your synced shots all at once.
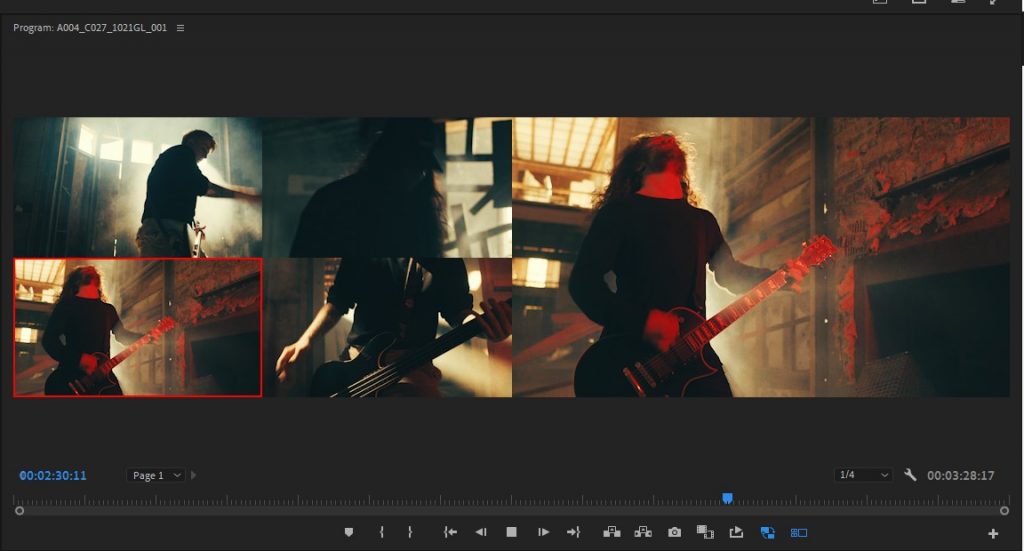
Now to get to the fun part — the live editing. Once you’re ready to begin, it’s time to be on top of the edit. As the clip plays in the timeline, you’ll be able to actively choose which camera to use on the fly. This can be done by simply clicking on the shot in the camera array or by pressing 1-9 on your keyboard. The numbers go from left to right, top to bottom. I prefer the keyboard method, as it’s more quick and tactile, but go with whatever you prefer. As the sequence goes, whatever is highlighted in red will be the shot chosen and you’ll see it active on the main monitor as well.
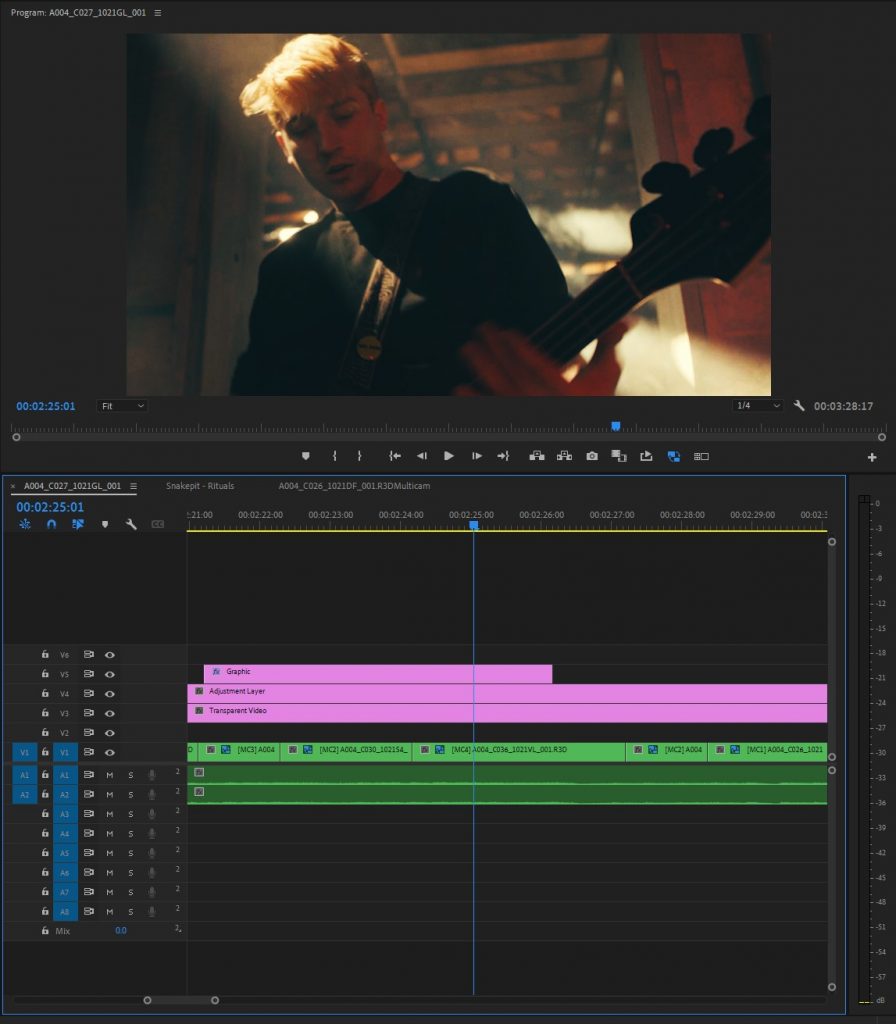
Once you’ve played through the entire sequence, you should be fairly close to having a completely finished video with a single play-through. Just untoggle the “Multi-cam View” Button and everything should look normal. You’re now able to go in and add effects, graphics, or B-roll, or you can adjust the clips you already chose themselves.
Cleaning It All up
Of course, there will be some tweaks you’ll want to make after the fact. Maybe you cut a little too soon or even a little to late and left some shots you’d like to clean up. No problem at all — that’s the beauty of doing this all in Premiere.
If you’d like to remove a shot entirely, each cut will be represented by a little clip within the multicam sequence. You can simply highlight that section and hit delete. This will remove it entirely. You’re then able to either extend the clip before or after to cover that hole.
Alternatively, you can also place your playhead on the exact moment of the cut and select another shot to take the same way you did while the sequence played out. This will automatically replace that entire portion until the next cut happens.
Manually Syncing
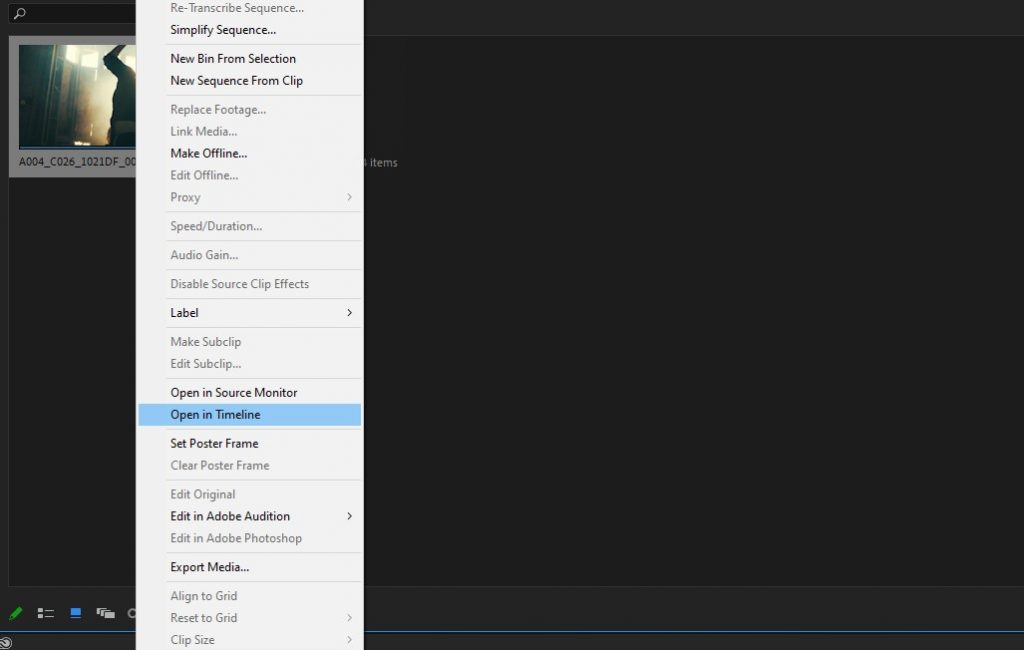
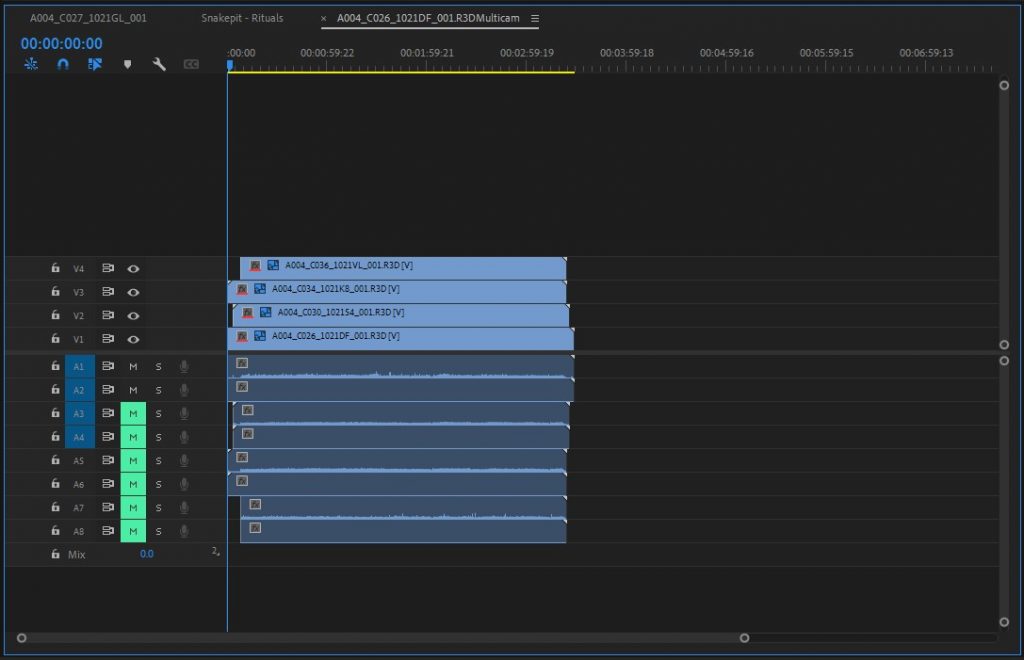
You may run into an issue where the clips won’t automatically sync, drift, or aren’t synced correctly, and may have to manually sync them yourself. This can be done easily by opening the multi-cam sequence clip and moving the clips around. Simply locate the sequence within your project, right-click, and click “Open in Timeline.” Now you can edit this sequence like a regular video timeline and the adjustments will be made to the entire multi-cam clip as a whole.
Editing via Multi-cam Editing is easy to do. It can be a giant time saver and a ton of fun if you like choosing clips on the fly. I love being able to pretend I’m working on a live broadcast and calling the shots as they happen. It also saves me from watching the same presentation four times over. Try out Multi-cam editing on your next music video, presentation recording, or live performance. You may find it saves you more time than you’d think.
Looking for filmmaking tips and tricks? Check out our YouTube channel for tutorials like this . . .