The foundation of any video edited in Adobe Premiere is the “sequence.” Let’s break down the basics of sequences, including how to create a sequence for your video edit, as well as a few tips for editing in Adobe Premiere Pro.
What Is a Sequence?
In Adobe Premiere Pro, a sequence is essentially the area for a video editing timeline. Most of your editing, arranging, effects, and exporting will require a sequence within which you will edit. You’ll drop your files into a sequence and begin creating a video from all of your rough elements. A great analogy is to think of your sequence like a pan you’d cook a meal in. You’ll have all of your ingredients (clips) ready to go on your counter, but to combine them into a final dish, you’d to cook them in a pan (the sequence).
How to Create a Sequence?
To begin, you’ll want to have a project in Premiere already open. You can do this before bringing any video clips or files into your project panel.
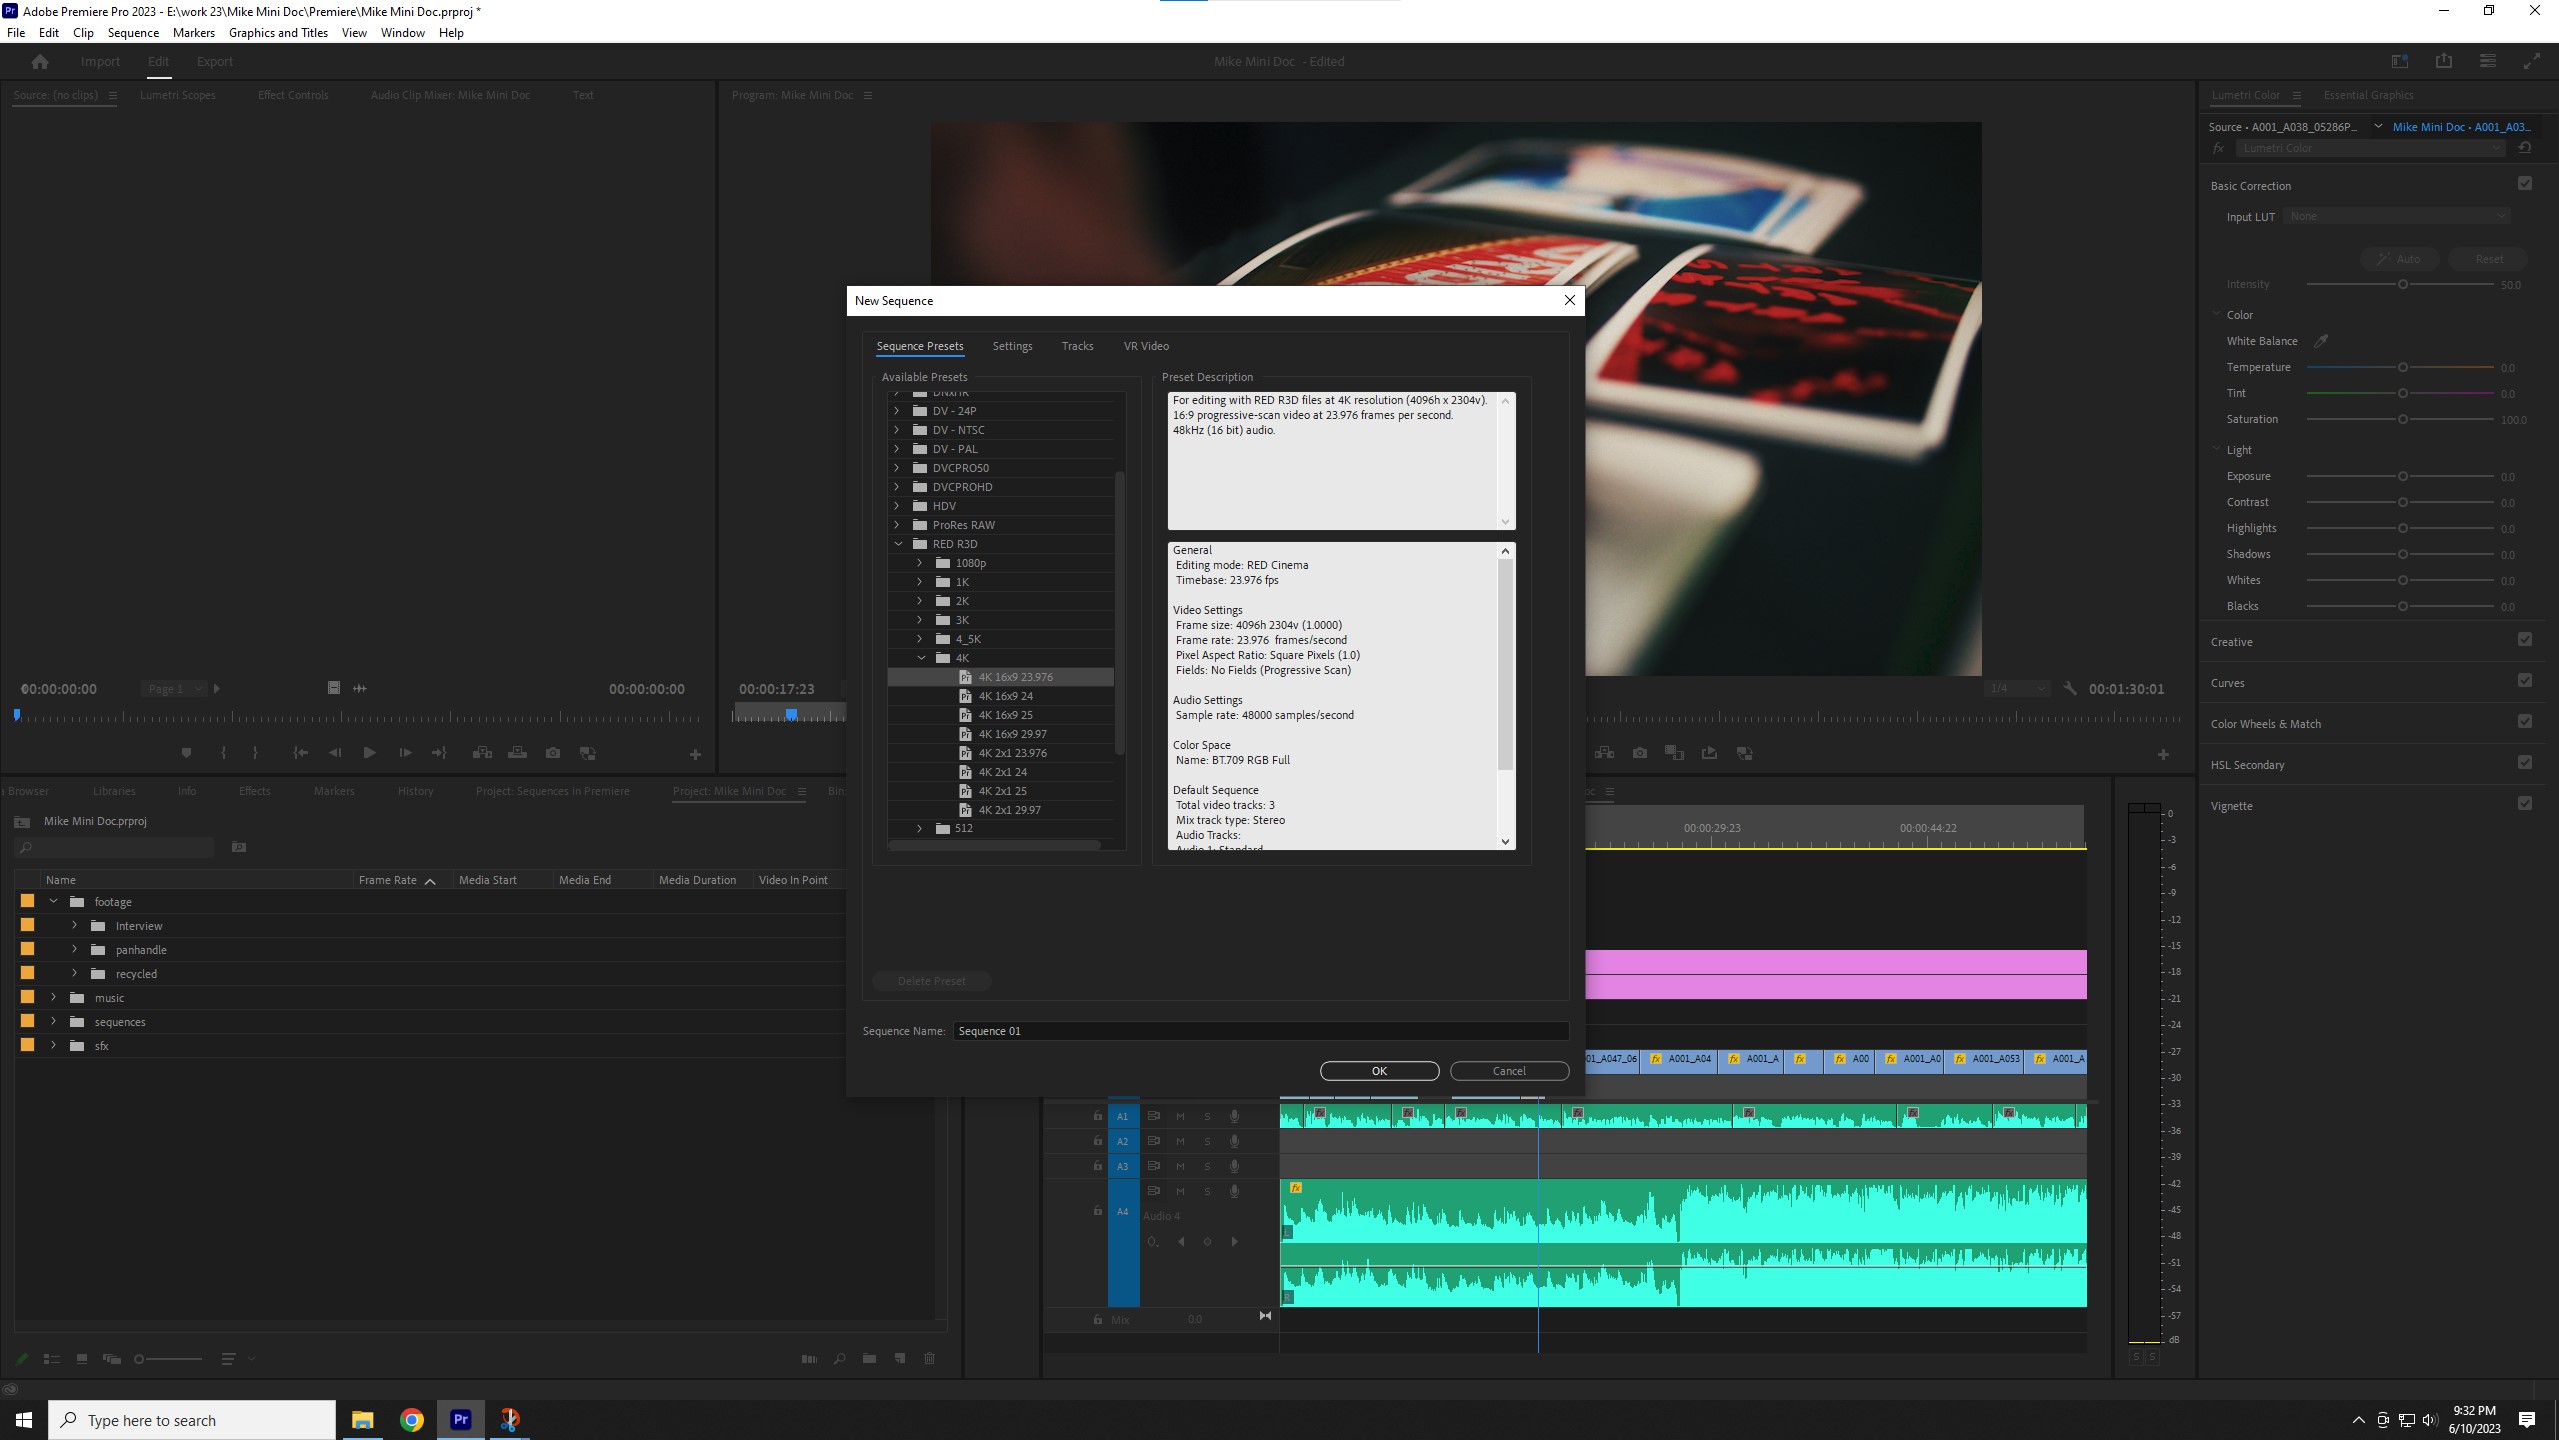
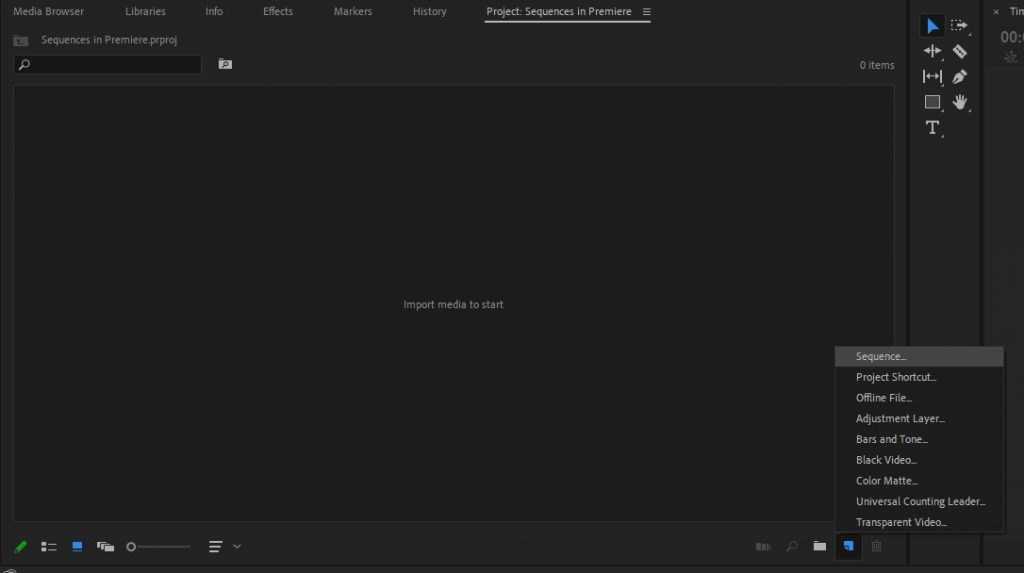
There are a few ways to create a new sequence in Adobe Premiere Pro. We’ll start with the most straightforward way and then explore a couple of shortcuts down the line. Locate your project’s file panel, usually located in the bottom right (where your clips are usually found). You can create a sequence in any folder in your project. From here you can either right-click an empty area in the panel or click the icon that looks like a piece paper with a folded edge (Create New Item Button). From here, either select “New Item > Sequence” or simply “Sequence.” This should bring up a new window with a slew of options.
This window may be a bit overwhelming, especially if you’re new to Premiere. Don’t worry though — you can always change any and all settings created in this window. If you’re familiar with the file types that you’re going to be working with, find the corresponding options within these folders. For instance, if you filmed on a DSLR or mirrorless, you’d want to start at the Digital SLR folder. This will drop down a few more options, first organized by resolution (1080p, 720p, 480p) and this will then drop down to frame rates (24, 25, 30).
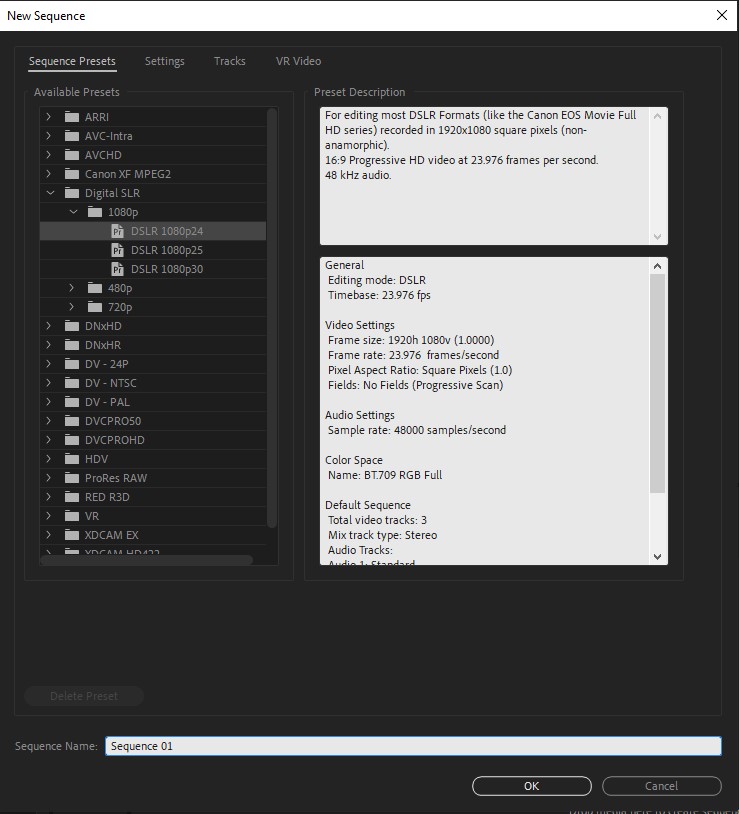
Lastly, you can name your Sequence, or hastily leave it Sequence 01 (no shame!). After hitting ok, a new timeline should populate the timeline panel, and a new sequence will appear in your project panel. Now we’ve created a new sequence and can start placing video and audio clips into the timeline and then start editing.
If you’re worried you may have selected the wrong settings/preset for your sequence, don’t worry — there are a couple of quick ways to ensure it is set to match your project exactly.
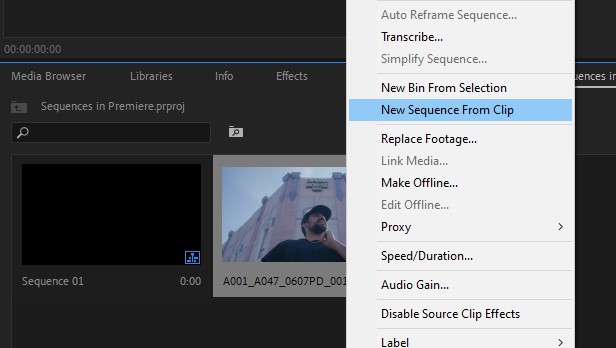
The quickest way to create a new sequence that matches your clip is to create a “New Sequence from Clip.” This takes all the information from your video clips, such as Frame Rate, Resolution, File Codec, etc., from your file and makes a new sequence that matches all of these parameters. One thing I’m not too pleased about is that it will automatically create the new sequence, but it will name that sequence the same as the clip you created it from and place it within the same folder. This can make it a bit problematic to find again, so be sure to reorganize and rename the sequence ASAP. It will also immediately drop the clip used to create the sequence into the timeline.
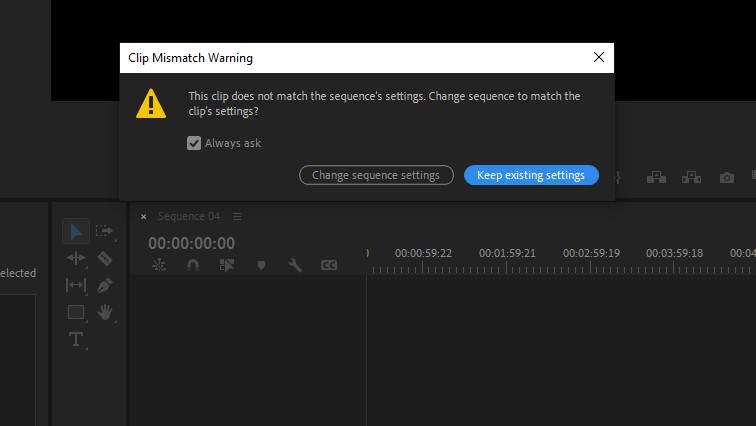
The second option is for when you’ve already created the sequence through our initial step. Similar to our first trick, this uses the specs found within a video clip. If the sequence you’ve created doesn’t contain any clips yet, upon dropping in the first clip, you may be surprised with a little window asking if you’d like to change the sequence’s setting to match the clip you’re dropping in. Unless you’ve created a sequence with very specific settings and you don’t want the settings to match, you’ll want to click “change sequence settings.” Now the sequence will be optimized to the clip that you dropped in.
What Are Sequence Settings?
A sequence has a lot of influence on your video project. There are quite a few settings and options available when creating a sequence that could change how your video clips playback, the color of your video, the resolution, and audio playback (just to name a few). It is important to get these settings right or adjust them to your liking to ensure good playback, editing speed, and rendering. For instance, having the wrong audio sampling rate or video framerate may result in syncing issues or odd playback problems. Let’s go through the different settings located within the “Change Sequence Settings” option in case you’d like to adjust them on your own.
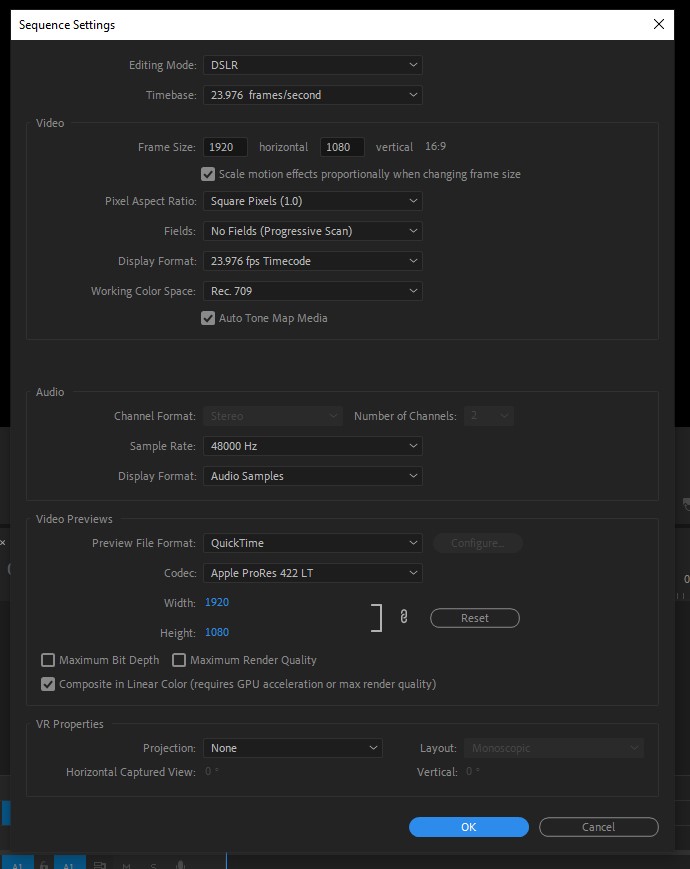
Above is what the Sequence Settings panel looks like, and it may be a little daunting. The first option, “Editing Mode” is the same as the preset options we used in our very first step. Once you make any changes to the parameters below, this will change to “Custom.”
“Timebase” refers to the framerate of the project. This doesn’t always have to match the video clips you’ll be using in your timeline. For instance, if you’d like to slow down 60fps footage to use slow motion, you’ll want to pick a lower framerate for playback (24, 25, 30).
The next section refers to only the video portion of the sequence. “Frame size” is the resolution of the sequence. Once these numbers are changed, the aspect ratio to the right will also update. These can be specified to whatever size you’d like, but common aspect ratios are 16:9, 4:3, and 1:1. Pixel aspect ratio is a unique function not typically used in common video, but rather wider cinema formats. Square pixels will display each pixel in a video in the fashion it was recorded, other options will stretch the pixels out to make them a bit wider than recorded. Fields refer to how the video will playback each frame. Most cameras film in progressive scan (each frame is displayed as a whole image), but older cameras may use interlace (half the image is shown between each frame). Display format refers to how the run-time of a sequence will be displayed. This will usually match your “timebase,” but you can change it to “feet +frames” for film or just straight-up frames. Lastly, “Working Color Space” refers to the range of colors and luminosity that will be used in the sequence. Rec.709 is the most common (most displays, social media, YouTube), but if your work will be displayed on a modern 4K display or in HDR, you may want to use Rec. 2100.
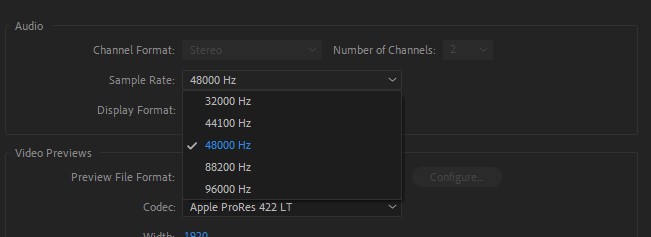
Next are our audio options. Chanel format refers to the number of speakers or channels that the sequence can use. Surround sound would use 5+ channels, but standard headphones would only use 2 (stereo, left and right). Sample Rate is the number of samples per second taken from an audio source. In music recording, this is typically 44,000 Hz, but in video, it is usually 48,000 Hz. If your audio was recorded at 44,000 but the video’s is at 48,000 you may run into syncing issues. Display format simply correlates to how the audio’s length is represented. Audio samples will display the most accurate as it doesn’t round the length, whereas milliseconds rounds the audio’s length to the nearest thousandth place.
The Video Previews section can be very important for playback purposes. If you’re using a slow machine, I-Frame Only will give you a smoother playback experience, but lower quality playback. QuickTime will create Prores preview clips and be of higher quality. You’ll be able to adjust the resolution of your video previews and if they render at a higher quality with “Maximum Bit Depth” and “Maximum Render Quality,” these will be more taxing on your system but will have a higher quality playback as you edit.
VR Properties pertain to VR videos edited in Adobe Premiere and how they are projected.
Creating a Sequence within your project may be a bit overwhelming at first, especially with all of the endless, confusing options. Choosing the correct settings is important, but it’s a lot easier than it looks on the surface. We’ve outlined how you can create a great working sequence and later adjust those settings to match what you need.
Looking for filmmaking tips and tricks? Check out our YouTube channel for tutorials like this . . .