Learn how to create an infinite black background for your YouTube tutorial videos.
Recently, I’ve noticed a number of YouTube creators, such as Eric Floberg and Curious Refuge, opting for a traditional black background for their YouTube tutorials. I’ve got to say, I really like it.
Story time.
In my secondary school, we had a compulsory uniform that we all had to wear. I remember hating those jumpers, but oddly enough, I wish I had kept one as a keepsake nearly 20 years later. One of the core reasons behind this uniform was to prevent discrimination among pupils based on their clothing, which might highlight differences in family income.
In a similar vein, I view the classic black background the same as wearing uniforms. Over the last ten years, YouTubers have gravitated towards large, RGB neon-lit studios filled with background candy. Using a black background eliminates all that. Not only does the classic black background provide a level playing field for creators of all levels, but it also offers a sense of consistency and timelessness to their videos. The black background remains reliable in a fast-paced digital landscape where trends come and go. You could also argue that this approach aligns with the concept of minimalism, stripping away unnecessary visual elements and focusing solely on the content itself.
Here’s a music video I produced nine years ago that relied heavily on the approach followed throughout this video.
However, there are a few important steps to follow to ensure this setup looks professional. Unlike filming in a studio with an infinite black background, doing it at home is not as straightforward. So, let’s dive into how we can accomplish this.
The Background Itself
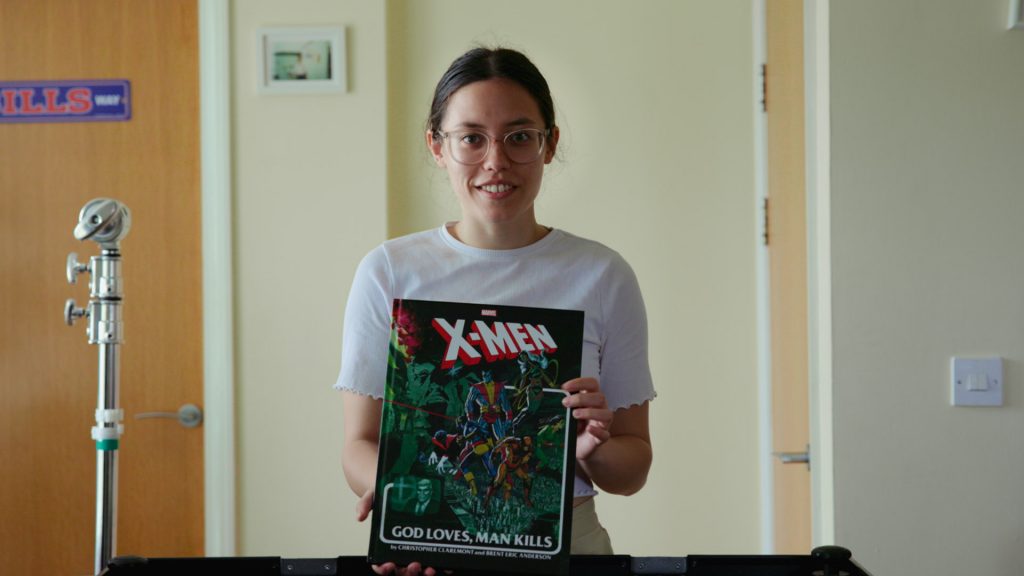
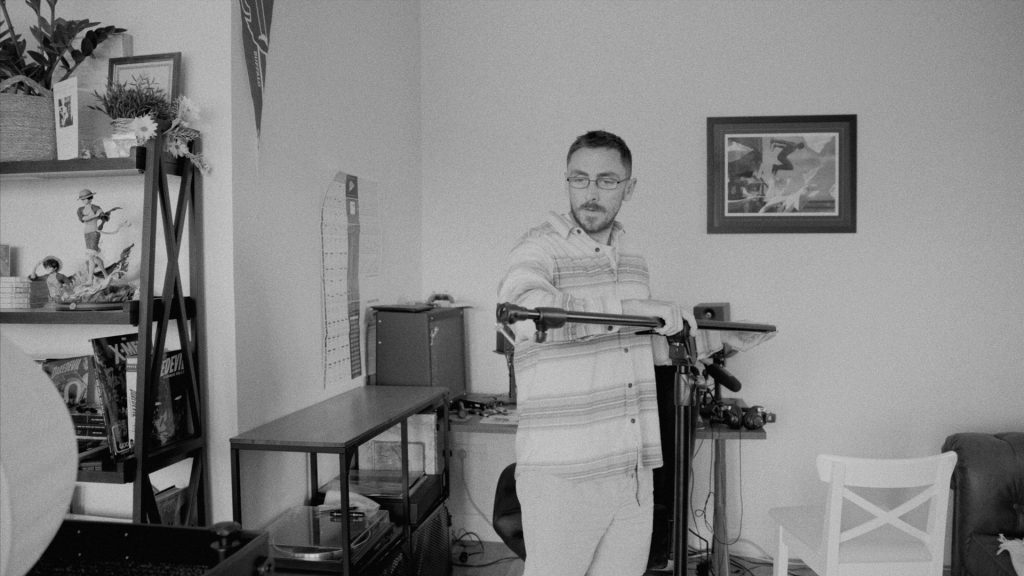
This is our starting shot without the black background. While it looks slightly okay, without an abundance of background candy or colorful lights, it seems a little bland.
First, let’s talk about the background itself. Depending on your focal length, we can use a wide variety of tools to create this infinite black background in a small home space. Whether it’s large muslin drapes or flags, the key is to use a black fabric that absorbs light. In my case, I’m using a 48x48in Floppy Flag.
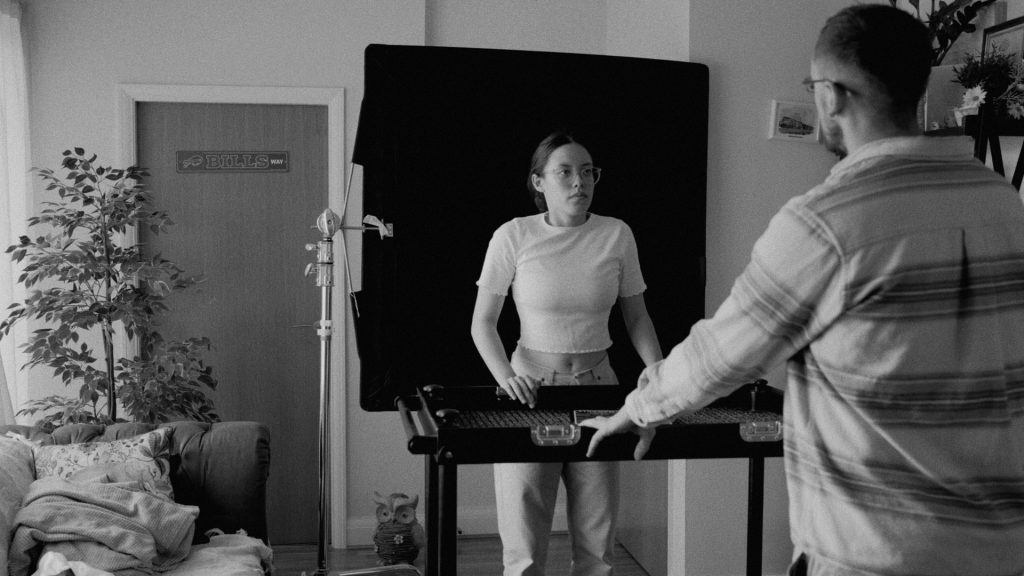
The positioning of this black material is also crucial. We don’t want it positioned directly against you, but we also want it to be within a reasonable distance. Even though it will serve as a black backdrop, it must also block the ambient light around you. Typically, keeping it 1 to 2 feet away is sufficient.
However, if you have opted for a wide-angle lens, your backdrop tool must be large. But, if possible, you ideally want to shoot at 50mm onward, as this will also help knock the black background out of focus. If you’re filming with a muslin sheet prone to creasing, this is ideal as your viewers won’t see the creases, which will break the illusion. The smaller your background, the longer the focal length you’ll need to use.
While this setup looks great, the ambient light within the room makes it seem amateurish, so now, let’s tackle the lighting.
Lighting
While it may seem obvious, you might not initially think about it, but yes, close the blinds and the curtains. You want to stop any ambient light from reaching your subject.
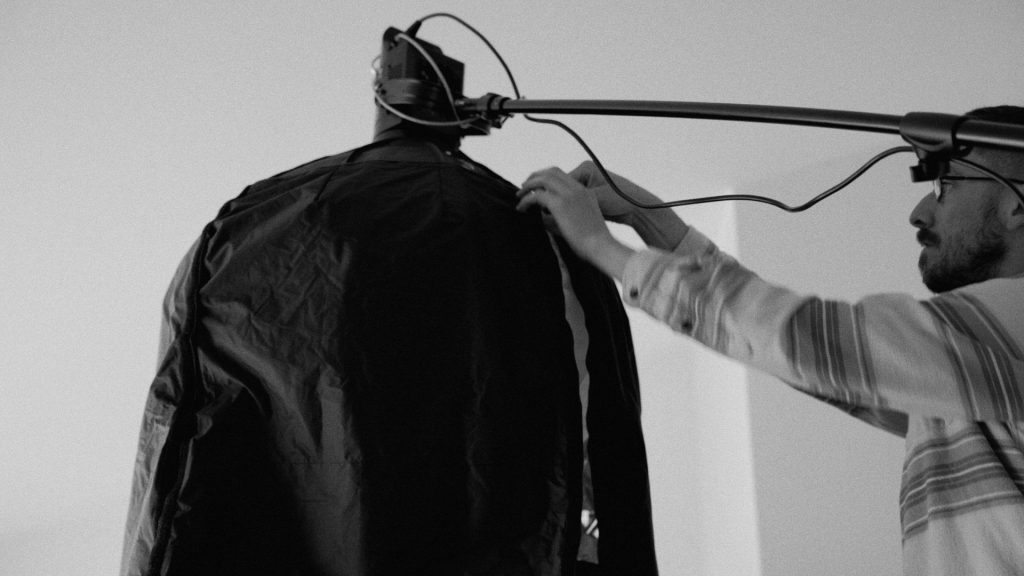
When it comes to lighting, you don’t need to flood the room with RGB lights like many modern YouTubers. This method can use just one light. However, we need additional tools to achieve the look we’re aiming for. These include a boom arm stand and an Aputure lantern.
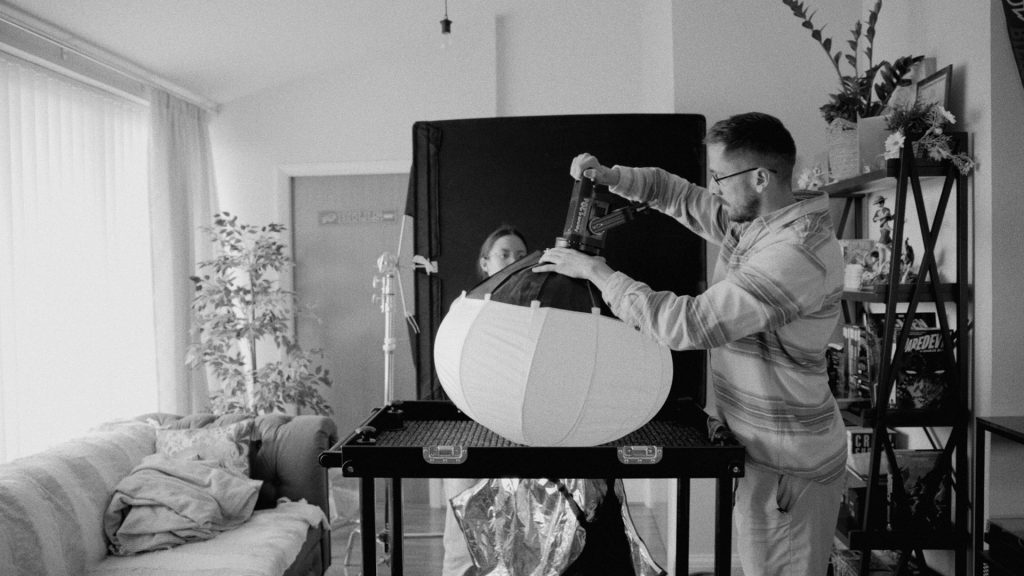
Instead of employing a traditional three-point lighting setup, we’ll position the lighting directly above the desk—noir style. While this typically creates low-key lighting, the desk close to our face acts as a bounce material, elevating some of our face’s harsh shadows and preventing our presentational segment from looking like a thriller film. To do this, we need to attach the light to a boom arm, positioning it directly above us with the source pointing downward.
Remember, if you’re ever using a boom arm for lighting, you need to use a sandbag for safety, which is to be positioned on the tall leg.
Now, we don’t want to use the light in its default state, as the wide beam would illuminate the background and the darker that becomes, the better. Therefore, I’m using an Aputure lantern with the extended flags attached. This helps prevent the light from spilling onto the black floppy flag and primarily puts the entire focus of light onto us, the subject. I would also be impartial to bringing the light forward a touch so it’s more directly overhead the front of your face than equally over your head.
While this setup looks good, there’s one more factor to consider — the camera settings, specifically the exposure settings.
Exposure Settings
The goal is to allow the exposure settings of the light to overtake any form of ambient lighting. To achieve this, we increase the brightness of the light while decreasing the camera’s exposure settings. This nullifies ambient light, letting our primary film light do the work and allowing the black background to fade into invisibility.
However, we want to keep that background from coming anywhere into focus, so we ideally want to shoot with a wide-open aperture to create a shallow depth of field. But what does that do? Right, it allows more light to reach the sensor. Therefore, I recommend using an ND filter to lower exposure.
If you find that you’re 90% of the way there, but there’s still too much light leak, or perhaps the background is slightly visible, you need to finish your look in post.
See, editing is just as important in creating this illusion. When adjusting the contrast and saturation during post-production, aim for a balance that darkens the background while keeping your face well-lit. This emphasizes the infinite black background and draws the viewer’s attention to you, the subject. You’ll find in most cases that lowering the black levels on either the correction wheels or curve tool will be sufficient.
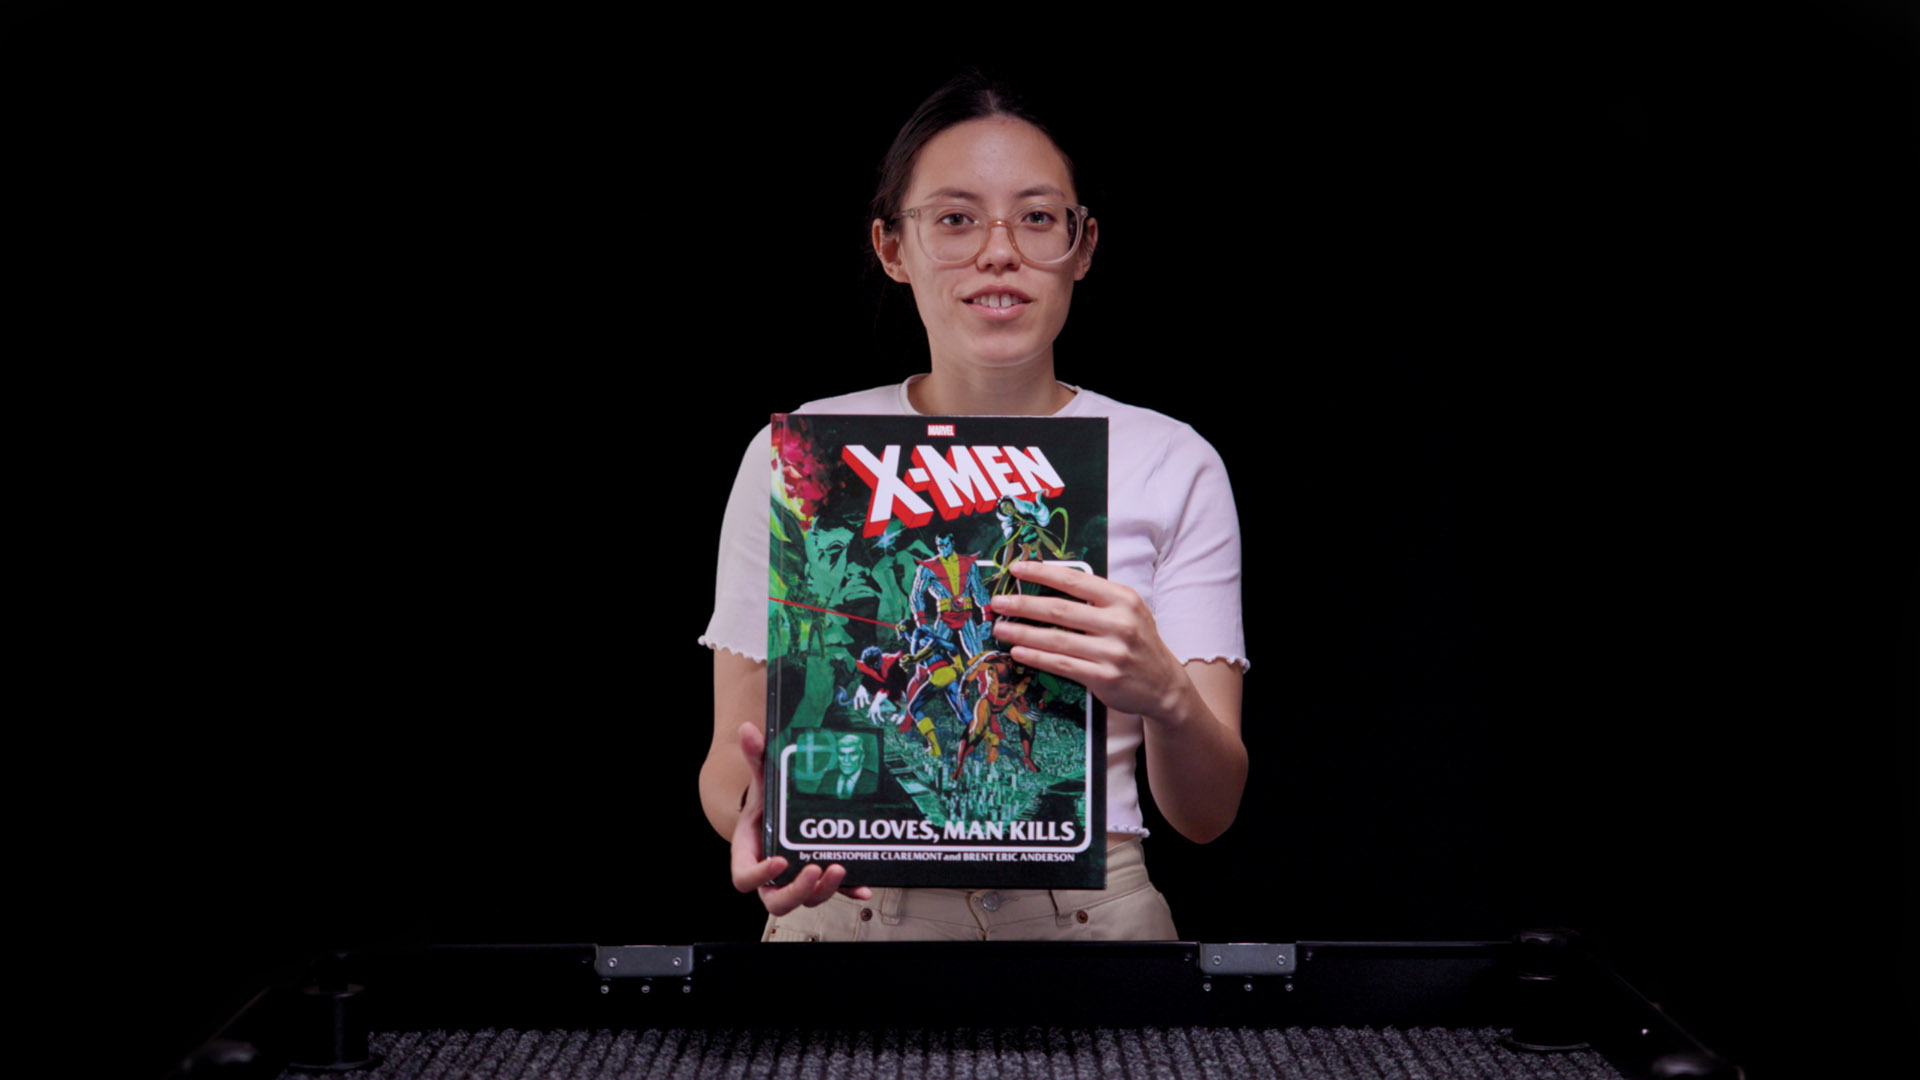
This is the final result.
Creating an infinite black background for your YouTube tutorials doesn’t require a professional studio or expensive equipment. You can create a sleek and professional-looking video right from home with the right lighting, camera settings, and post-production approach. And like my school uniform. The black background will look the same whether you’re a new creator or a professional filmmaker — it doesn’t discriminate.
Looking for filmmaking tips and tricks? Check out our YouTube channel for tutorials like this . . .


