Ok, so you finally get your first big gig, you’ve booked the studio, you’ve booked the lights, and the very first thing you might think about doing is turning said lights up to 100% power.
Let it shine!
However, you may find that your image is flat as a result. You will find no contrast or depth when a subject is illuminated from all sides equally. Beginners of the craft often gloss over the notion of controlling lighting or even taking it away, as the initial goal is to flood the scene with light. After all, how many YouTube tutorials have you watched where the host is recommending a list of lighting gear? However, removing light from your subject is a powerful way to create more contrast to enhance the mood of your film.
Let’s explore how.
What Is Negative Fill
I’m not talking about removing physical lights from your film studio or blocking out all the windows; I’m talking about using negative fill. This technique can be a powerful tool for compositional storytelling in film. The scene’s mood, visual appeal, and intrigue can be enhanced by strategically removing light. This can create a more decadent atmosphere, a more cinematic image, and help set the scene’s tone. In the video tutorial below, we will explore how to do this.
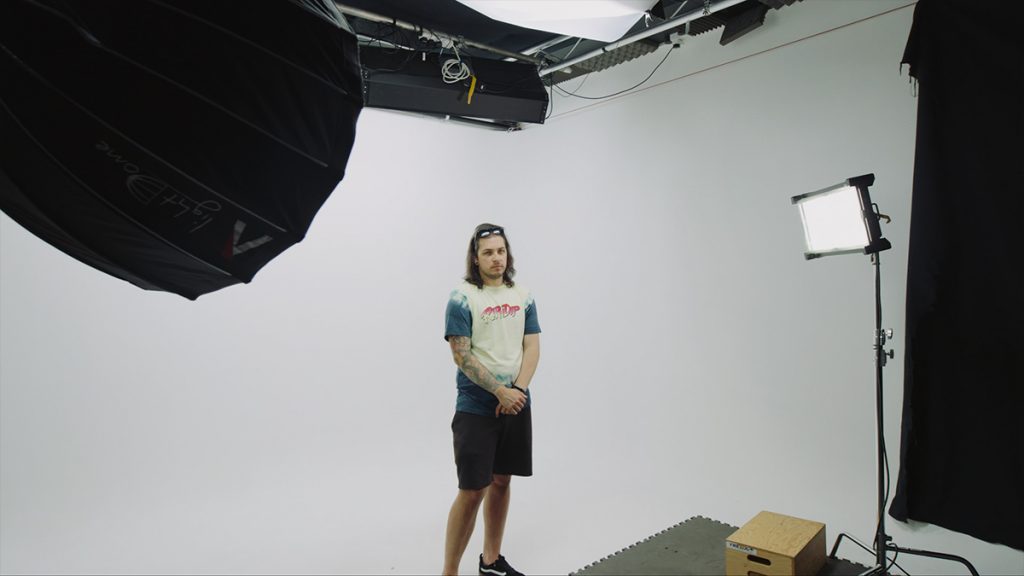
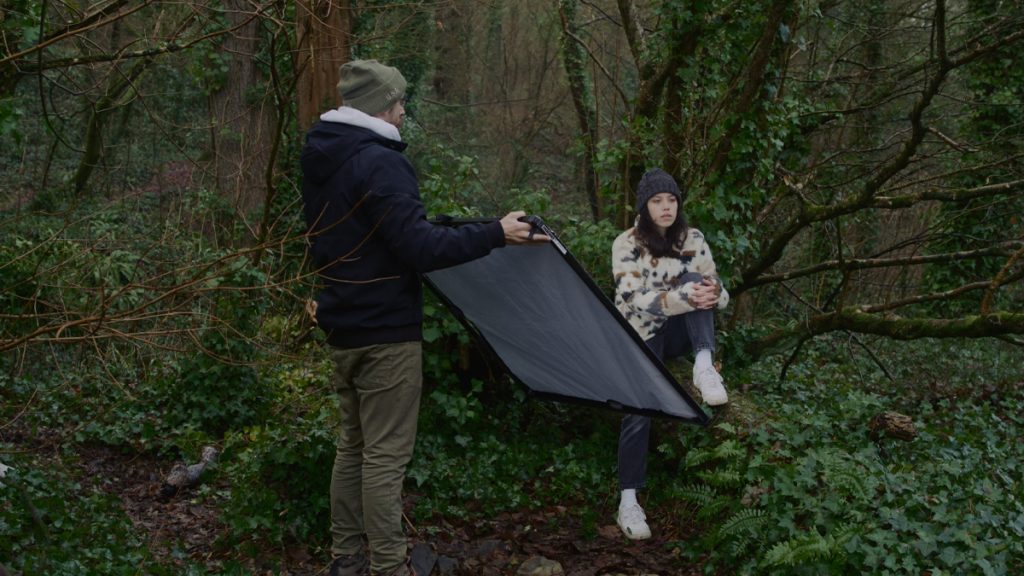
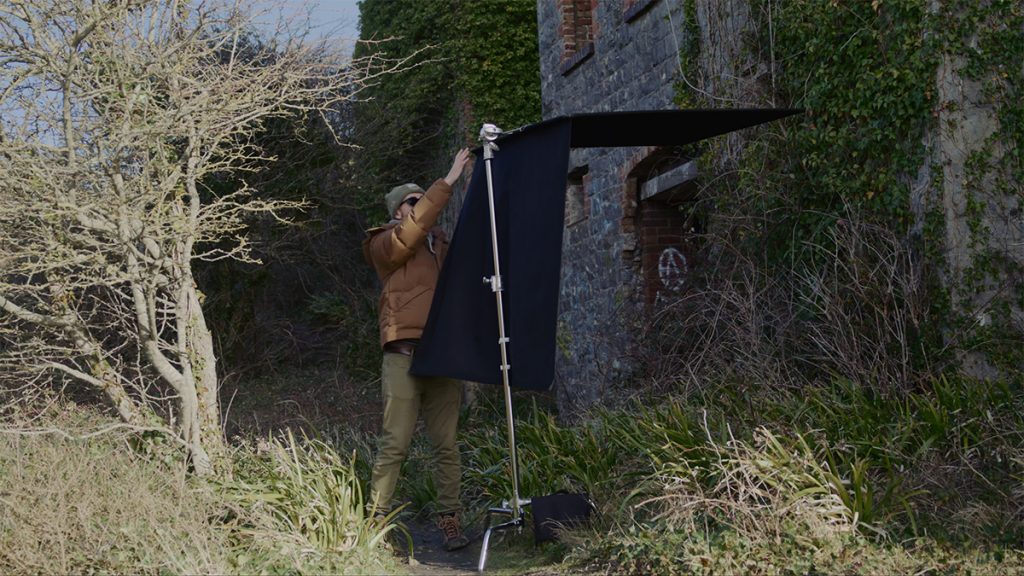
Negative fill is a technique that blocks and absorbs light with a tool called a flag. A flag is typically made from a piece of black fabric, and it absorbs the light when positioned close to talent — as opposed to reflectors, which add ambient light. Negative fill allows the cinematographer to remove ambient light.
A flag is a very versatile tool on set, and it’s primarily used to block and shape light, but its use in negative fill is invaluable. A flag can come in various shapes and sizes, but if you’re on an ultra-tight budget, don’t worry, as a decent-sized piece of black fabric will do the same job. But you do need to ensure it’s not made from a glossy material, like leather or silk.
Let’s look at using negative fill in action.
How to Use Negative Fill
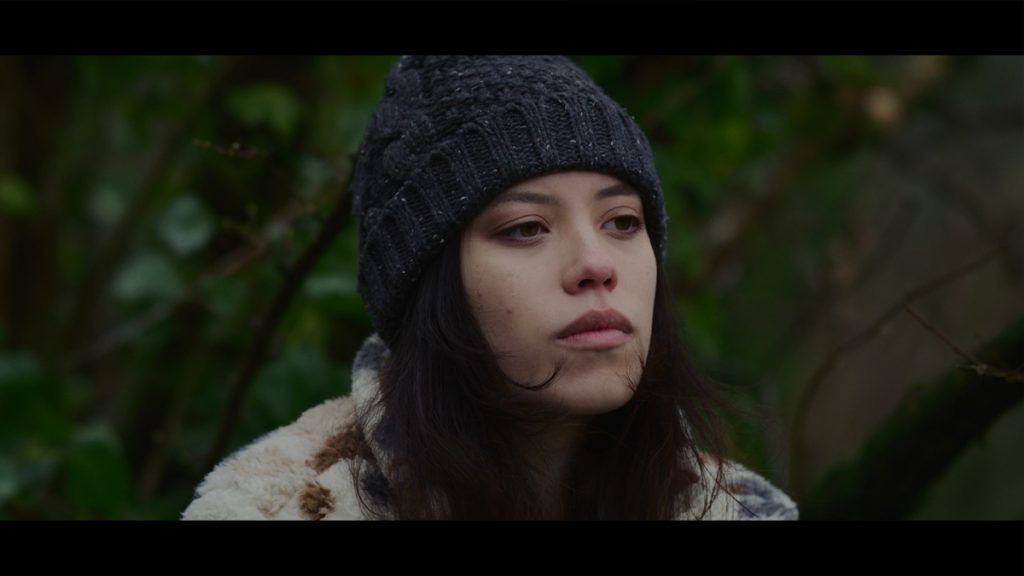
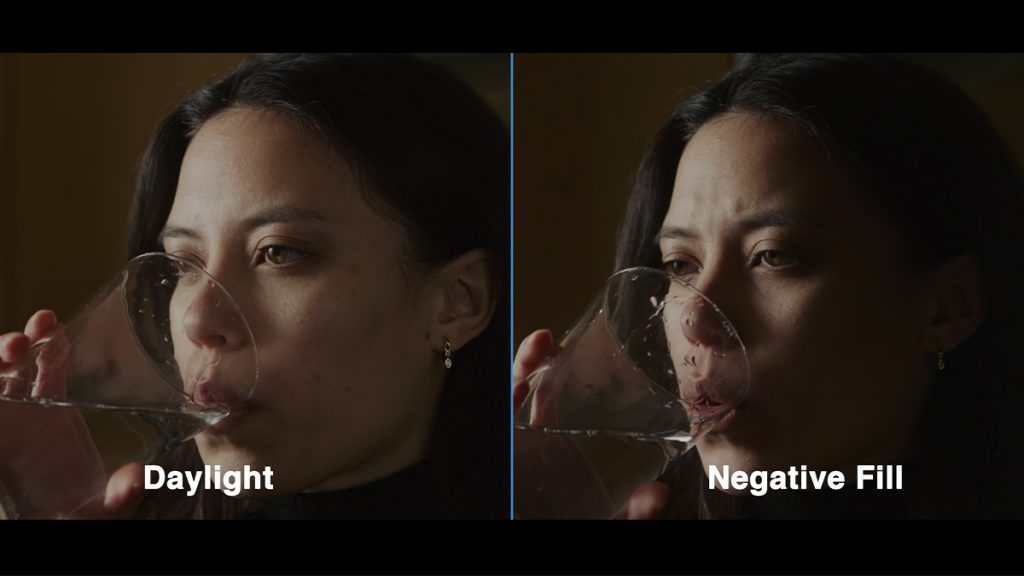
This is our scene: a young woman walks through the forest, lost and worried. She pulls out her phone, and she has no signal. This is how our shot looks with ambient daylight lighting. And you know. It’s ok; it’s not bad.
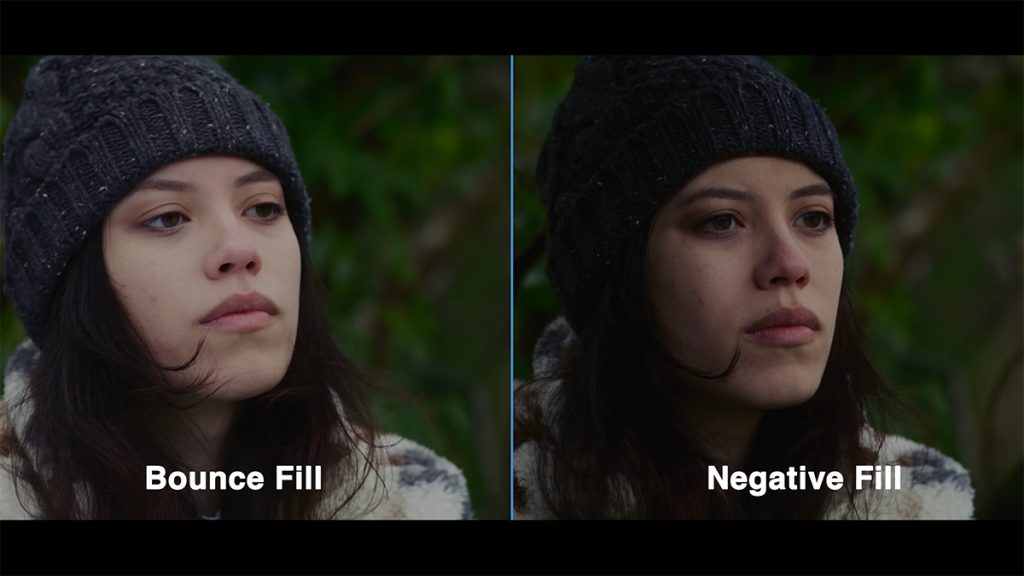
In a low-budget circumstance, we could increase the image value by placing bounce material on the darker side of the subject’s face to bring out the shadows.
Because we’re bouncing light into the darker area of the subject’s face, this would be classed as a fill light. This makes the shot look more pleasing and brightens the subject’s face; however, if our scene’s tone is moody and somewhat menacing, we’re not getting it from the bounce light.
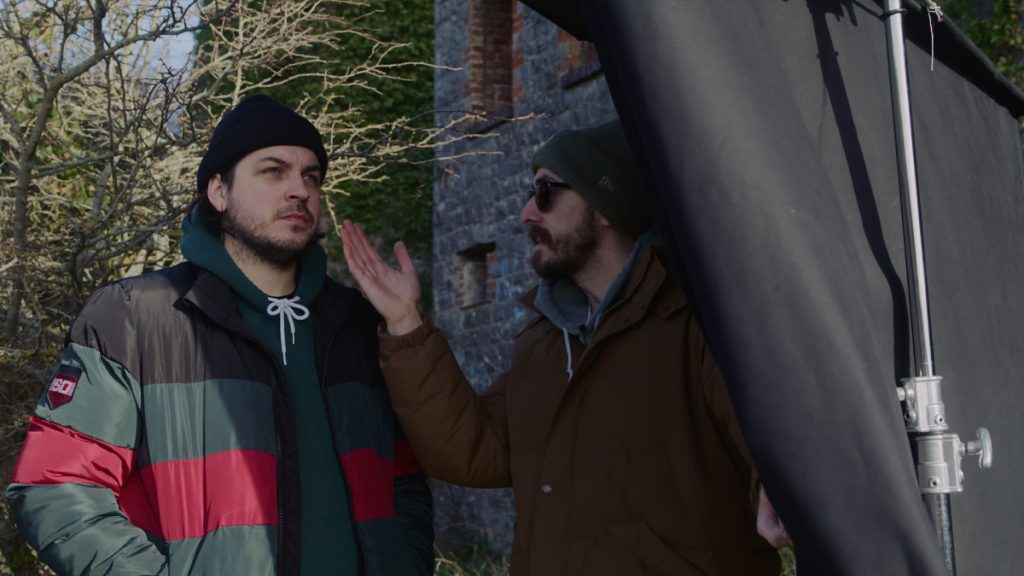
This is where using the flag comes in.
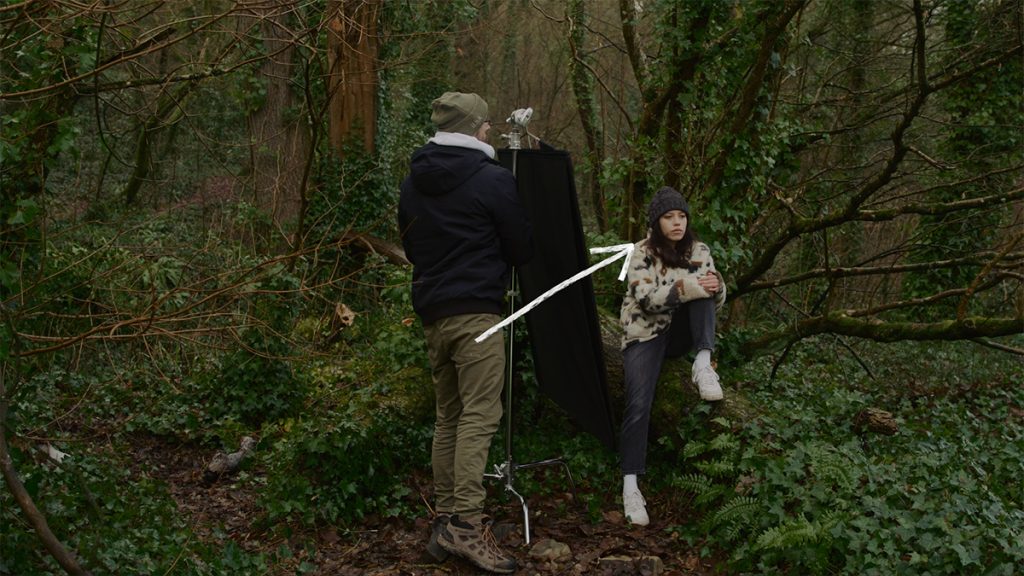
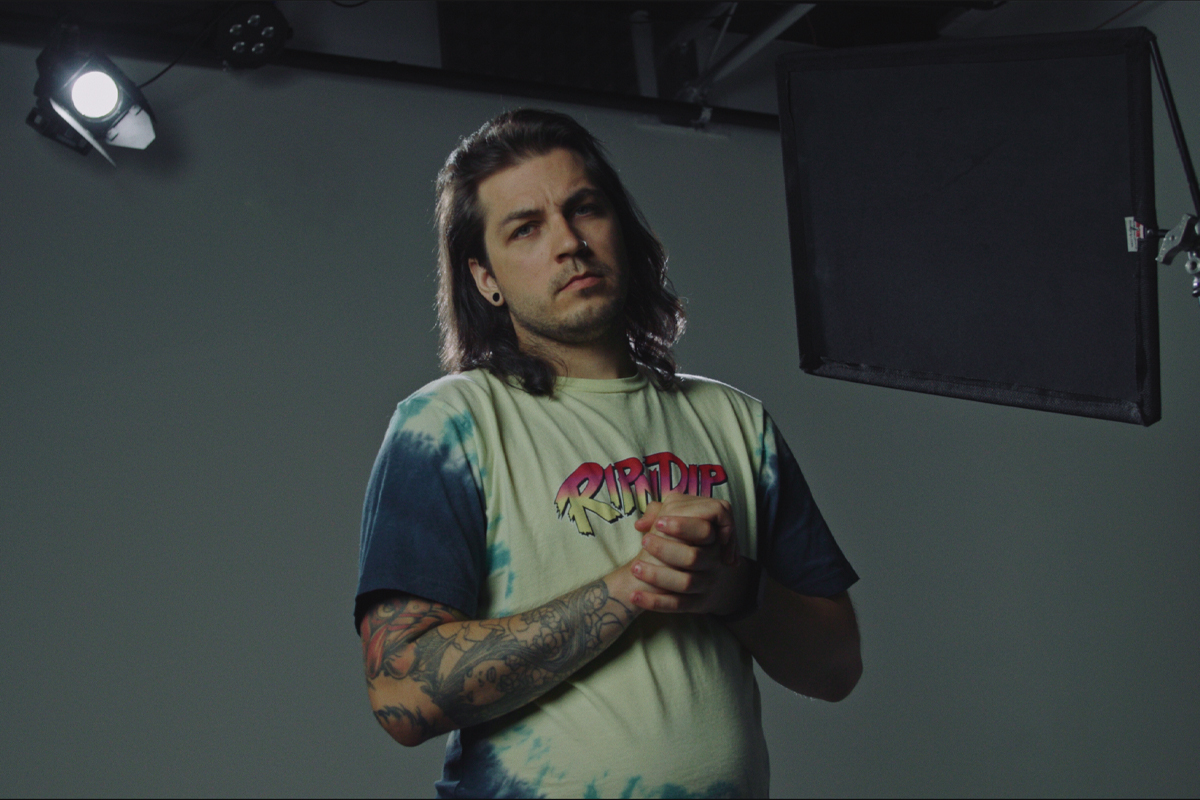
If the bounce creates a fill light because it bounces the ambient light back to our subject, the flag will do the opposite. It will not only block the surrounding ambient light but also absorb the directional daylight and, as a result, darken our subject’s face, introducing contrast. This is where the term negative fill comes from.
This is the shot with negative fill.
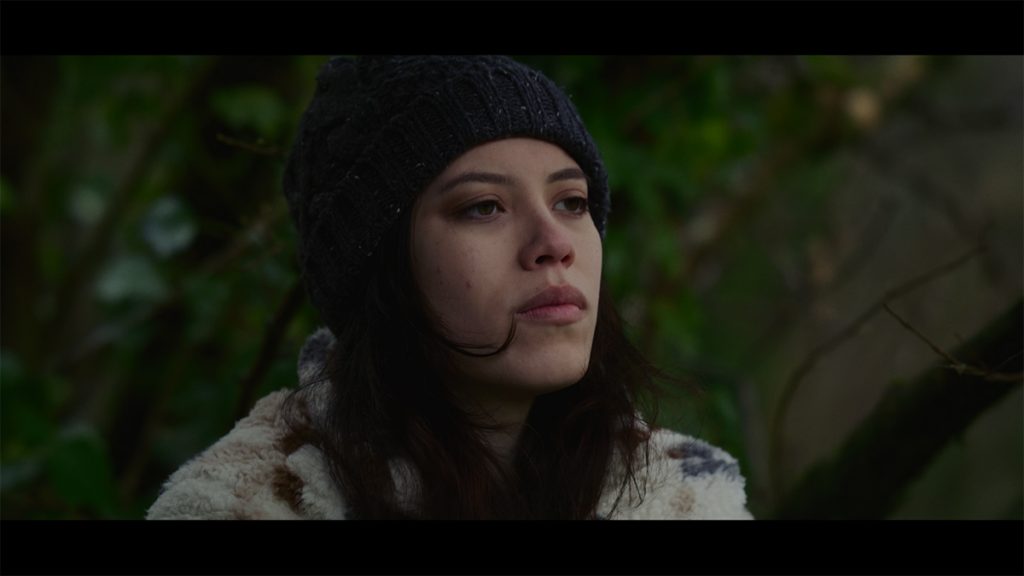
This looks much better; the contrast helps add some depth to the subject’s face and makes the image appear moody, which correlates to the story.
There are no hard rules about using negative fill. However, you will want to ensure the negative fill is positioned on the side of the face which is already the darkest. And I suggest pairing this with the far-side key method, where the camera is placed on the dark side of the subject’s face.
Additionally, because the negative fill is usually positioned close to the talent, you will want to be filming on a reasonably tight focal length, maybe around 50mm and onward — if not 70mm. Of course, you can use wider focal lengths, but you will need to use larger forms of negative fill. On a professional set, it’s not uncommon to see enormous forms of black fabric to help create contrast on a larger scale.
Using a Floppy Flag for Negative Fill
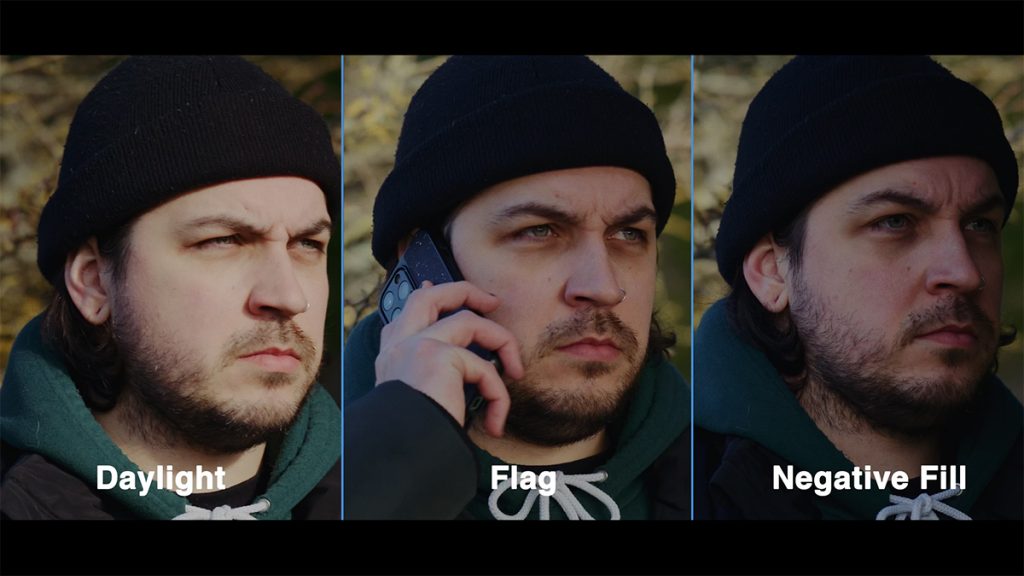
Using negative fill worked well in our previous location because the light was relatively diffused from overcast conditions, and you’ll often find that you’ll get better results outdoors when the light isn’t too harsh. But we can’t control the sun, can we? Of course, professional filmmakers also use negative fill in a sunny environment, but how? They do so by using a particular type of flag called a floppy flag.
A floppy flag, also known as a floppy/floppies, does precisely the same thing as your regular flag, but it has a detachable “floppy” part that drops down from underneath the framed flag. This can block the side of your subject, while the framed segment will block light at the top.
In the fictional circumstance of the example shot, the character is waiting for a phone call to hear that a heist has been successful, and unfortunately for him, it was not. Given that we were filming in the middle of winter, the midday sun isn’t as harsh as it would have been in July. But I still find the shot slightly too bright.
While just using the flag creates a pleasing image and is easily usable, the use of negative fill from the floppy fabric helps promote the turbulent moment the character is facing. What should be a recurring theme throughout this tutorial is how the negative fill can help aid the story.
The variation between the three shots is only slight, but you will find that the smallest of changes can genuinely promote a different feeling.
Okay, in two of our examples of displaying negative fill, we’ve done so in an outdoor location. But what about using it indoors similarly to only using available light?
Using Negative Fill Indoors
That in and of itself sounds like a complete nightmare. Interior locations with no lighting? That screams 2010 YouTube content. However, with careful blocking of your scene, we can still use negative fill to create a contrast-filled image.
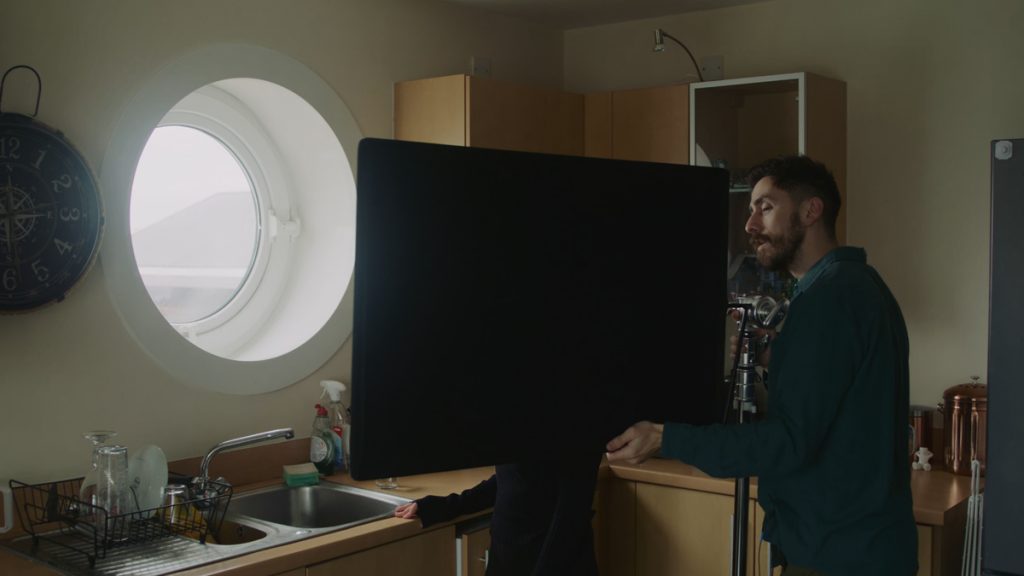
First, you will want to position your talent by the window. This is always the best place to position actors indoors and without lighting, as the window light will often be enough to illuminate your talent. You will get bonus points if it’s overcast as you will use naturally diffused daylight.
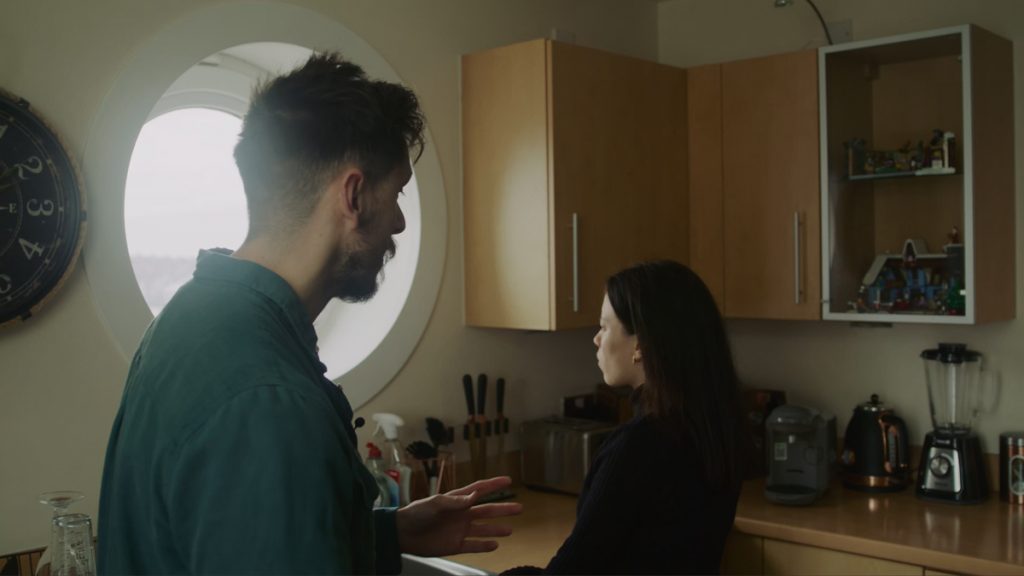
In my example, I have the actor near the window. The outdoor light nicely illuminates them — for some, this may be permissible. Yet, once again, by removing the ambient light that falls onto the darker side of the subject’s face, we can increase the contrast, creating a shot with more interesting depth, and once again . . . you know it — it helps aid the story for this particular scene.
Again, you position the black absorbent material on the darker side of the subject’s face, and in turn, that will deflect and absorb the ambient light around them.
Like our previous two examples, you will note that the difference between the before and after doesn’t promote a stark difference; however, there is a difference. The reduction of light and the addition of contrast certainly help benefit images when used.
Negative Fill Quick Tips
Using a flag might be the simplest of all the elements of filmmaking, but there are some best practices you should follow.
- Place the flag on the darkest side of the subject’s face.
- Use the far-side key method to heighten the negative fill.
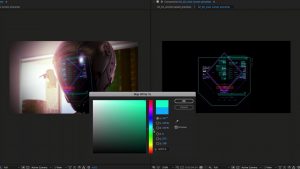
- It’s also a good idea to use a light meter to measure the light before and after using negative fill to ensure you get the desired result.
- Keep to a long focal length when using smaller forms of negative fill.
- Black cloth can be just as helpful when on a budget.
I hope you’ve learned it’s not always about acquiring more light to create a better image, and the reduction of light, dare I say it, may help you craft a more cinematic look.
Until next time!
Looking for filmmaking tips and tricks? Check out our YouTube channel for tutorials like this . . .