Today, we will continue our deep dive into DaVinci Resolve 19’s newest features by exploring the Film Look Creator. This new feature could potentially put competitors like Dehancer and FilmConvert at risk of obsolescence, as it performs similar functions, perhaps even better.
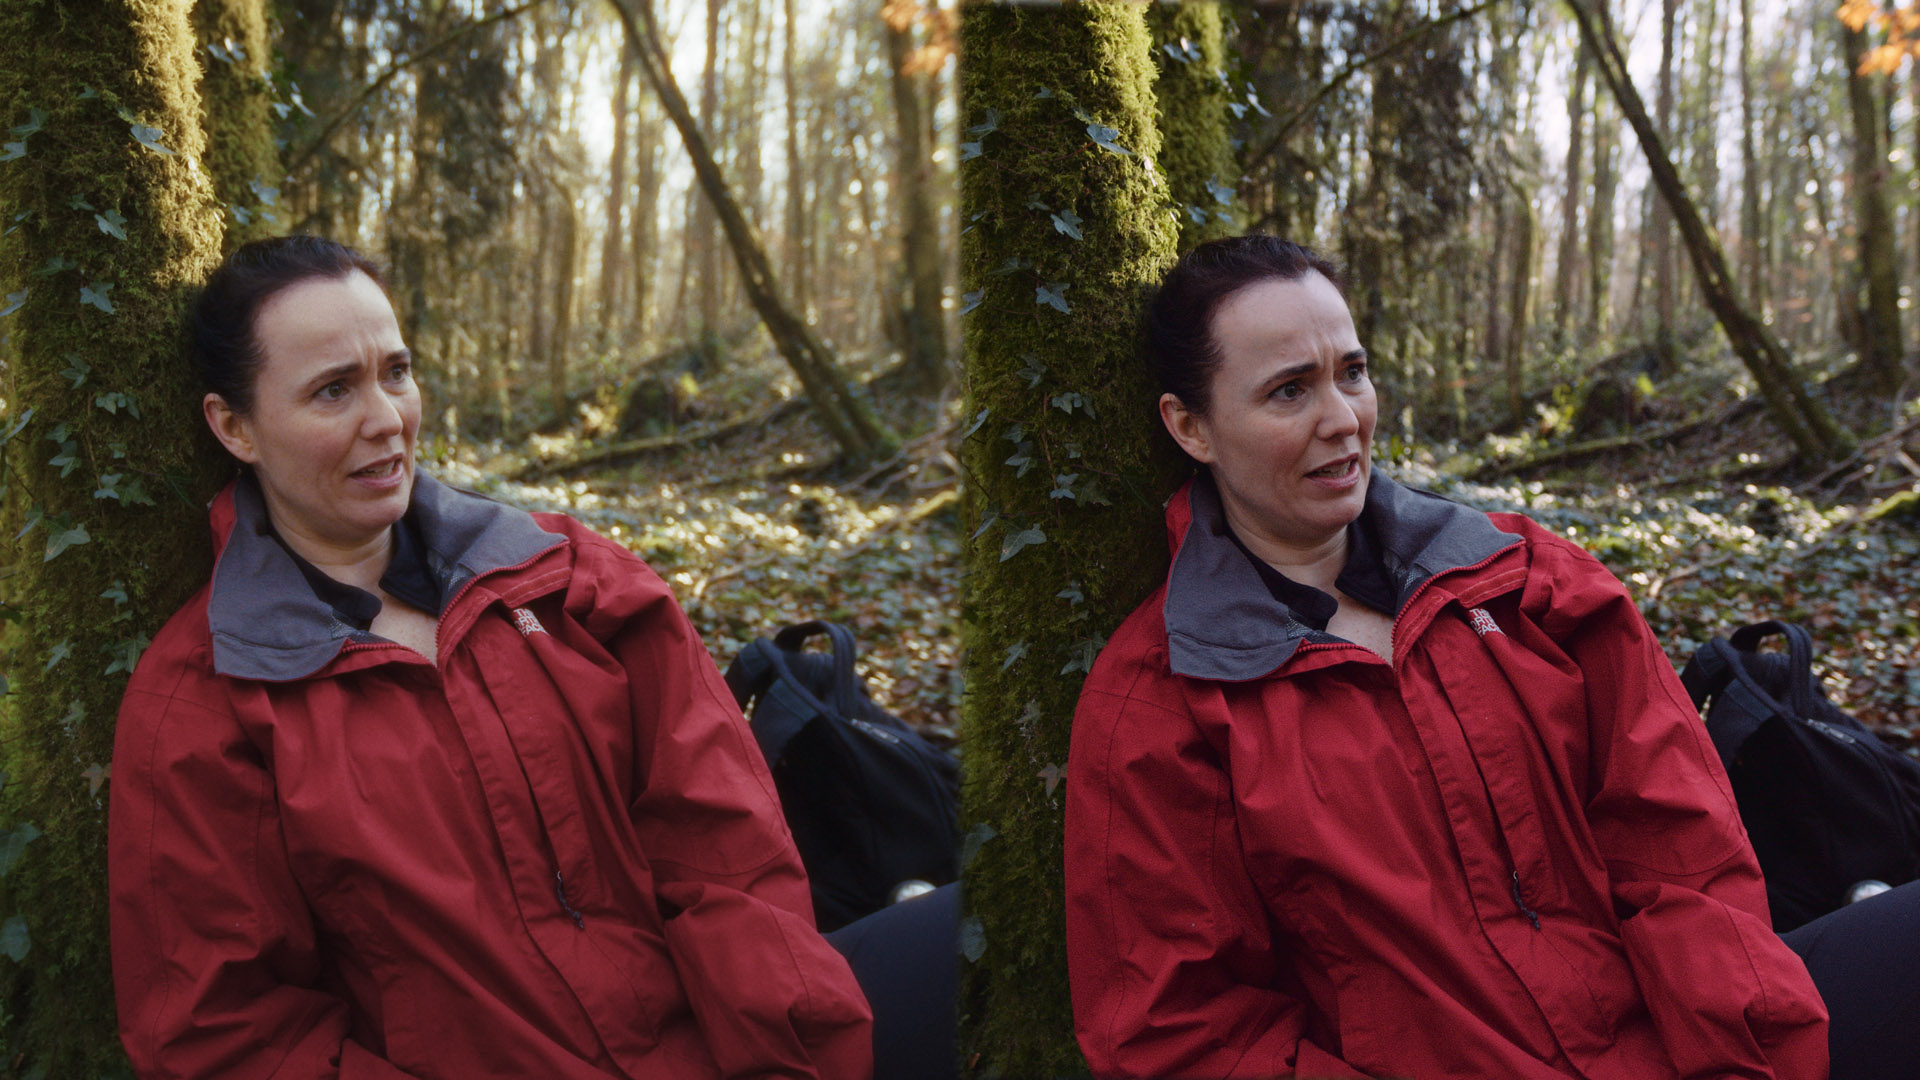
FilmConvert on a Single Node
I’ve been using FilmConvert for a long time, typically applying it at half-strength at the end of my grading process to add a hint of filmic quality.
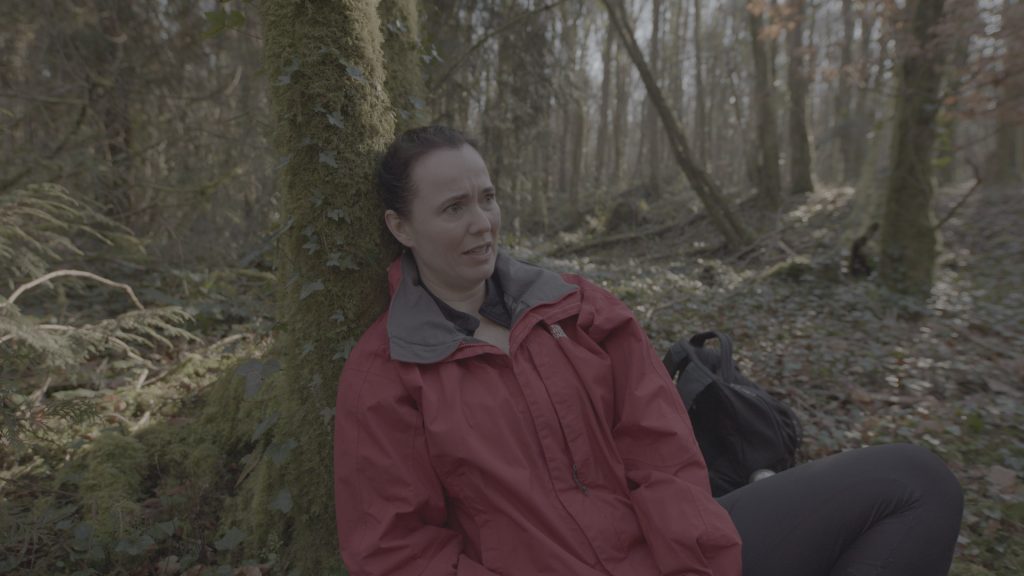
This is the before grade:
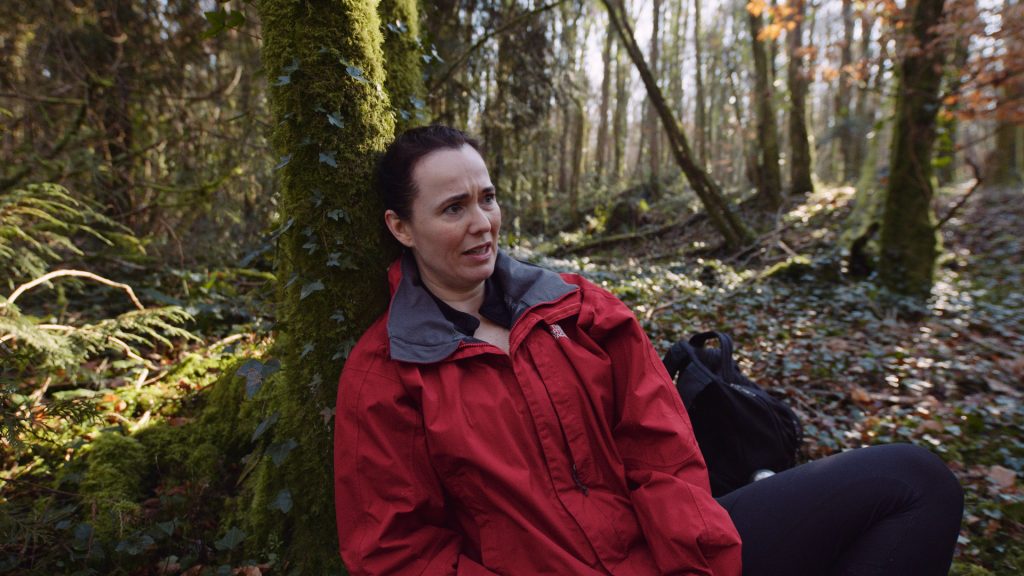
And this is the grade after I’ve applied my Film Convert settings:
While I implore you to watch the video tutorial, let me briefly explain my steps when using Film Convert.
I selected the Blackmagic Design camera profile for the 6K model with Gen 5 color science.
The film settings are Film Convert’s unique selling point. It offers a range of film stocks, from motion picture to 35mm and Polaroid styles. When selecting KD 5207 Vis 3, I usually find the initial settings—especially the contrast and warmth—too intense, especially for a UK spring scene. I adjusted the exposure and temperature to balance the image and pushed the saturation slider slightly higher. Likewise, to bring the forest scene to life, I decreased the magenta tint and added some green.
Next, I addressed Halation. This effect, a halo around brighter areas due to light surpassing the film emulsion and reflecting, was considered undesirable by film manufacturers but had become a popular aesthetic for online creators. I enabled it in FilmConvert. However, I did note the watermark. This was because you must pay an additional upgrade fee to use halation. Not ideal. I recommended careful adjustment of halation strength, potentially increasing highlights in the preceding node for a more refined effect, primarily through tree gaps, using the log wheel for precise control.
FilmConvert tends to add substantial grain by default, which isn’t ideal for bright daylight as you wouldn’t typically see that level of grain on film, so I reduced it to 50%. This adjustment created a more suitable filmic appearance. I also tweaked the redness from the film stock to better represent the transition from autumn to spring, perhaps even reducing the contrast slightly.
Having used FilmConvert for years, I appreciated its broad selection of film stocks and its capability to enhance images with minimal adjustments. The result, as previously displayed, looked great.
That being said, let’s look at The Film Look Creator.
Film Look Creator
Compared with Film Convert, here’s the same image from the Film Look Creator. Again, like Film Convert, all created within one node.
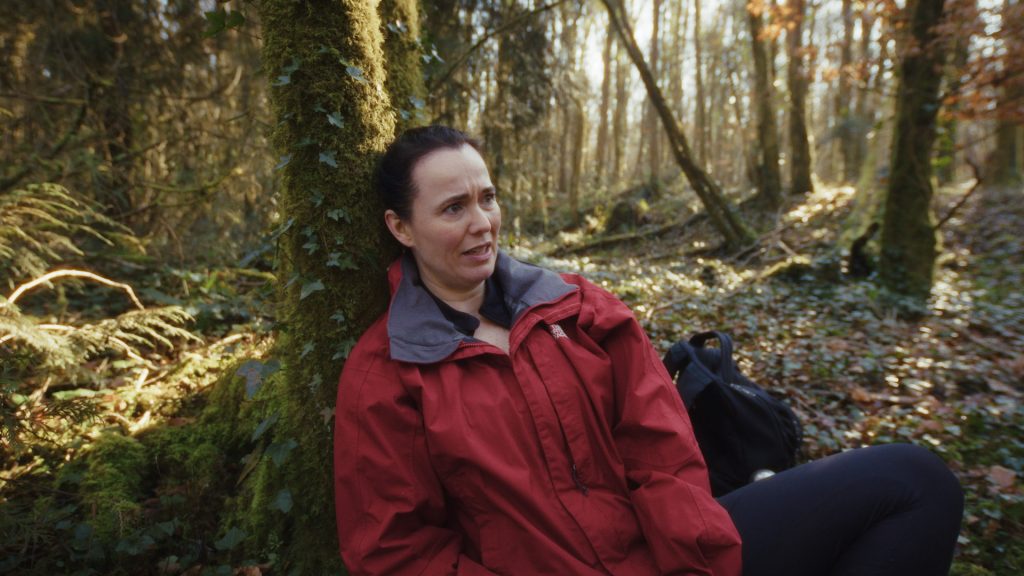
The Film Look Creator is a versatile plugin that modifies images’ color and physical attributes to mimic motion picture film stock without replicating specific film stocks from manufacturers. It offers a base “Blackmagic film look” that users can adapt. The plugin includes nearly 60 adjustable parameters organized within a single window and can function independently within Resolve. This scene-driven tool works with any footage as long as it is correctly color-managed.
A distinctive feature of the Film Look Creator is its use of chromatic adaptation for adjusting white balance and tint, allowing for realistic shifts in a scene’s lighting. When adjustments seem excessive, the skin bias parameter can recalibrate skin tones, enhancing the plugin’s capacity to improve results more proactively than competitors like Ixta.
Users can explore various built-in presets within Film Look, such as 65mm nostalgic and bleach bypass. However, it is crucial to ensure the correct color space is set for the footage. After setting this, precise color settings should be confirmed.
Like Film Convert, let’s briefly run through the steps I took to create the above grade.
- Exposure Adjustment: I started with the exposure to achieve a balanced tone across the image.
- Highlight Adjustments: I then shifted my attention to the highlights, focusing adjustments on background elements using the highlight slider.
- Fade Control: I adjusted the black point using the fade control, which introduced a milky, slightly retro look to the image.
- Temperature Adjustments: To reduce unwanted redness in the scene, I adjusted the white balance temperature.
- Tint Adjustments: I made slight changes to the tint to help maintain natural skin tones.
- Skin Bias Adjustment: This step was critical for fine-tuning the appearance of skin. I shifted from warmer, darker tones to cooler, lighter ones as needed, ensuring the warmth of the primary subject’s face remained intact.
We then have the split tone tool, which adds a color tinge to the highlights of images, mimicking the effect seen in old 16mm films.
Another feature to consider is halation, now included in a simplified form within Film Creator. Unlike the standalone effect in Resolve Studio, Film Creator does not allow viewing of isolated regions, offering a more basic version of tools found elsewhere in Resolve, reducing customization options.
Bloom, known for creating a haze-like visual effect, should be used sparingly to avoid overpowering the desired filmic look. I will also introduce some film grain, explicitly looking for a 35mm preset to enhance authenticity.
I’ll avoid the flicker and gate weave effects, as they can be overly dramatic for digital images intended to have a cinematic appearance. Instead, I’ll use the film gate effect, which applies a matte to the image without needing additional blanking or imported graphics, and I’ll deactivate the curvature feature.
The final image, as shown, looks beautiful.
Comparing FilmConvert and DaVinci Resolve’s Film Creator, both tools strive to emulate the look of the film. I’ve used FilmConvert but am leaning towards Film Creator for future projects. DaVinci Resolve, especially with its handling of color science and skin tones, provides superior management of color information in Film Creator. This and additional no-cost tools like halation in Resolve Studio offer significant advantages.
Looking for filmmaking tips and tricks? Check out our YouTube channel for tutorials like this . . .