The sun is a great source of natural light, but it can also ruin your shot. In this video tutorial, we cover a few tips you need for your next outdoor shoot.
Recording videos inside can be a breeze — it’s a controlled environment with air conditioning and adjustable lights. Sometimes, the project calls for heading outdoors. Taking your filming outside can have its challenges, namely, the big, bright sun. In this tutorial, let’s go over a few ways that you can use the outdoors to your advantage and still get great-looking footage.
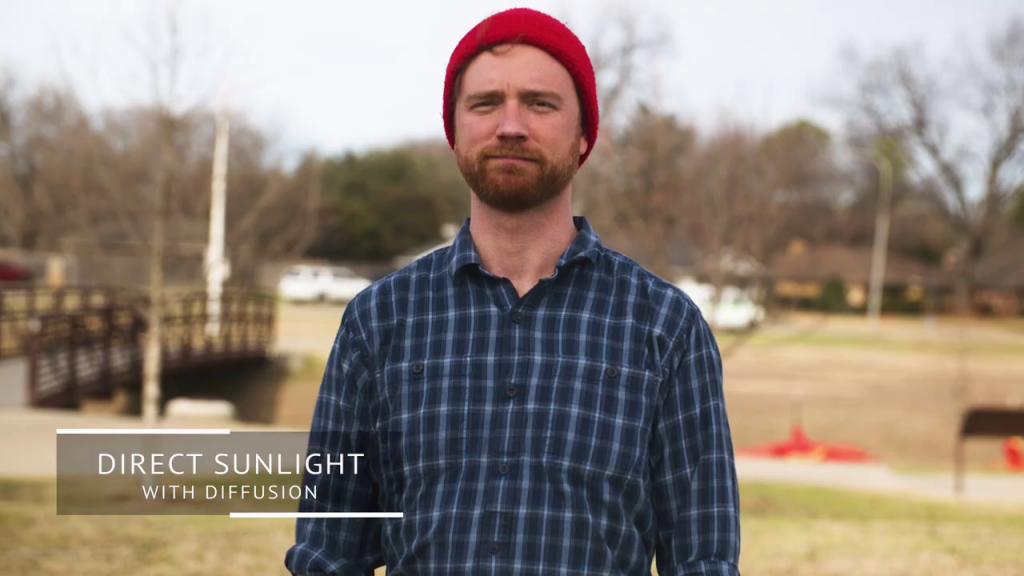
If you’re not familiar with filming outside, your instincts may tell you to put your subject facing the sun to grab as much light as possible. Exposing them like this is easy. Unfortunately, this is probably the worst option when filming in direct sunlight. Facing directly into the sun will create unflattering shadows on the subject — hard shadows will fall just under their face, in their eyes, and on their chest. The goal moving forward is to create depth and definition with full light on the subject.
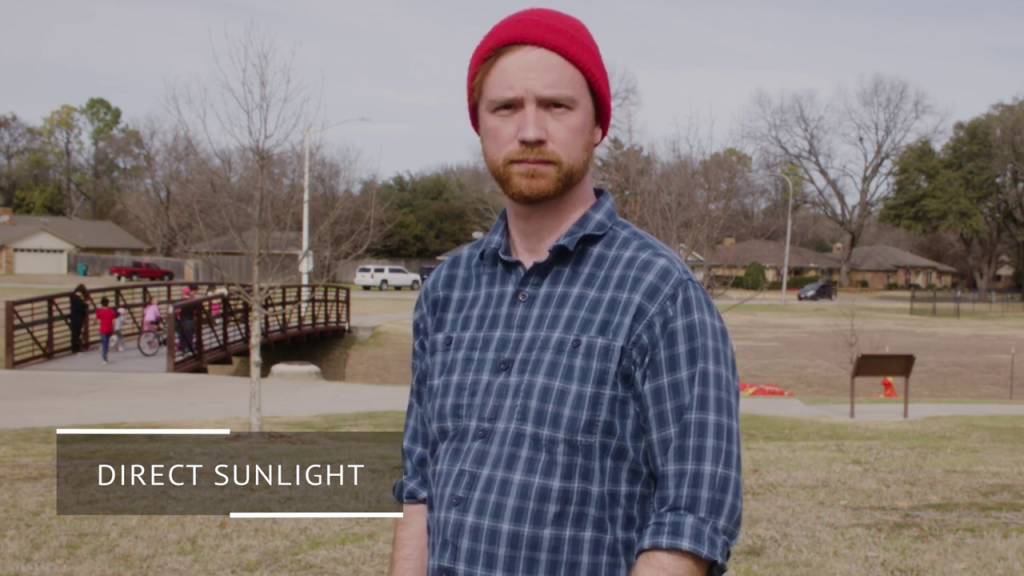
One reason you may need your subject to stare directly into the sun is because you need to highlight the background behind your subject at the same time. This could be the case in a few instances, like discussing a landmark, a building, or an event, and there aren’t other options for positioning your subject.
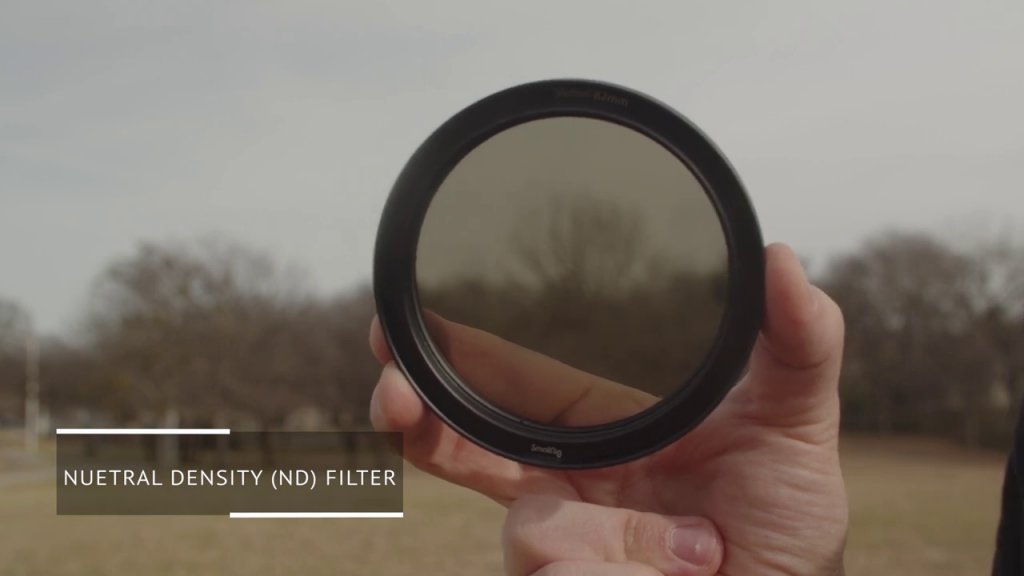
Luckily, there are still a few options to improve how your video will look. First, let’s cover what you can do in-camera. We’ll begin by applying some sunglasses to our camera with the use of a neutral density (N.D.) filter. Shooting indoors, you may wish you had more light in your shot, but outside, you’ll have far too much. An ND filter will allow us to open up our camera’s aperture to a wider setting and thus blur the background behind the subject to create a shallower depth of field. By blurring the background, it becomes less distracting and separates your subject a bit more.
Next, we’ll zoom in with our lens as much as possible. This will compound the shallow depth of field, making the background even more out of focus. Zooming in will also compress the subject and the background, flattening the image a bit more. I would aim for a focal length between 50-100mm, if you have that capability. These tips for adding ND and zooming should be applied to every scenario to add depth to the image. As a bonus, if you have an uninteresting background, making it fall into a complete blur can be a helpful way to mask it.
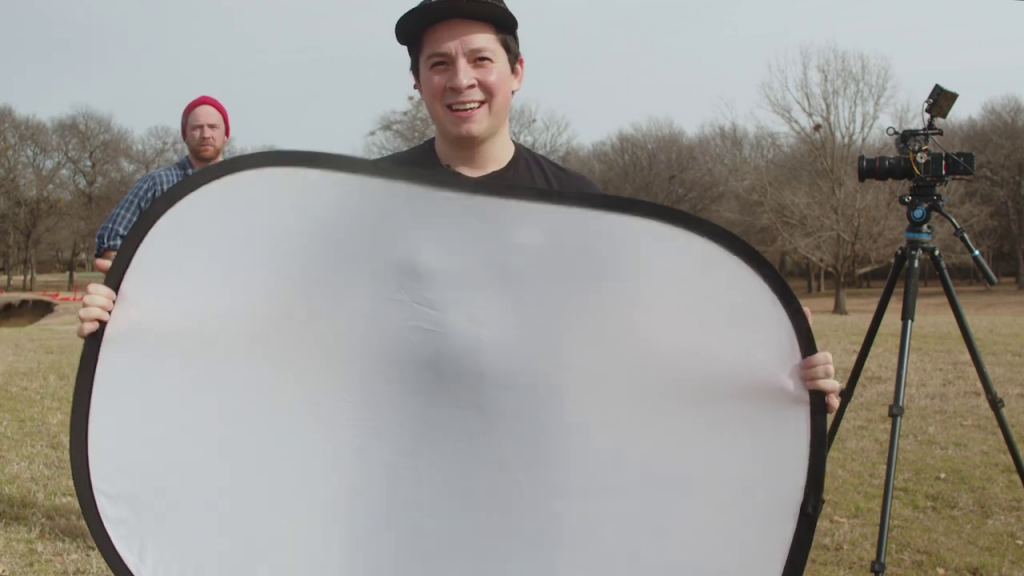
Now, that we’ve got our camera set up, we can start making adjustments to our lighting. Obviously, we can’t change the sun’s brightness or its position, but we can adjust our filming and position in relation to the sun. The star of this tutorial is the 5-in-1 reflector. This is a great, inexpensive piece of film equipment that is going to save the day. We’ll start by using the diffusion portion of the reflector and placing that in between our subject and the sun so that our subject gets just a little bit of shade. The diffusion still allows some of the sunlight to pass through, but the silk fabric changes the harsh quality of the light. This is softening the hard shadows on our subject.
The next thing we can do is change the position of our subject and camera in relation to the sun. A good starting point would be moving to a position that puts the sun at about a 45-degree angle in front of the subject. This will create some shadows on the opposite side of their face, which will create depth and definition, rather than the flat profile that we had previously.
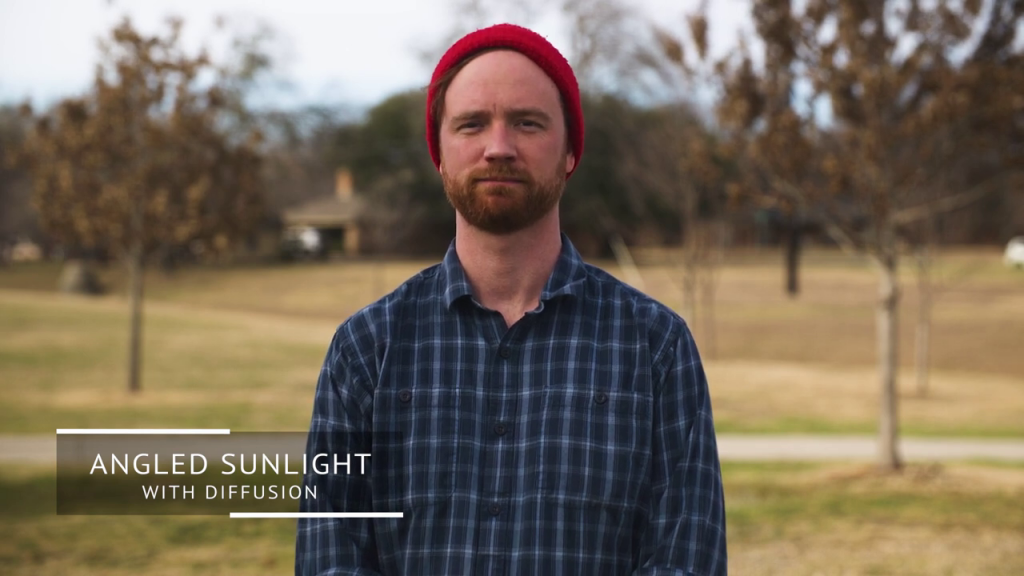
Now, we’ll bring back our good friend, the 5-in-1 reflector, to assist us again. We’ll still use the diffusion in the same fashion as we did before, between the sun and our subject. This serves the same purpose as before, softening the shadows on the subject and creating pleasing shadow falloff on the opposite side of their face. Soft shadows are generally more flattering for the people we’re filming, and it is a good tip to use diffusion whenever possible.
Another great option is to place your subject in between the camera and the sun, backlighting your subject. This can come off as very dramatic, and it eliminates those pesky harsh shadows that we had before. The downside is that now your subject is completely in shadow, again with no definition or depth on their face.
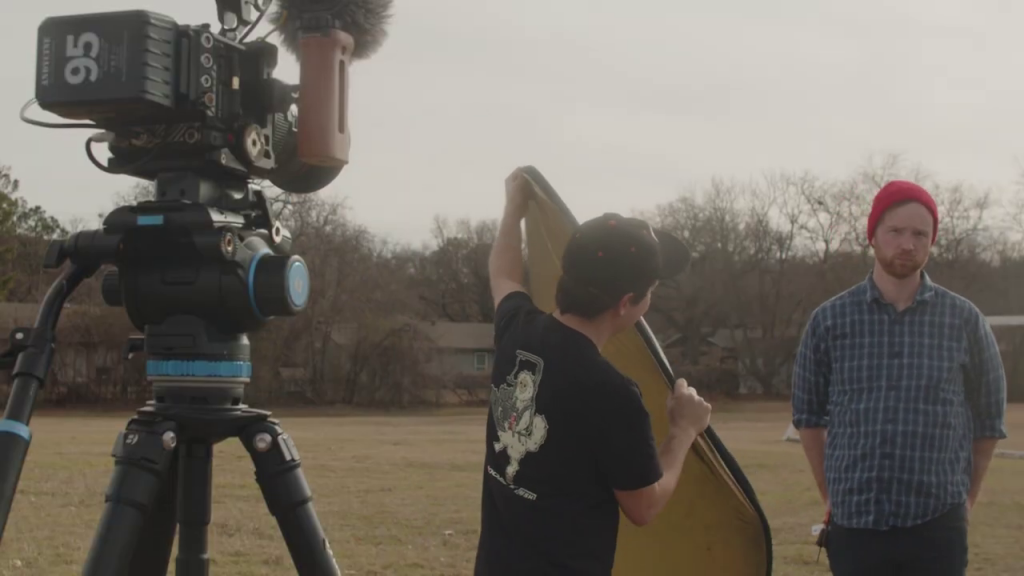
This is where the reflector saves the day again, but in a different way. By using the “bounce” portion of the reflector, we’ll bounce the sunlight back into our subject, brightening them up and giving them some definition. This is now doubling the sunlight as a key light and a backlight. The 5-in-1 reflector should have a few different strengths, so be sure to pick which one works best for your situation. Below is an example of the silk bounce and the strong, shiny bounce. One is a bit more subtle than the other.
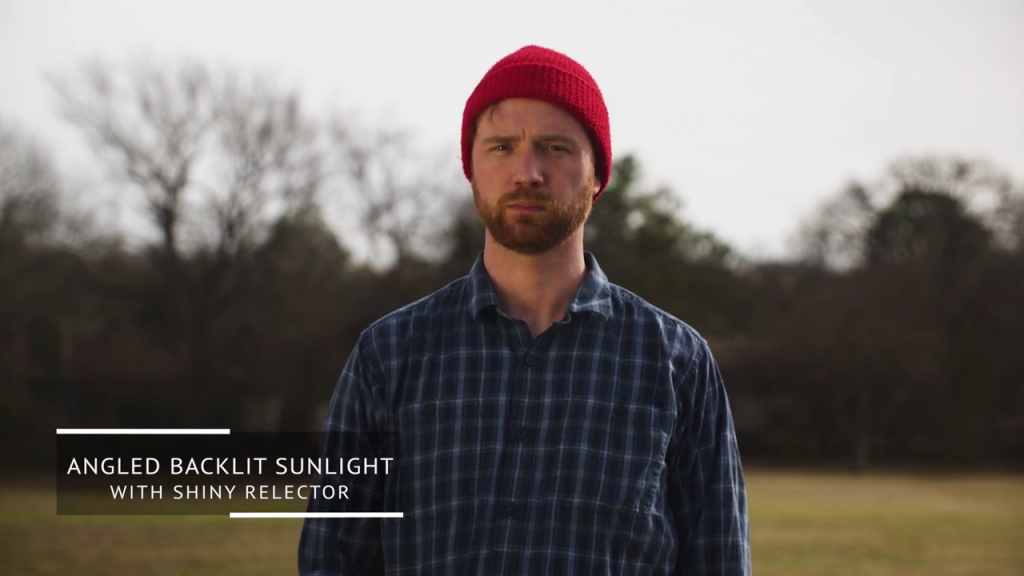
Just like we did with the sun in directly in front, moving around so the sun is coming at your subject from an angle is a great option. In our example, we’ve changed our position so the sun is hitting from about a 45-degree angle from behind. This is giving us a bit more play as a backlight and hair light, creating more definition and separating our subject from the background. We can also see the sunlight bleed a little into the front of our subject, giving us some great detail. Same as before, let’s use the reflector to bounce that sunlight right back into their face and use the sunlight as our key. I love this situation because now we’ve essentially achieved the industry-standard, 3-point lighting technique, outside with only the sun. We are missing a fill light in this situation, but we can fix that by using another reflector.
Ultimately, filming outside doesn’t have to be intimidating. With these few tips, you can start creating great-looking footage with little effort. Lighting position is everything, and it’s all about how you modify the existing sunlight to achieve what you need from the scene.
Looking for filmmaking tips and tricks? Check out our YouTube channel for tutorials like this . . .
Looking for more tips and tricks? Check out these articles.