In this article, we’re going to look at an After Effects plugin called Mask Prompter from Blace Plugins, available for $49.99. So, what is Mask Prompter? Apparently, it will create mattes with nothing more than a single text prompt. Mattes are incredibly important for visual effects and motion graphics. From layer reveals to adding individual effects to a single object within a scene: they are paramount to most workflows.
So let’s look at how useful Mask Prompter is. Spoiler alert: It’s very good.
Like always, I highly recommend watching the video tutorial so you can see the tool in action
The Scene
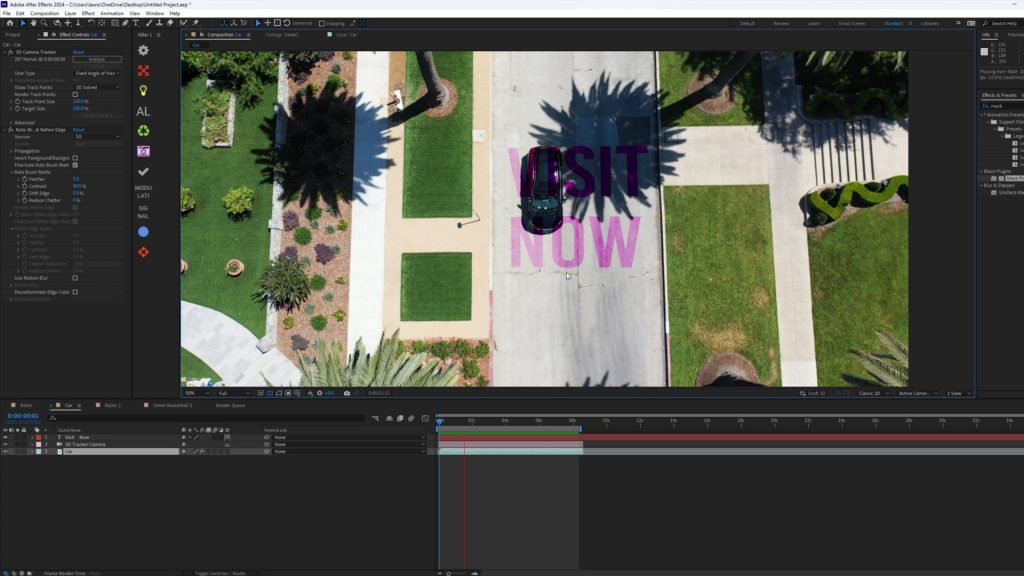
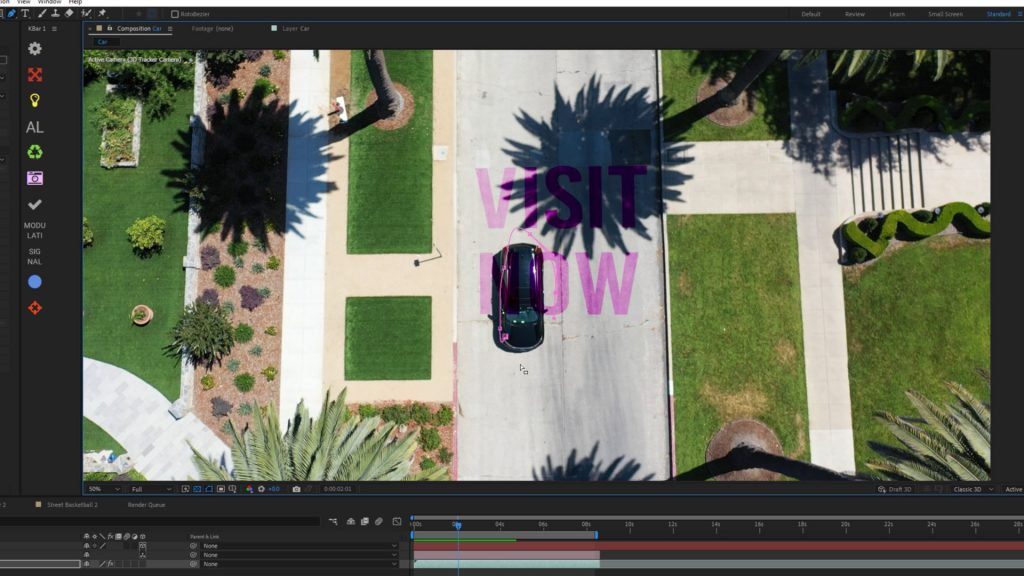
In this example, we have a drone shot of a car driving on the road on a hot summer’s day, which will be used at the end of a tourist commercial. We want the text to entice the viewer to visit the location. In the tutorial, I have already pre-comped the text to the road. It sticks to the ground as the drone flies and blends nicely with the concrete. The aim is for the car to drive over the text, but the text is layered over the vehicle in this example.
Typically, when we look at text or shape layers, they’re very easy to use as matte layers. After Effects can automatically generate transparency based on these layers, allowing users to manipulate and control the visibility of underlying layers precisely. When it comes to footage, we need to do rotoscoping in order to create a mask and then use it as a matte. This is why green screens are so prevalent in VFX, as they provide a uniform background that can be easily removed, simplifying the process of isolating the subject for further composition or effects.
In this scenario, we need to isolate the car. One approach would be to use the pen tool to outline the car, creating a mask, and then animate the mask’s keyframes as the car moves across the frame. This process should be relatively straightforward since the car is moving in a straight line.
Alternatively, we could bring the car into the layer panel and apply a rotoscope brush, tweaking it intermittently to achieve the desired effect. While this tool is effective, it often feels like a tennis match; there is a considerable amount of back and forth involved.

Mask Prompter
So, instead, let’s explore Mask Prompter. Begin by duplicating your footage layer and positioning it above the text layer. Then, drag the Mask Prompter tool from the effects panel onto the top car layer. Largely, you can bypass the initial parameters and proceed directly to “Add Text Input.” This feature works similarly to tools like Midjourney or ChatGPT, where you simply input a prompt to guide the tool. Instruct the tool to focus on isolating the car using its AI-driven rotoscoping capabilities. Once “add text input” has been selected, a new mask layer with a text prompt will be active on the footage layer. In my case, I will select the mask’s text layer, press enter, and type “car” to initiate the process.
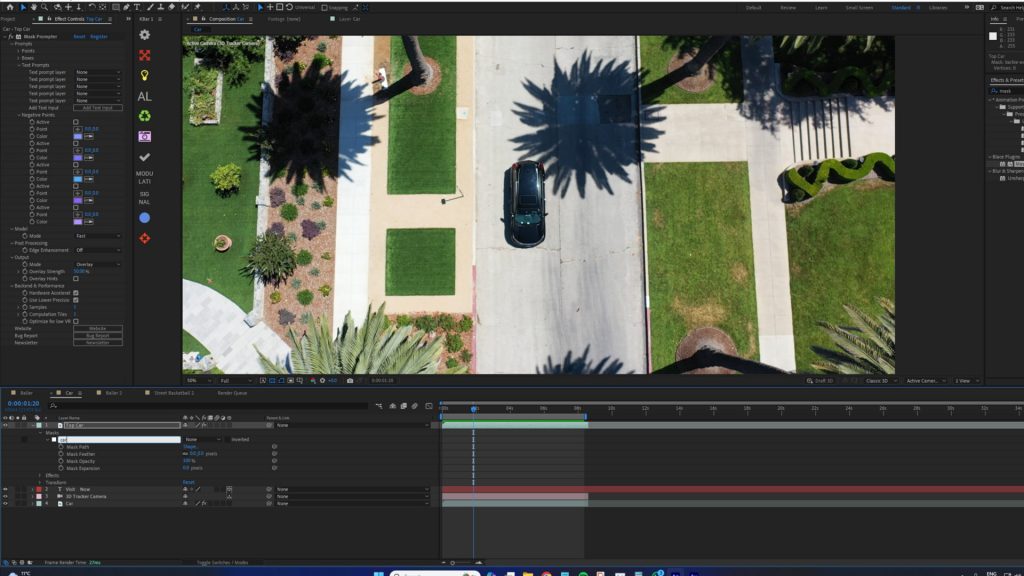
Return to the effects panel, and go back to the text settings. Here, you need to direct Mask Prompter to the specific text prompt layer to target; select “car,” and there you have it. We’ve essentially instructed Mask Prompter to locate the car within the sequence and generate a matte for that subject, eliminating the need for manual mask drawing or using a roto brush tool. Remember, this is a GPU-based plugin, so a powerful GPU is necessary to ensure optimal performance.
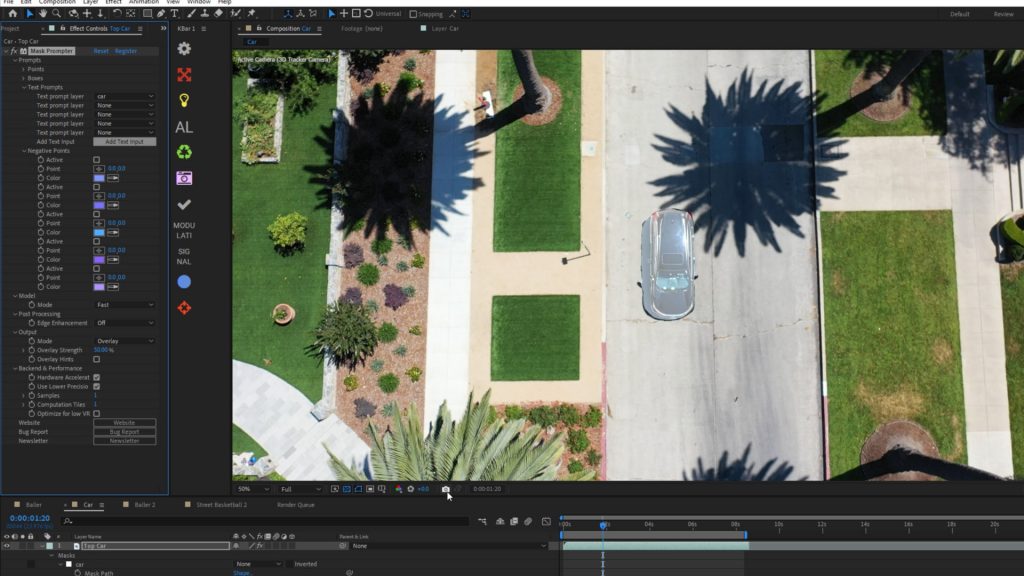
Due to the variety of processing settings available, I chose to adjust the mode for this example. I didn’t want the shadows to appear over the text, so I switched the mode from “Fast” to “High Quality.” This effectively removed the shadows because this mode assesses whether your computer’s GPU can handle the more intensive processing. If your GPU isn’t powerful enough, sticking with “Fast” might be better, but if you have a decent GPU, selecting “High Quality” or at least the “Default” setting will enhance the rotoscoping quality provided by the Prompt engine. Although this mode did a good job of removing the shadows, the edges were slightly too sharp for my liking. To soften them, I went to Edge Enhancement and selected “Small,” which nicely feathered out the edges.
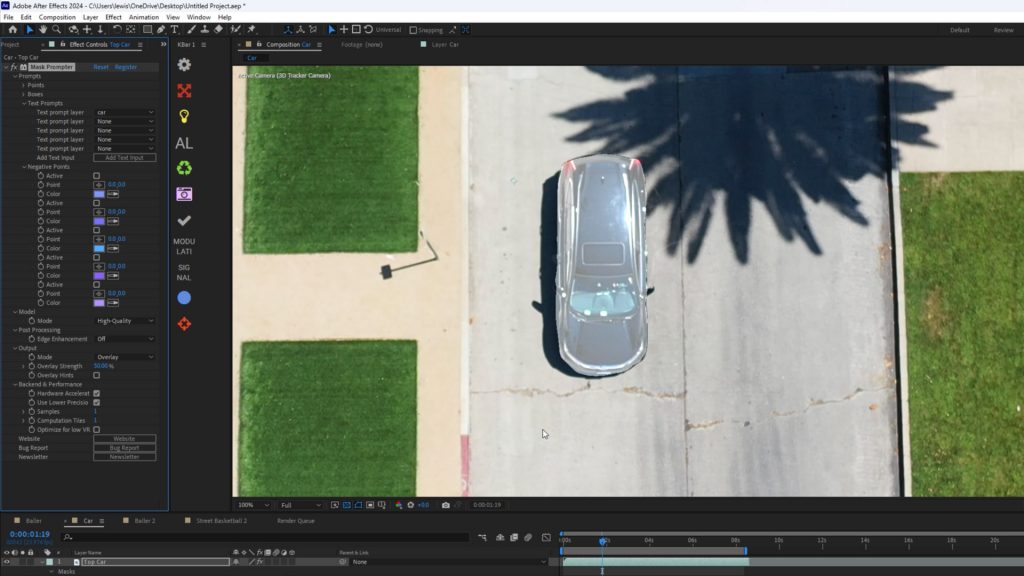
Finally, we can switch the output mode from overlay to untransparent, and since we’ve already set up the layers underneath, this becomes our final shot.
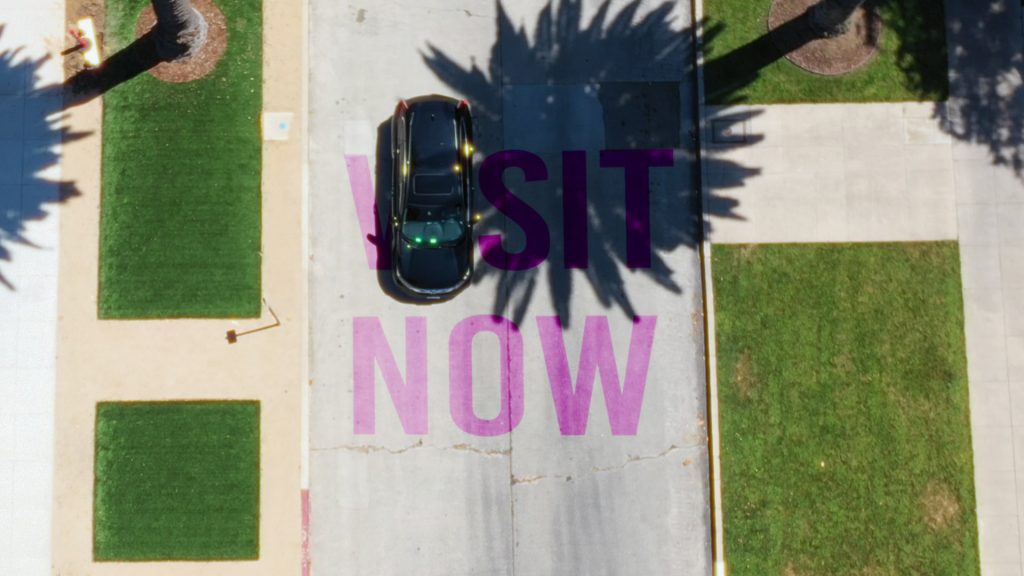
Although it took a few minutes to demonstrate, if I weren’t explaining each step, the process would have been much quicker. The rotoscoping would have been completed almost instantaneously, creating a composited matte image of the car moving over the text in just under 60 seconds. This rapid capability showcases the efficiency and power of the tool in real-time applications.
Looking for filmmaking tips and tricks? Check out our YouTube channel for tutorials like this . . .