Look, it’s 2023. A $2,000 Sony lens does the same as a $2,000 Canon lens. An $800 Sennheiser mic does the same as an $800 RODE mic. And a $5,000 Canon camera? You get where I’m going with this. Equipment is so well-manufactured today that only small differences between brands stand out. Canon may have better skin tones, and Sony may have better autofocus, but cameras from either manufacturer will give you good results. The same applies to non-linear editing software (NLEs) like Premiere Pro, DaVinci Resolve, and Avid. They all have their strengths and weaknesses, but they do the same thing. However, there has been a mass exodus of Premiere Pro users to DaVinci Resolve in recent years.
As someone with a Premiere Pro tutorial with nearly 1,000,000 views and a certified DaVinci Resolve trainer, I want to share some reasons why switching is beneficial. But I won’t give the usual answers like it’s free or doesn’t crash. I want to share some not-so-obvious reasons why making the switch is beneficial.
GPU vs CPU Performance:
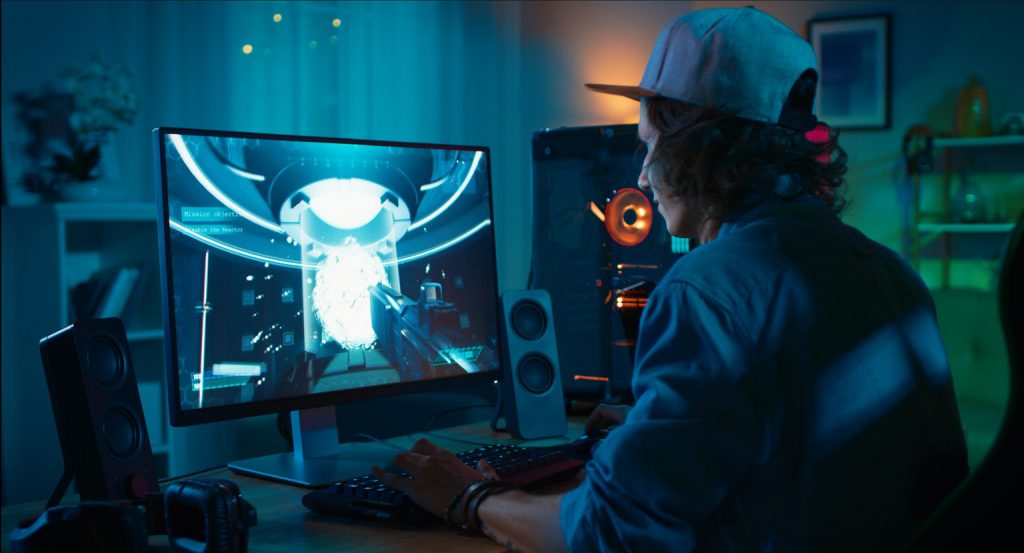
As a PC gamer, I strive to have the best PC components to play at ultra settings and with great FPS. The GPU is the one component that is often upgraded. I tend to upgrade around every three years. At the moment, I currently have an Nvidia GTX 3080, and I’ll likely upgrade to a 4080 later this year. If you’re a PC gamer, you’ll be delighted to discover that DaVinci Resolve takes advantage of GPU acceleration more efficiently than Premiere Pro.
Both applications will draw power from your installed GPU and CPU, but Premiere Pro is historically CPU-first.
On Adobe’s Support page, they state; Currently, most of the processing is done by CPU and GPU assists in processing certain tasks and features.
DaVinci Resolve’s GPU optimization is evident in several aspects. For example, the color-grading process benefits significantly from GPU acceleration, enabling real-time playback and rendering of complex node structures and LUTs. The Fusion page, DaVinci Resolve’s built-in visual effects and motion graphics tool, also relies on GPU resources to handle the computational demands of advanced compositing tasks. This means that even when working with resource-intensive effects, the software remains responsive and efficient, minimizing delays and performance hiccups.
Furthermore, DaVinci Resolve supports multiple GPU configurations, allowing users to harness the power of multiple graphics cards for even better performance. This scalability ensures the software can take full advantage of available resources, delivering an optimal editing experience regardless of the project’s complexity. By prioritizing GPU acceleration and effectively utilizing the available hardware, DaVinci Resolve has provided me with a smoother, more-efficient editing process, leading to increased productivity and better results.
Format Restrictions
DaVinci Resolve has a rich history as a color-grading platform, and it can handle high-resolution footage from a variety of media types. While Premiere Pro can also edit various formats, I often found myself needing help with issues when using it. Ironically, while making the video tutorial, I imported my Resolve timeline into Premiere, but because the footage was Blackmagic RAW, I had to download the codec from Blackmagic’s website in order to get the files to load. While not a major issue, it is a slight inconvenience.

Likewise, I can easily drag R3D files from a desktop folder straight into the media pool or timeline with Resolve. In contrast, with Premiere Pro, RED footage is captured as segmented R3D files, requiring a more cumbersome process of importing through the media browser. Furthermore, Premiere Pro supports many formats natively, but some formats may require plugins or third-party applications to work properly.
For instance, FLAC, the lossless audio codec, isn’t supported at all, necessitating transcoding through Audition before importing into Premiere Pro. With Resolve, I can instantly import FLAC files straight onto the timeline.
When I’m on a deadline or in the middle of receiving a burst of creative energy, the last thing I want to be googling is, “How do I import this into Premiere?”
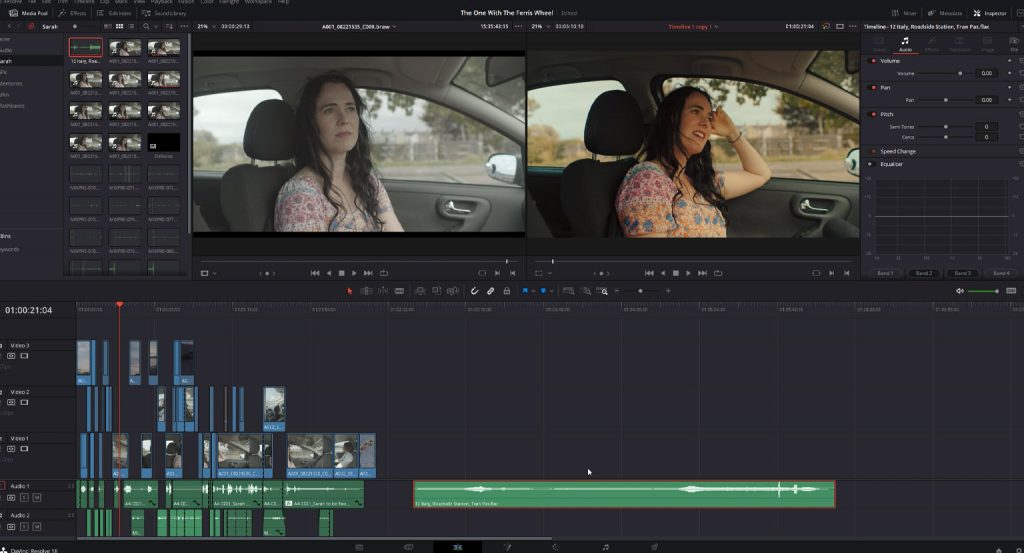
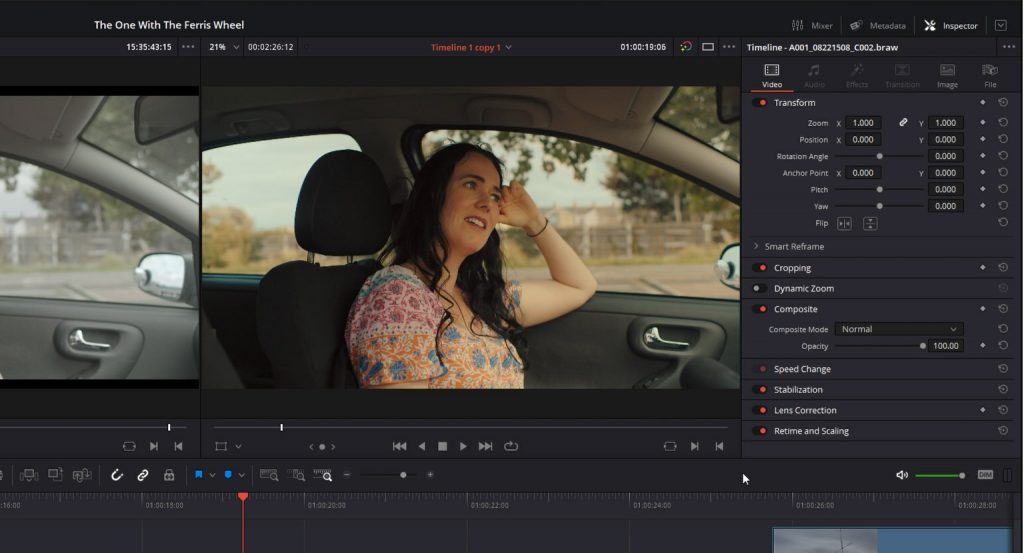
Individual Video Clip Parameters in the Inspector
One of the main reasons I switched to DaVinci Resolve is the ease of adjusting individual video clip parameters in the Inspector panel.
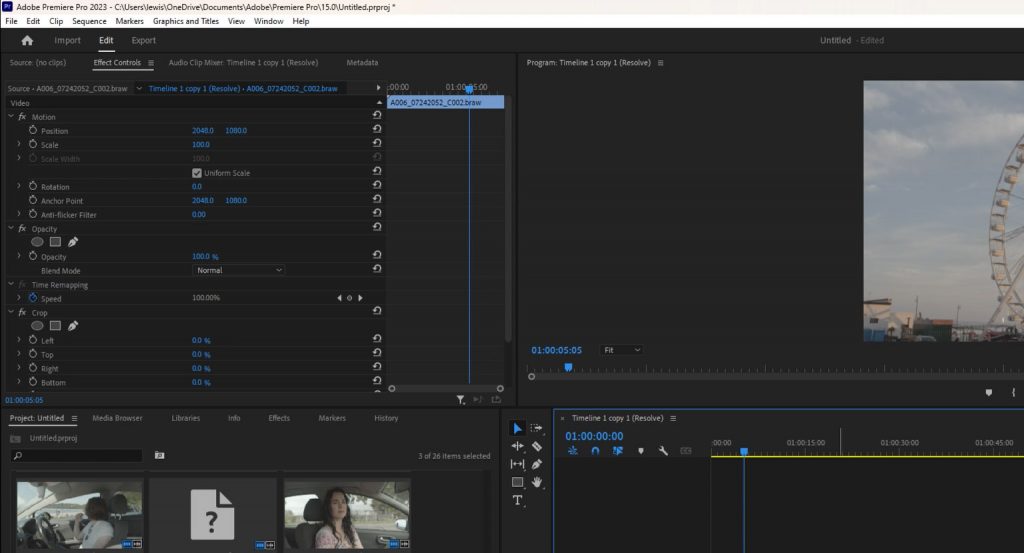
In Premiere Pro, you often need to individually go into the effects panel or adjustment layer to modify parameters like scale, position, or rotation, which can become cumbersome and clutter the timeline. It’s 2023, and you still can’t modify a selection of clips simultaneously. Why?
In contrast, DaVinci Resolve’s Inspector allows you to make these adjustments directly on the clip itself, streamlining the editing process and making it more intuitive. This feature not only saves time, but it also reduces the complexity of the timeline, making it easier to navigate and manage.
In addition, DaVinci Resolve’s Inspector provides greater control over clip properties, such as composite modes, cropping, and dynamic zoom. The panel is context-sensitive, meaning it automatically updates based on the selected clip, ensuring you always have access to the relevant parameters. This centralized approach to clip adjustments keeps your workspace organized and helps maintain focus on the creative aspects of your project.
By integrating essential clip adjustments into a single, easy-to-use panel, DaVinci Resolve’s Inspector significantly enhances the editing experience. The increased efficiency and improved control over clip properties have streamlined my workflow and contributed to better-quality projects.
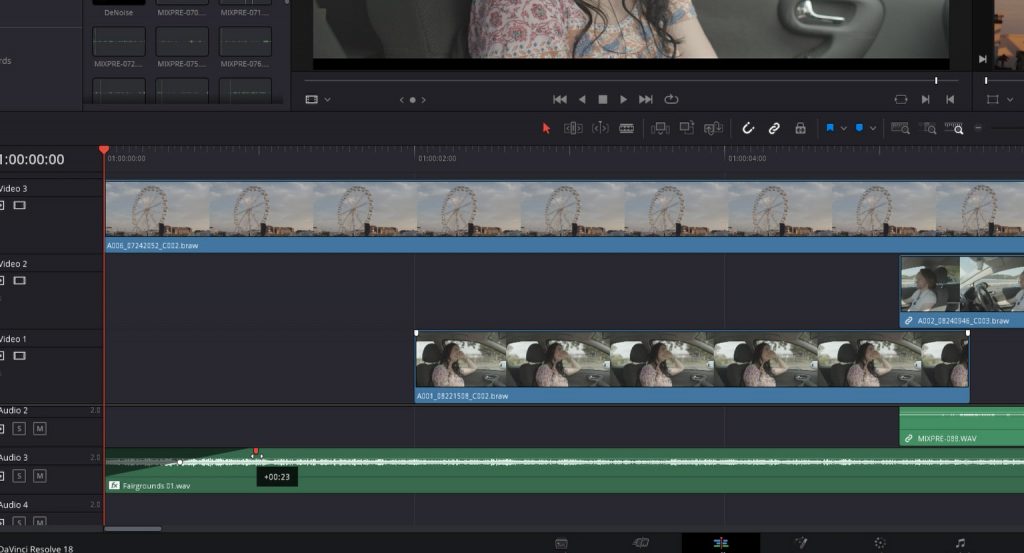
Superior Audio Tools
Another advantage of DaVinci Resolve is its superior audio workflow on the Edit page. While Premiere Pro offers decent audio tools, the interface can feel cluttered and challenging to navigate, especially for complex projects. I often find the audio aspect of Premiere Pro to be quite primitive in terms of what it can achieve. But that’s expected when there’s an entire dedicated application, Adobe Audition, that is expected to be used within the audio eco-system with Premiere.
On the other hand, DaVinci Resolve boasts a cleaner and more intuitive audio workflow with the built-in Fairlight audio engine. This integrated solution provides professional-level audio editing and mixing tools directly within the Edit page, eliminating the need for additional software or cumbersome round-tripping. The result is a more seamless and efficient audio editing experience that significantly improved my workflow.
For example, in Premiere Pro, the normal way to fade audio in is to create two keyframes on an audio clip, and lower the first keyframe.
Not too difficult at all, however, over the course of an edit, this task can become tedious. With DaVinci Resolve, it’s a different story. You simply go to the start or end of a clip, white handles will appear, and you drag them inward. Simples.
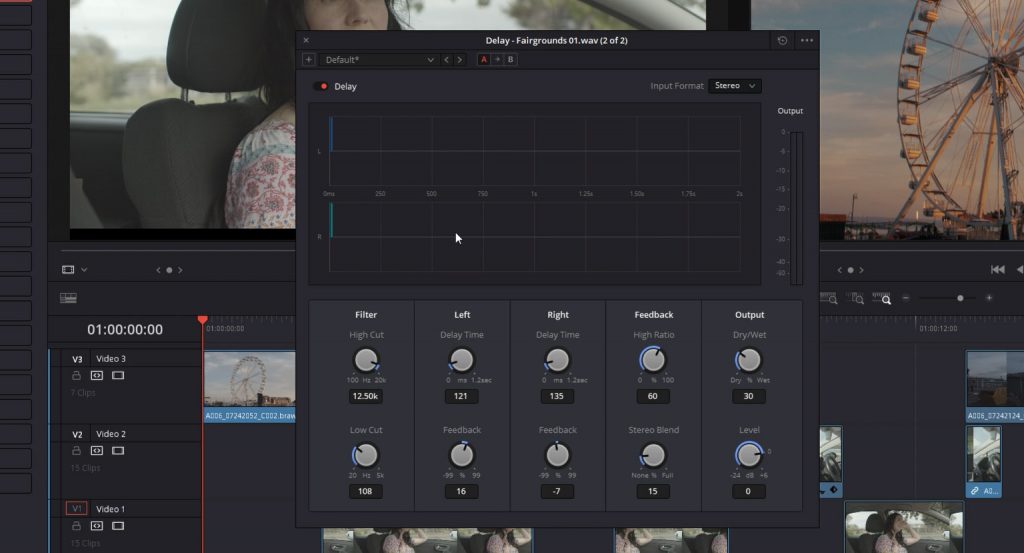
You don’t even need to access the Fairlight page to experience the full power of Resolve’s audio capabilities. The visual display of audio in Resolve is more captivating and informative than in Premiere Pro. For example, the EQ display in the inspector and the pan diagram in the mixer is more aesthetically pleasing. Even the way audio effects pop into their menu is more visually appealing. If I add delay to a clip in Resolve, I get this intuitive pop-up menu with adjustable settings and controls.
Yet, with Premiere, we must first re-open the effects controls, and then we are presented with this drab option.
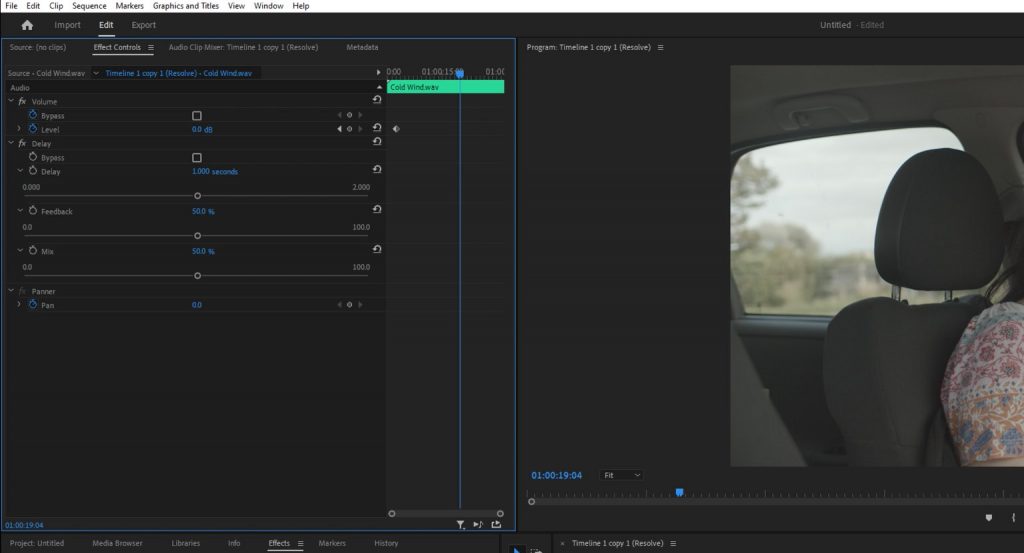
There’s always a lot of ‘chasing’ with Premiere Pro. You need to open tabs, open windows, change workspaces, and so on. With Resolve, you are presented with the tool you need.
While the most important aspect of audio is how it sounds, Resolve’s visual aids help you understand exactly how the sound is processed. This is an invaluable feature.
The improved audio workflow in DaVinci Resolve has made my editing process more efficient and led to higher-quality audio in my final projects. Furthermore, the integration of Fairlight directly into the Edit page streamlines the editing process by allowing users to perform audio edits and adjustments without switching between multiple panels or applications such as Adobe Audition. This seamless approach to audio editing ensures that you can focus on your project’s creative aspects rather than being bogged down by technical challenges or convoluted workflows.
Modern User Interface
For this section, refer to the video to see the UI in action.
I first downloaded Premiere Pro when I was 16; that was 16 years ago. While it’s received numerous great updates over the years, very little has changed regarding its design. It feels drab and lifeless to a degree. Again, as just noted, there’s very little visual information regarding adjustments—just number fields and sliders.
Conversely, DaVinci Resolve’s user interface has been a game-changer for me. It’s incredibly more responsive and cleaner than Premiere Pro’s interface, which sometimes feels cluttered and slow. DaVinci Resolve’s UI has been designed with efficiency in mind, and it’s easier to access the tools and features I need without getting lost in endless menus and panels. I cannot recall the number of times I’ve had to reset the workspace in Premiere to find the correct panel. See, while Premiere Pro is known for its high level of customizability, that can sometimes be a drawback. With so many options to customize the interface, getting the look you want can be overwhelming and time-consuming.
In contrast, DaVinci Resolve’s interface is streamlined and focused, so you can focus more on your work than tweaking the interface. Unlike in Premiere Pro, where you might have to cycle through tabs or return to the window menu, DaVinci Resolve’s panels allow you to access everything quickly. Expand them to access the necessary tools, keeping everything just a click away. To open a panel, click on the corresponding button in the interface. For example, click on the effects button to open the effects panel. Closing the panel is just as simple.
DaVinci Resolve’s interface optimizes workflow and makes editing more efficient.
Conclusion
As I mentioned before, once you’ve reached the highest level of product quality, your choice often boils down to minor features and loyalty to a particular brand. While certain aspects of Resolve bother me — occasional crashes, for instance — there are still certain aspects of Premiere that reign supreme, such as the automatic installation of certain After Effects plug-ins. However, considering the factors that usually prompt users to switch, as well as those outlined above, I’ve been using Resolve as my preferred option since 2016 and will continue to do so for the foreseeable future.
Looking for filmmaking tips and tricks? Check out our YouTube channel for tutorials like this . . .
Looking for more tips and tricks? Check out these articles . . .