DaVinci Resolve made a splash at NAB 2023, and today we’re going to run through one of its exciting new features, the Relight tool. Instead of using power windows, Relight is a tool that enables you to enhance the authenticity and naturalness of your scene’s lighting by generating a surface map that assesses the perceived depth and orientation of objects in your 2D image. Relight applies a lighting effect from the surface map, allowing light to reflect off objects more realistically based on their “depth.”
It’s amazing.
I highly recommend watching the video tutorial, as there are a lot of visual examples where you can see the tool working in real-time, but as always, you can follow the written guide beneath.
Let’s address two things right away. This is a Studio version plug-in, so it’s not available on the free version of DaVinci Resolve. Secondly, this tool is currently only available in the beta version of Resolve 18.5. As always, it’s never recommended to download a beta while in the middle of a project. So if you still need to get the Studio version of Resolve, or you’re unable to switch to the beta version for a while, let me be your test guinea pig for this software update.
The Tutorial
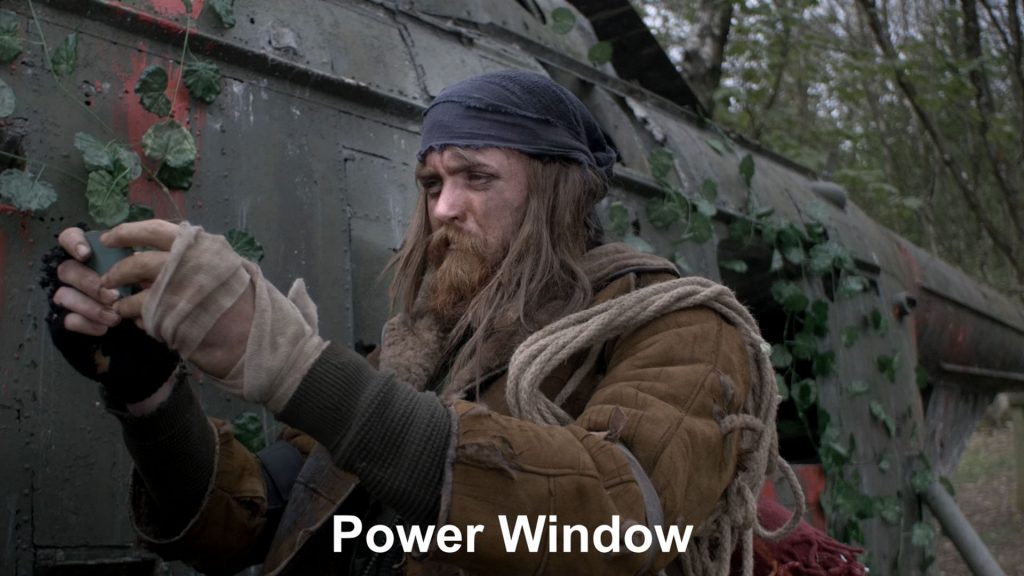
So, there’s always the situation where we wish we had more lights on set. Previously, in Resolve, we would create a power window and add illumination to the talent’s face or the area we wished to illuminate. The issue with this method is that it does not perceive depth and is confined within the environment of the mask. The Relight tool looks to remedy that. It is important to note that the Relight effect enhances the perception of depth without generating any factual 3D geometry data. When a spotlight is directed at an object, the effect does not produce a shadow on the wall behind it. Instead, it is intended to emphasize the existing lighting in the scene. So bear that in mind; it won’t magically add an Aputure Nova into the scene.
Without further ado, let’s look at how to use it.
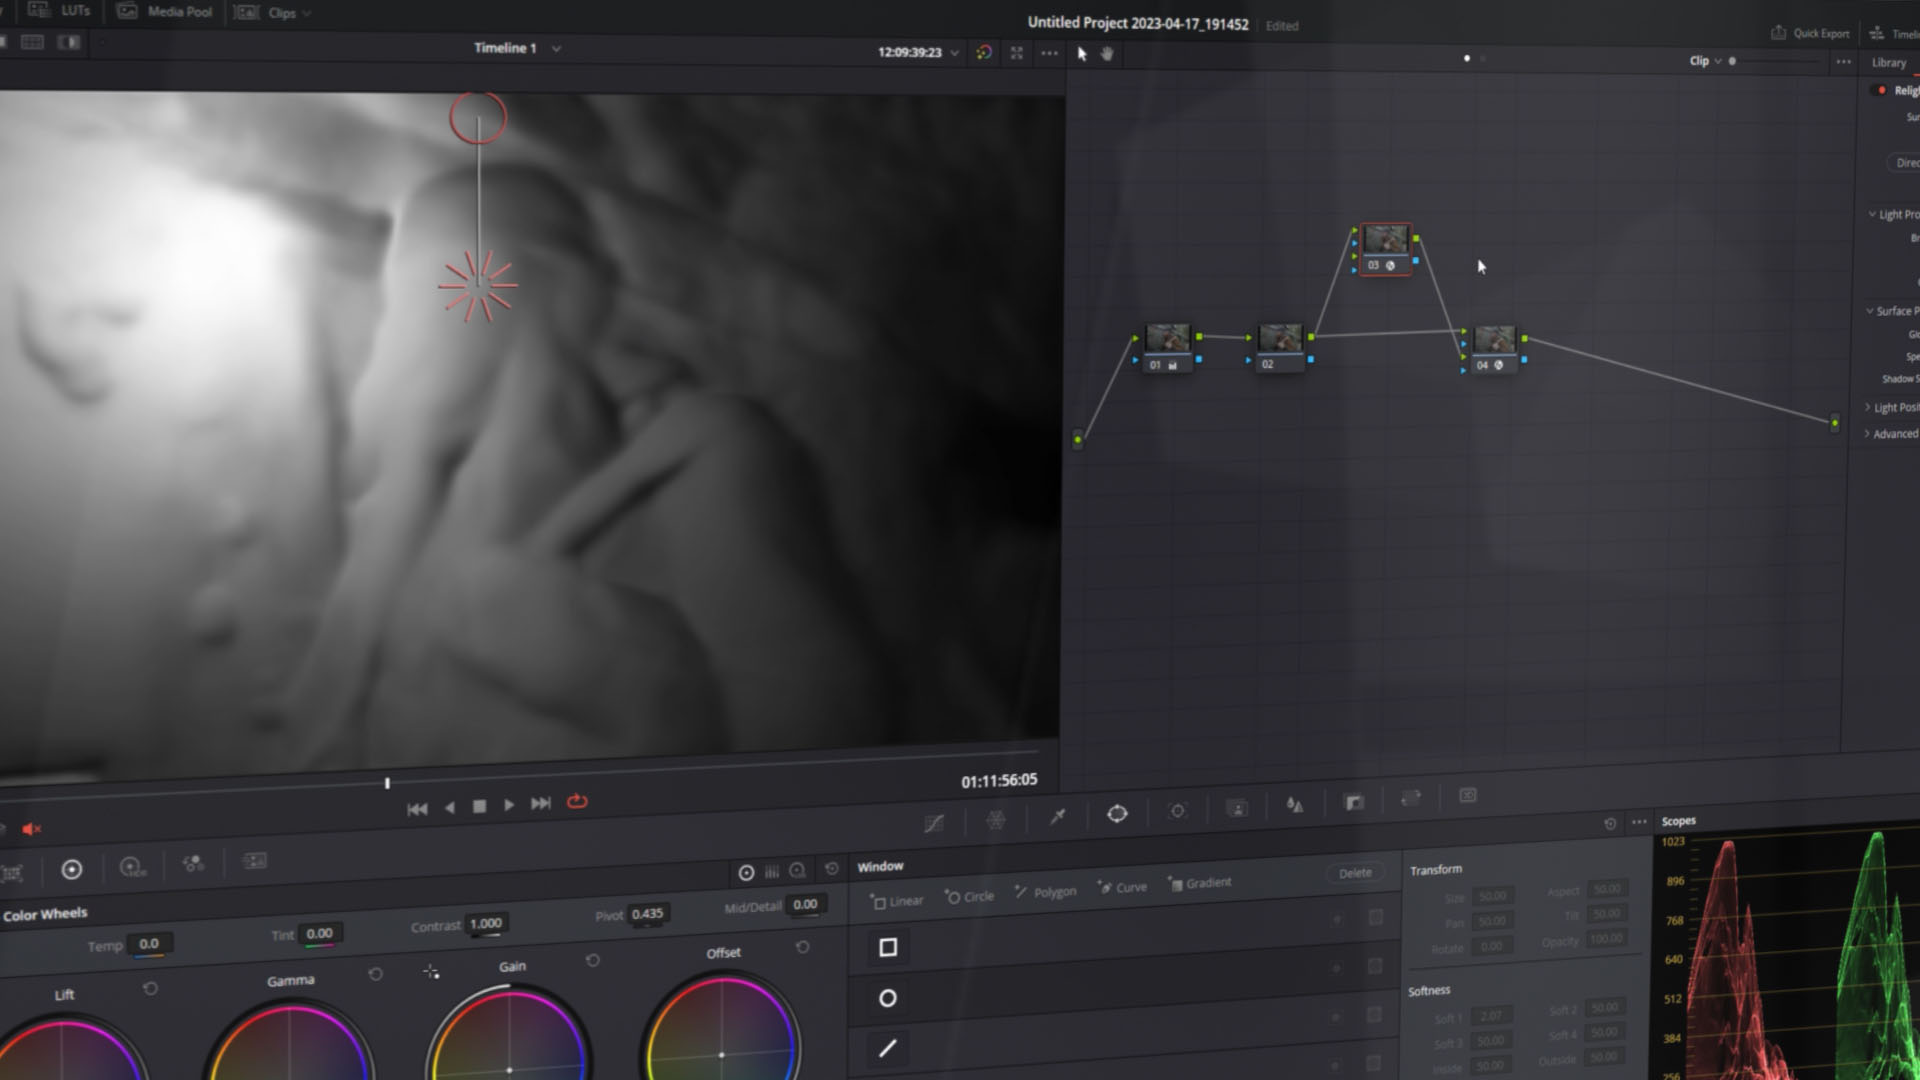
Relight Tool Node Structure
First of all, performing image analysis, generating a surface map, and subsequently relighting the outcome requires considerable computational resources, making it challenging to achieve real-time performance on existing hardware within a single node. Now, while doing such a thing is possible, Blackmagic recommends sharing the burden between two Relight nodes.
So, let’s add a node here, add Relight, and then add a secondary node, and again, add Relight. The chain link between the nodes needs to be displayed.
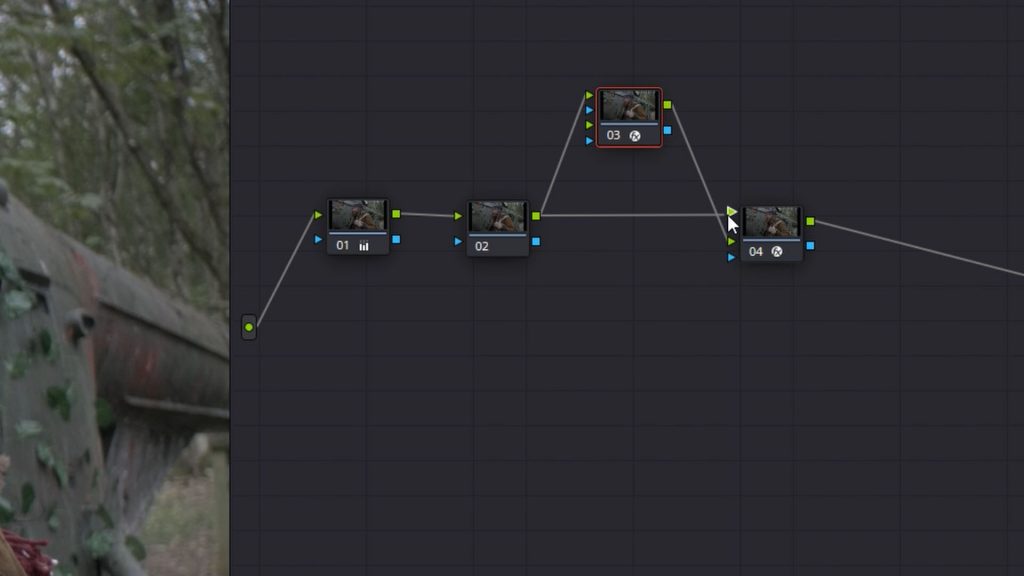
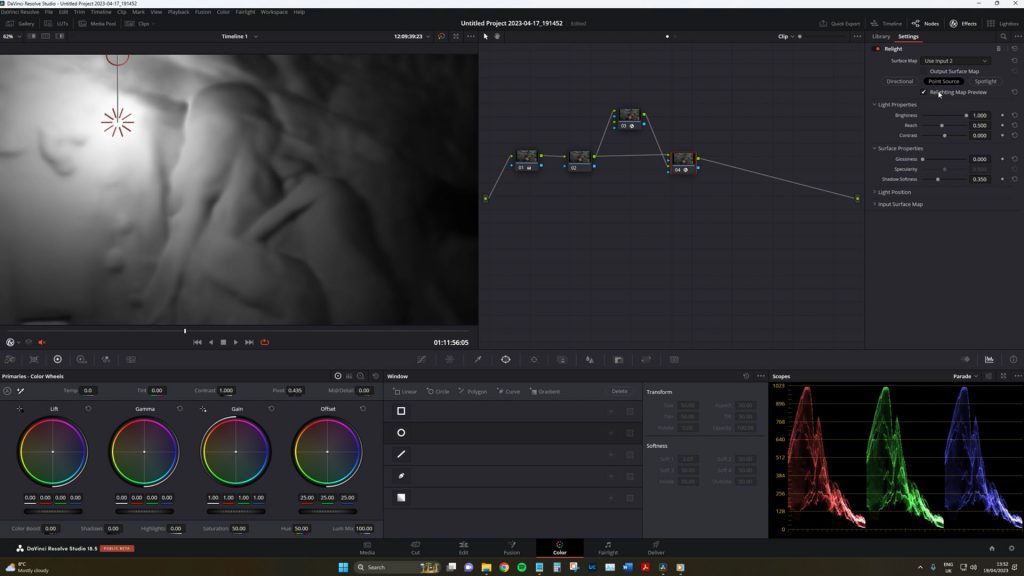
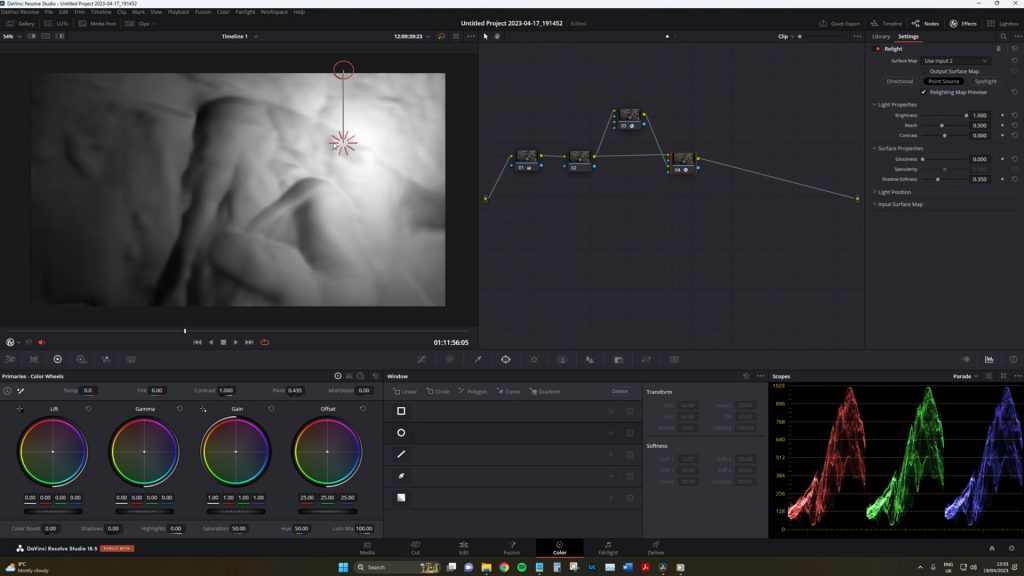
The initial node will be responsible for surface map generation and rendering, storing the results in the cache, which will then be passed onto the second node for relighting. So, on node one, we will select “Output Surface Map.” This will create a surface map. As seen on screen, it’s a colorful-looking output, but we can also define the areas of the image.

Now, to adjust the settings for the effect, go to the second Relight node, and choose “Import from Input 2” in the Surface Map Settings.
Now, notice how quickly we can move the lighting tool around within the preview monitor, and of course, you need to have the OFX overlay active. Yet, if I were to disable this and instead have all the computing power in the one node, you can see that even with a GTX 3080, this is very sluggish, so let’s change it back.
How to Use Resolve Relight
Ok, now we can see a depth map preview, and we have a light source on the preview screen. If I were to drag the light source and move it across the screen, we could see that the light affects different areas of the image differently. It illuminates areas as if they were a practical light, but we can also see the darker areas fall into shadow.
This is the significant difference between using a power window and the relight.
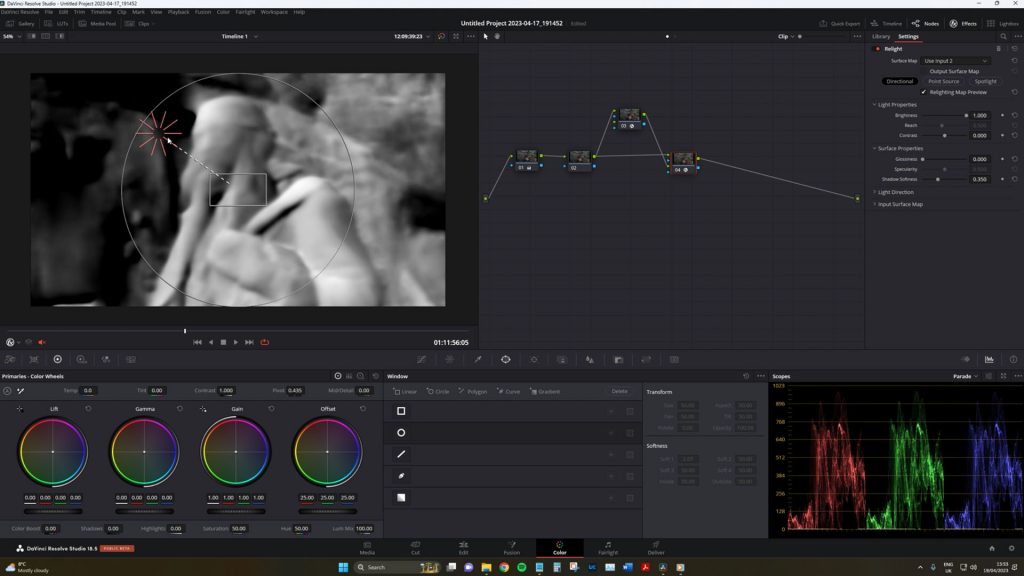
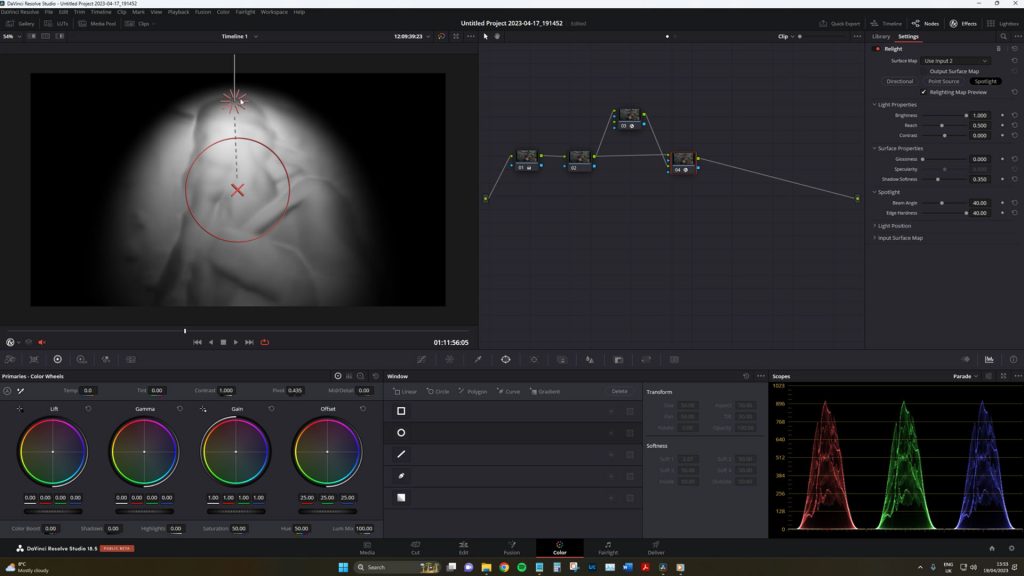
There are three methods to adjust the light in various ways:
- The directional option generates a light source that emanates from a particular direction at an infinite distance.
- The point source, which generates a light source from a central point.
- The spotlight option, which creates a cone-shaped light source.
The method you choose will depend on the type of shot you have.
We will look at the point source for this tutorial. But ideally, the directional property can cast a broad light in a single direction, making it ideal for replicating the behavior of natural light and changing the time of day. The spotlight property can be used to focus the light onto a specific location with cone and drop-off controls.
After choosing the selected method, there are a variety of sliders that you can adjust to create the type of light you’re looking for. I know this is a step-by-step tutorial, but the sliders of the properties speak for themselves as for what they do. But we will look at the surface properties, as there may be some terms you might not be familiar with.
The surface properties dictate how light is reflected on a surface, affecting its appearance. Enabling them can create a metallic-like shine on reflective surfaces.
- Glossiness: increases the amount of reflected light in the glossy range.
- Specularity: determines the degree of metallic appearance in reflections.
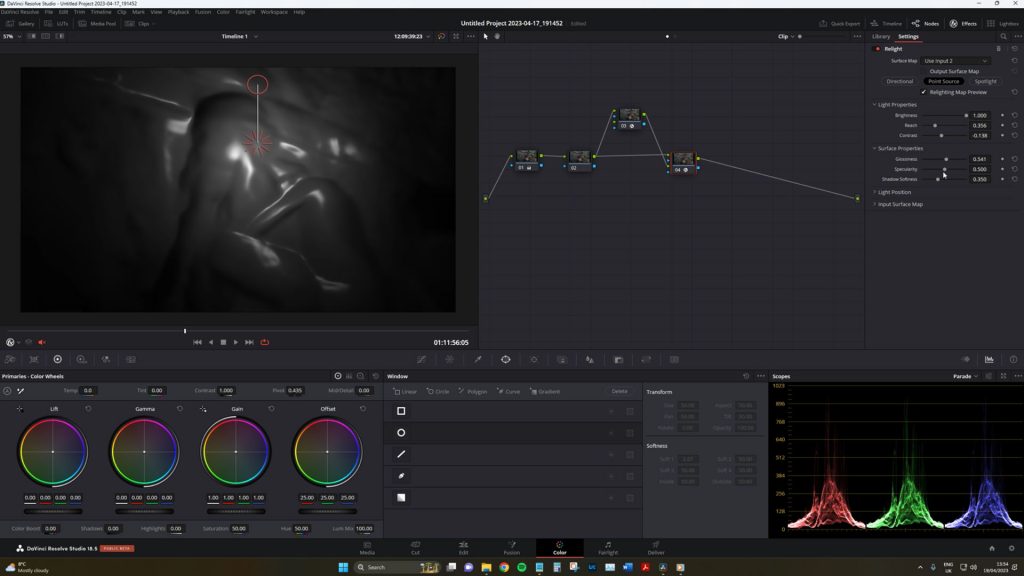
These two features can help add the illusion of additional light as when you look at objects, especially reflective objects, you’ll note what is called specular highlights along hot areas. The relight tool aids in adding these.
Ok, when you have a preview that you think represents the additional light you would like to add, you need to deselect relighting map preview and return to our original footage. Your initial thought may be, well, hang on; this is no different from where we started. And that’s true. We now need to use the primary wheels to dial in the light.

As you’re adding light, you only really need to touch the gain wheels to adjust the highlight region.
By adding a slight amount of gain, we can see the relight has been correctly applied. But when the gain is now applied, it instead is confined to the rules set out within the Relight parameters.

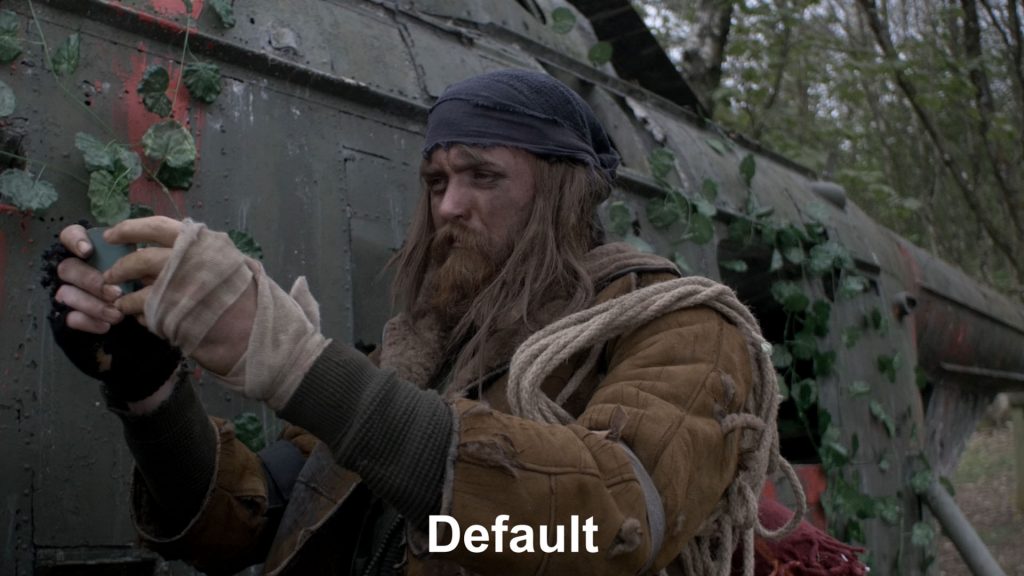
As you can see from these examples, the tool is incredibly powerful and really does help mimic the likes of additional light. We can also add color to the tool to simulate certain types of light, such as evening light. If we look at the comparison with a quick power window, there’s a strong difference in how the brightened areas are reflected within the image.
Of course, there are issues; depending on the background, we might encounter some odd casts, it doesn’t project shadows, and as noted, it is a very intensive operation; your GPU must be up to scratch.
But yes, this is it, and before I leave, you should also know that if your shot moves, you will want to add OFX trackers and analyze the clip to the node before adding the relight feature because of its intensity.
Stay tuned for more Resolve content!
Looking for filmmaking tips and tricks? Check out our YouTube channel for tutorials like this . . .


