Does DaVinci Resolve 19’s defocus background effect actually work? We find out in this review.
Blackmagic has finally released the long-awaited DaVinci Resolve 19, albeit in beta form. This update brings a variety of new features, tools, and enhancements, many of which leverage the AI neural engine. One particular feature caught my attention: the ability to add a fake, shallow depth of field by defocusing the background. Creating a convincing defocus effect is challenging due to the complex characteristics of a real defocused background. Last year, Adobe Lightroom introduced a similar feature, and the results were fairly decent — though not entirely convincing, they were passable. However, adding a defocused background in a video is vastly different from doing so in a photo.
Defocus Background Effect In Action
In this article, we’ll explore just how effective this new feature is. I’ve downloaded a variety of clips from the Videvo library under different circumstances and with varying backgrounds to test the limits of this tool and see if we can create a convincing shallow depth-of-field effect without using a fast prime lens.
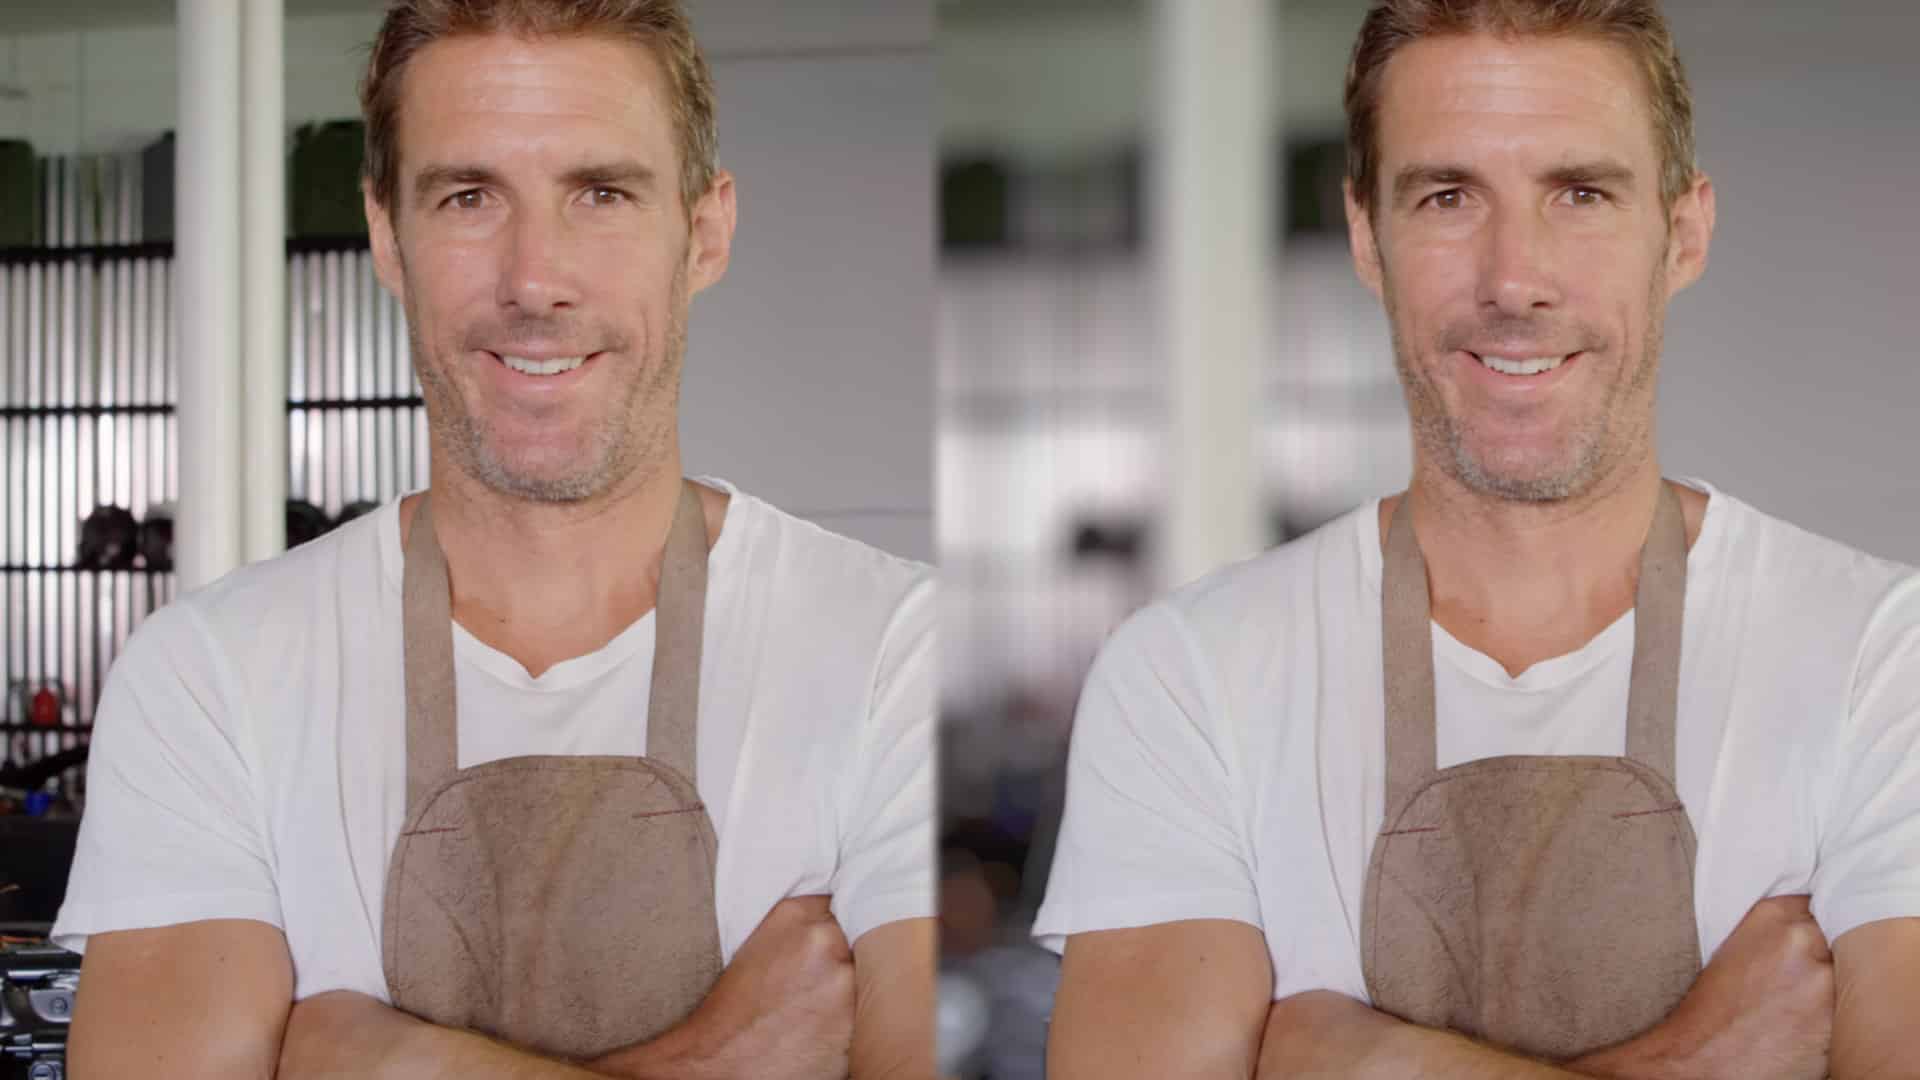
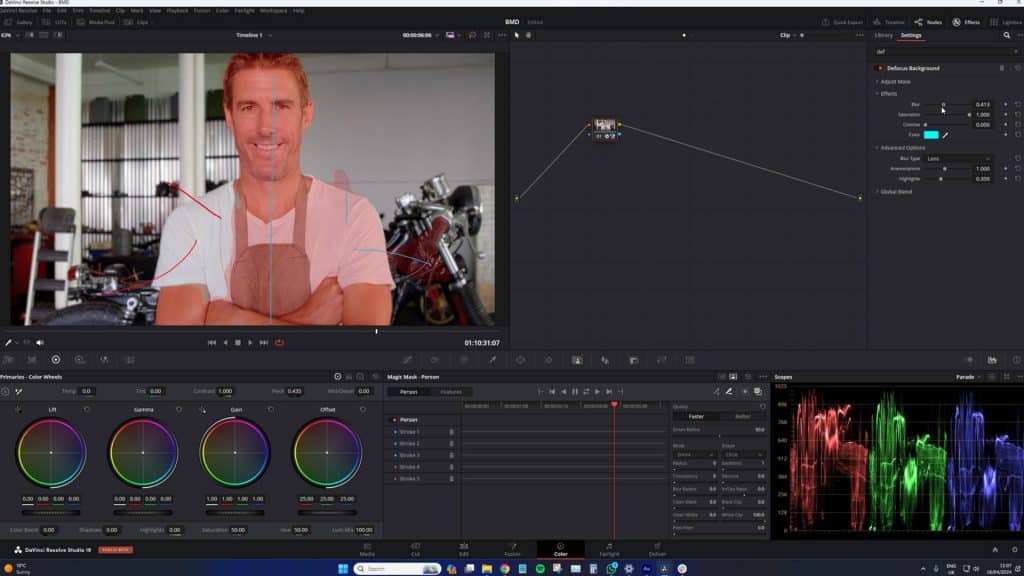
With our first clip, we have a shot with a bike mechanic who is very happy because he has just built a new prototype motorcycle. Unbeknownst to him, the motorcycle is under a NDA, and he shouldn’t be displaying it, so we need to protect him from a potential lawsuit. We’ll head over to the color page, but unfortunately, applying the effect isn’t as simple as just dragging it onto a node. It requires a bit of setup.
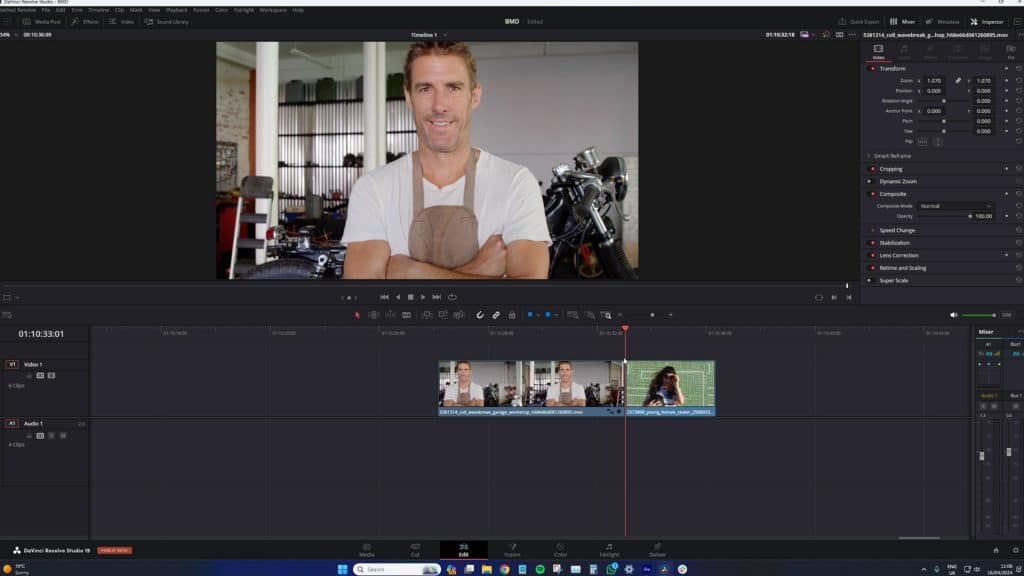
There are two ways to approach this. We can use an external key node structure or add everything onto a single node. I recommend against the latter. So, if we activate the magic mask feature and ensure the additive qualifier is on, and the toggle mask overlay is active, we can start by drawing a stroke over the body and adding the defocused background.
You can manage this within a single node; however, the screen may become cluttered, especially with multiple strokes. Making adjustments without it resembling a chaotic, crayon-filled screen can be challenging.
Instead, I suggest creating a structured node setup like this.

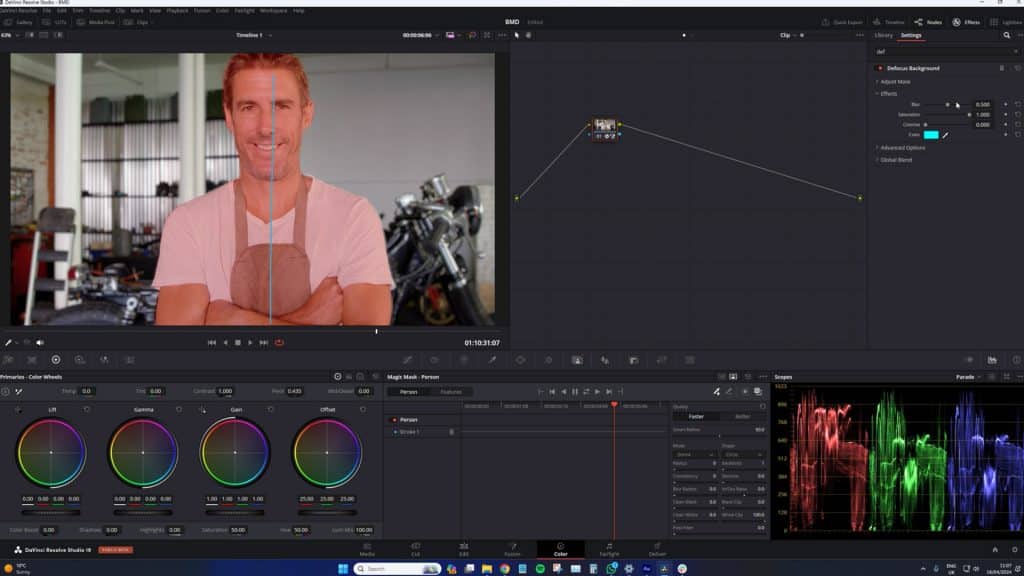
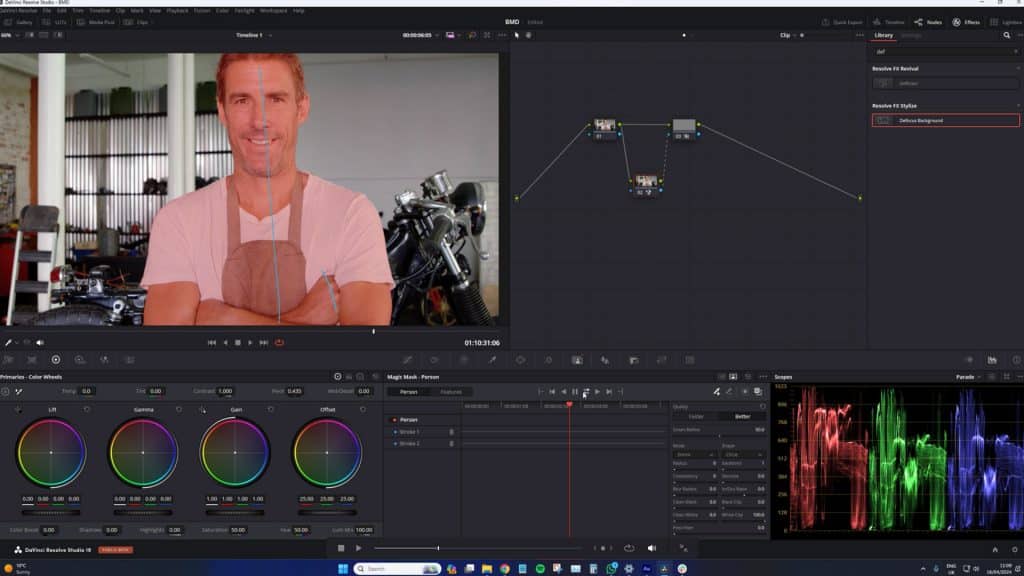
We will create an external key, ensuring that what is masked out in Node 2 isn’t affected by adjustments in Node 3. To do this, connect the green square of Node 1 to the green triangle on Node 3. Then, connect the blue square on Node 2 to the blue triangle on Node 3, setting up what Resolve calls an external key.
Return to the magic mask panel, select “Magic Mask Person,” activate the toggle for mask overlay, and draw a stroke over the subject. Modern compositing means we don’t need to draw around the figure meticulously; the software does a decent job. However, note the ear and parts of the shirt may not be captured accurately. Switch from “quality faster” to “better” for improved results.
There are moments, like an unmasked hand, where additional strokes are needed. Draw another stroke, analyze forward and backward, and watch for missed areas. For example, the bike cylinder unexpectedly being caught in the mask is a bug typical of this beta version. If this occurs, apply a subtractive stroke to the area and reanalyze. Keep an eye out for any sudden flashes of red mask, but we should be clear about proceeding once we add the defocus effect. A slight blur may be applied to soften any sharp edges, achieving a well-defined mask.
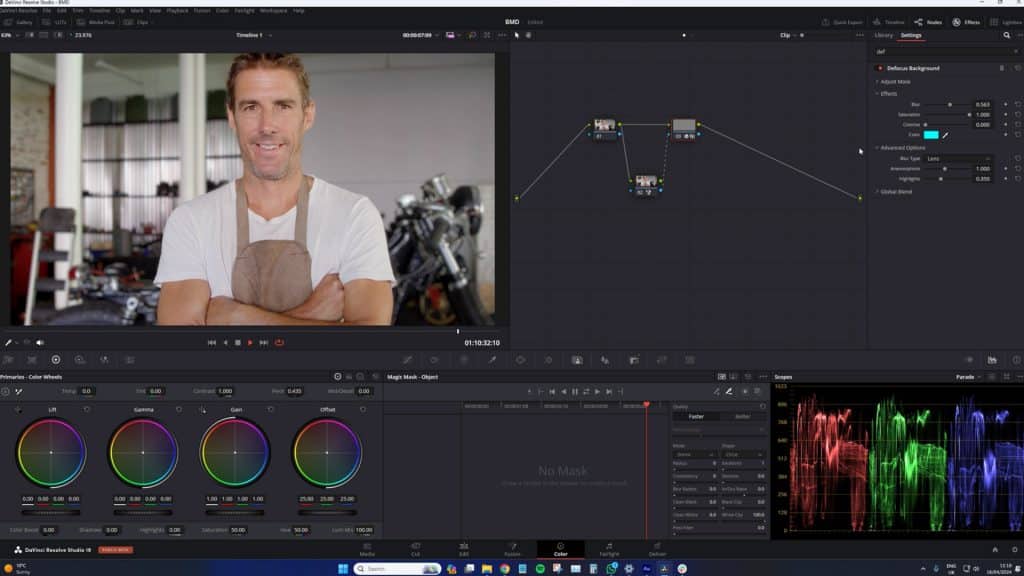
Even his hair, styled in spiky spikes, has been well captured. Now, we’ll add the defocus background. But first, let’s turn that off and press play. Okay, that looks pretty decent. Do I have any critiques at the moment? Not yet, so let’s increase the blur.
It appears we’re experiencing some ghosting around his shoulder, and perhaps the mask isn’t as tight as we’d like. So we’ll go back into the magic mask and start refining it to eliminate that issue. I always forget whether it’s the whites or the blacks that need cleaning. This is looking good; maybe we should apply some noise reduction.
We’re still seeing some ghosting around the shirt, but we can consider this a win. If this were a social video, I doubt anyone would notice such details, and overall, we’re successfully defocusing the background. It’s not quite the same as using a prime lens with a very shallow depth of field, but it’s pretty effective in blurring out the focus. If you’re at the stage where you need to defocus the background in a video clip like this, the ghosting around the shirt is likely the least of your concerns. However, we do have to acknowledge that it’s there.
Defocusing Flowing Hair
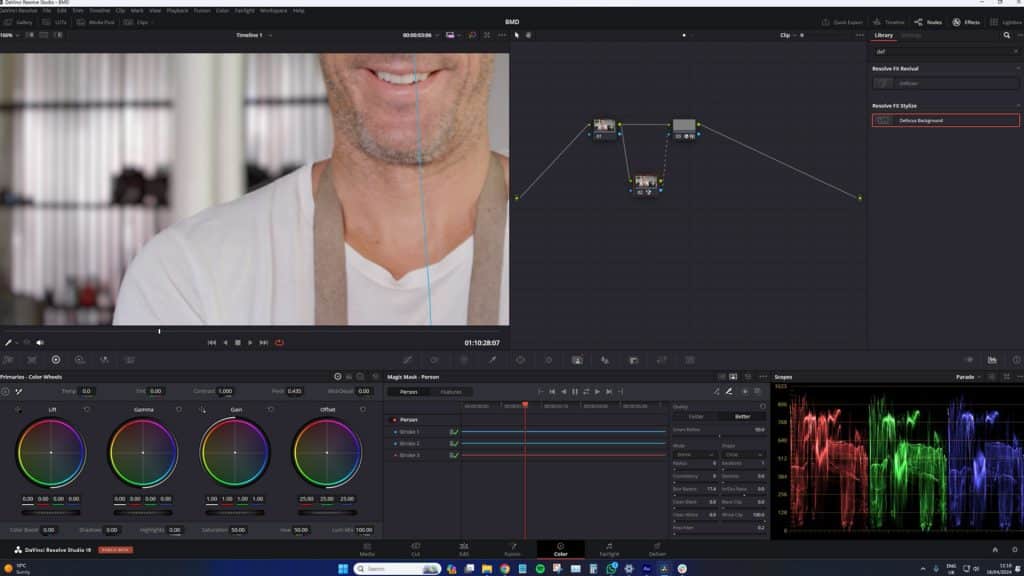
For the second clip, we have a model who appears to be holding a helmet for cycling or skateboarding. The background features very distinctive mosaic tiles, which our director wants to be blurred out because they are too distracting. I’ve chosen this clip mischievously because I know the flowing strands of hair in the wind are a compositor’s nightmare. On a green screen, this would be problematic. I’m not confident the blur effect will handle it well, but let’s see how it goes.
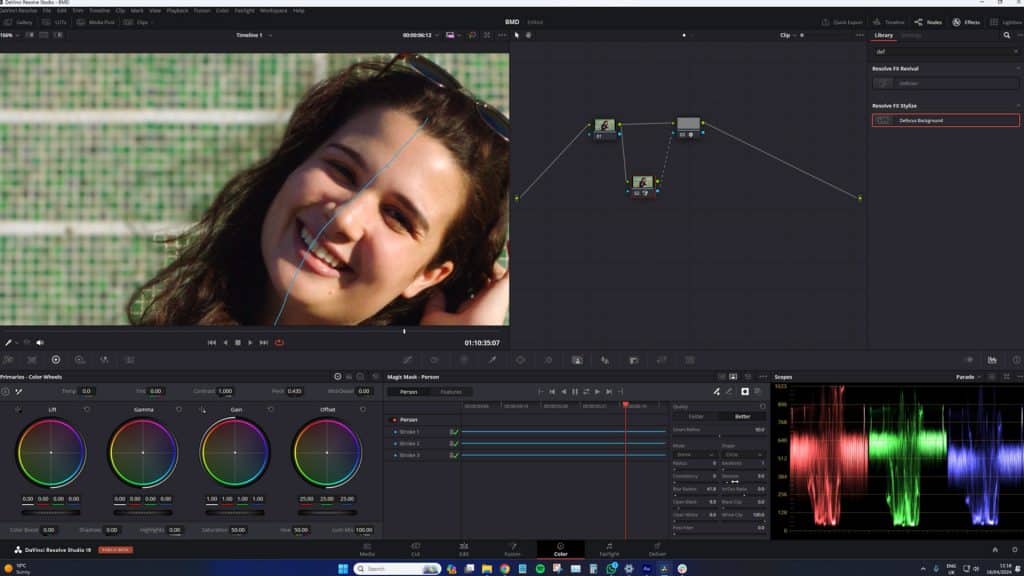
I’ve already gone through the process of applying the magic mask. Now let’s add a defocus background to the node, and while we’re at it, let’s switch to a better setting and maybe add a bit of blur to clean up the blacks and the noise.
It’s done a decent job. Now, we have parts of the background between the flowing hair strands appearing normally and not defocused, but I initially thought the background would be seeping through significantly more. It might be because I’ve got the Denoise activated, but even with Denoise turned down, it’s not too much of an issue. But it certainly isn’t perfect, or at least as good as the car mechanic.
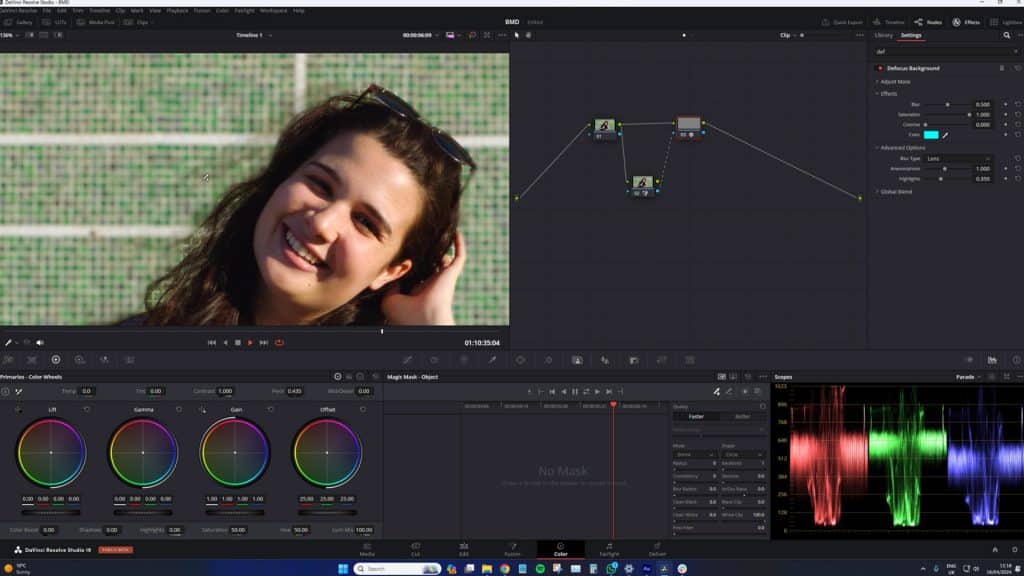
If you want to fix this, you would need to increase the settings on the magic mask panel, which, in turn, gives it that artificial blur effect, similar to iPhone portrait mode. The strands of the hair are caught up in the blur and look slightly ugly.
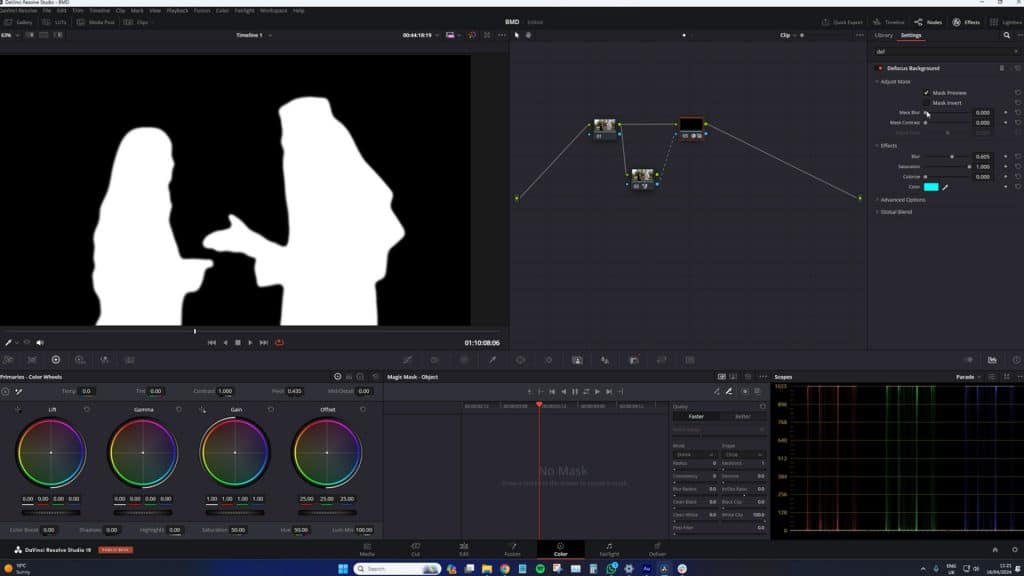
Multiple Subjects in Movement
For our third example, I’ve pushed the beta version of Resolve by testing the defocused background effect to an extreme. We have two business operatives in a park making a deal, but we didn’t get a location release for the building in the background, and the producer wants it out of focus.
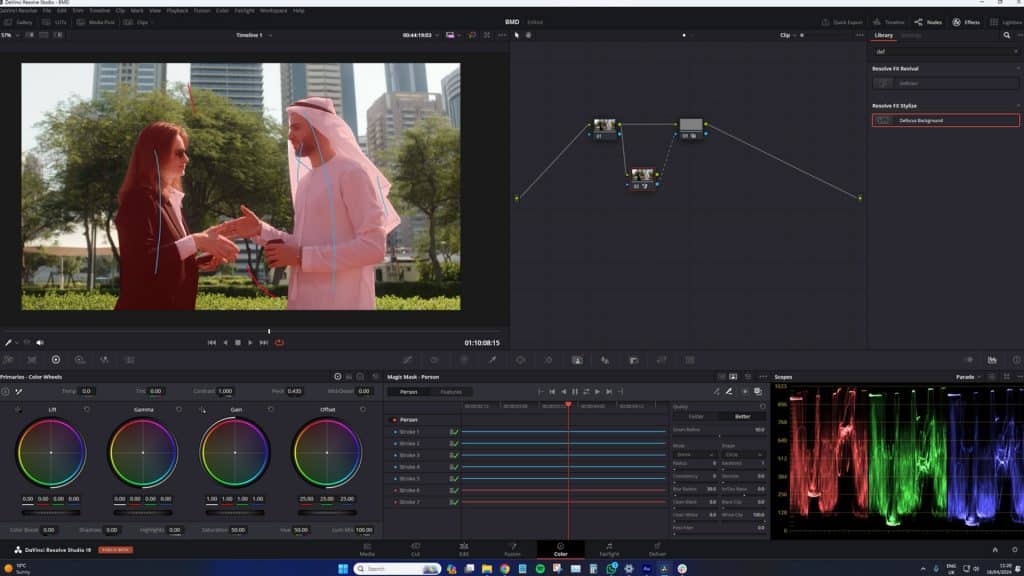
I’ve already created my mask, and I might enhance it slightly and add a bit of denoise. We’ll go to our third node, apply the defocus background again, and increase the blur significantly to ensure the background is out of focus. This shot has a lot of hand movement between both parties. The translucent material here is causing some issues.
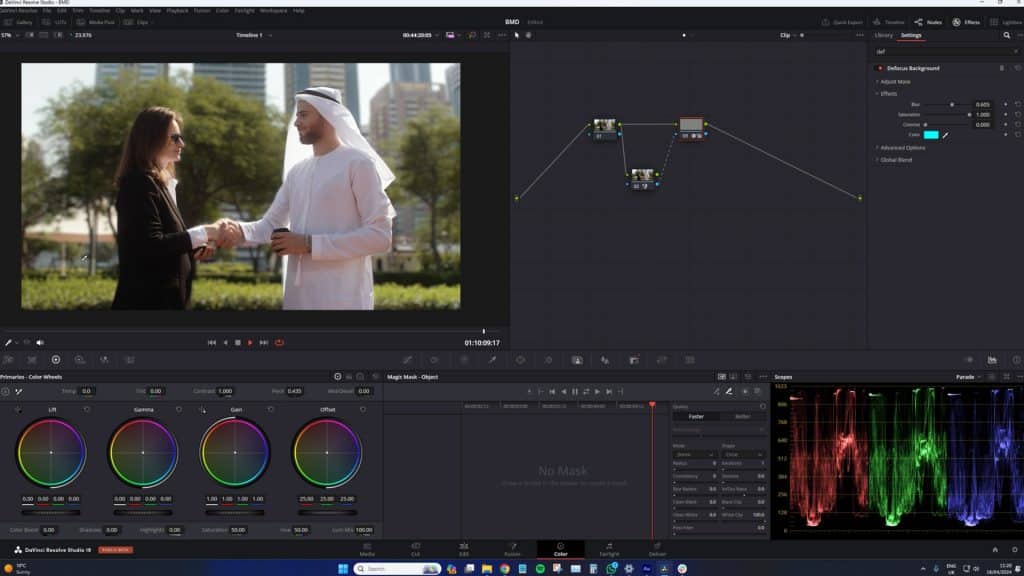
Resolve seems to struggle with managing the soft edges of the material, acting a bit like diffusion, similar to the issues with the nose. However, for a quick shot for social media or a web ad, it might pass. With more refinement in our magic mask or within the adjusted mask properties in the defocus background tool itself, we could potentially achieve a better mask.
Overall, it’s just about passable. The types of shots that really stand out are the car mechanics, where there’s little to no movement, no flowing hair, and no soft material.
Conclusion
The results today were somewhat mixed, but remember, the software is still in beta, and Blackmagic is stellar at updating their software, so this is only going to improve, as we’ve seen with many AI tools. However, at the moment, your footage needs to be composed very specifically if you plan to defocus the background later — ensure your subject isn’t wearing colors similar to the background, avoid transparent materials, and minimize movement (and, of course, flowing hair). Despite these limitations, there are definitely a few situations, like this tutorial sequence, where I could use this since I’m filming on an F4 lens and sometimes want more background blur.
Looking for filmmaking tips and tricks? Check out our YouTube channel for tutorials like this . . .