Adding effects to your projects and clips in Premiere Pro is just one step of the editing process.
With the use of adjustment layers, you can quickly add effects to multiple clips, adjust their effects more easily, and decide exactly where those effects should end. In this tutorial, we’ll define adjustment layers, explore how they work, and show how you can affect the layers.
What Is an Adjustment Layer?
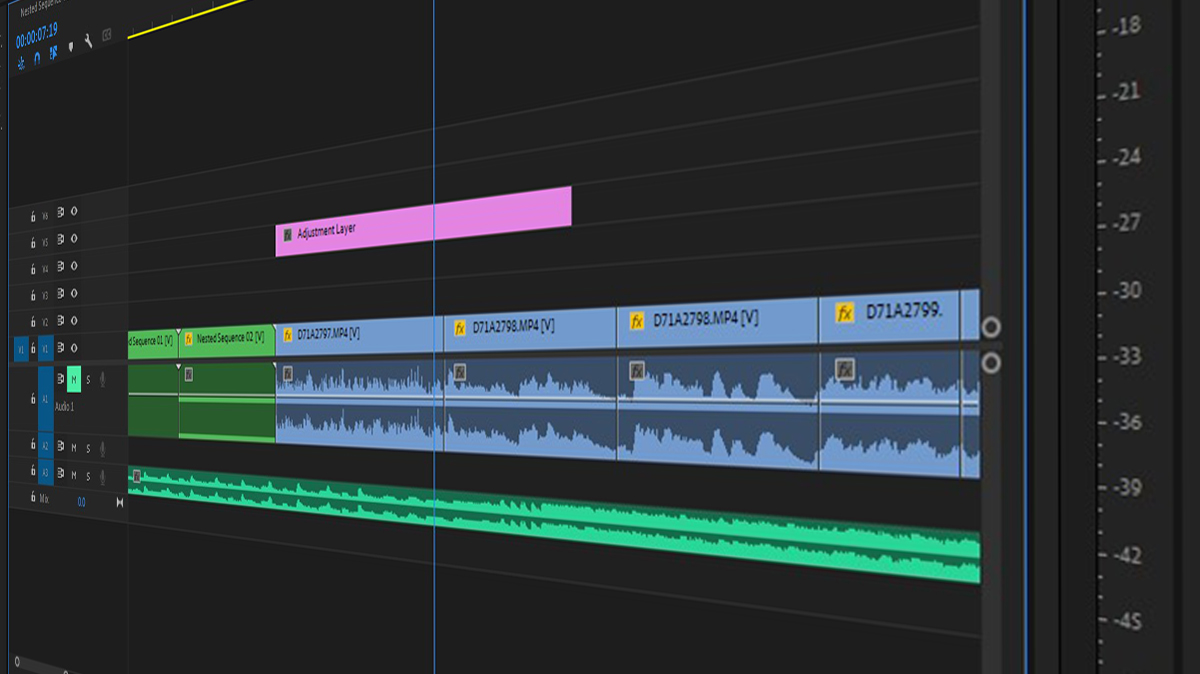
An adjustment layer is a type of clip that you can create within Adobe Premiere Pro that lives within your project’s files. Once created, you can insert this clip within an existing timeline, and any clips underneath it will inherit the adjustment layer’s effects. This can be your entire timeline, just a few seconds, or even just a few layers.
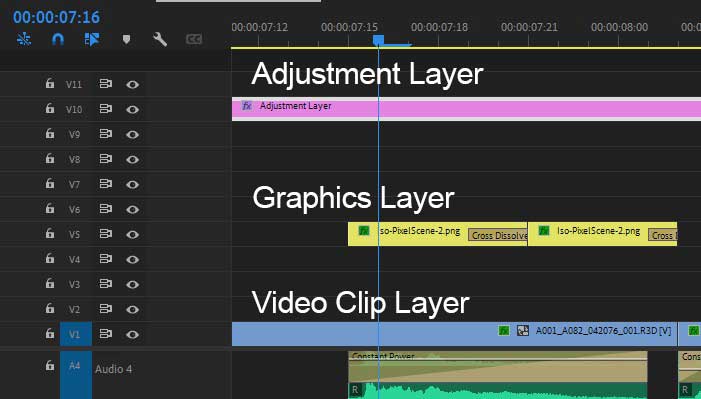
The beauty of adjustment layers is that you can quickly add the same effect to multiple clips and/or layers in a matter of seconds, without needing to add the effects individually to each clip. Additionally, you can go back and make adjustments on the fly, again, without having to make adjustments to every clip . . . which would be crazy tedious. Think of an adjustment layer like a filter that each clip underneath it will pass through, inheriting those effects. Clips above the adjustment layer won’t be affected.
In my work, I use adjustment layers mostly in collaboration with color correction or color grading. Essentially, I can nail down the correct color correction and grading for an entire scene and apply it generously. This is because I’ll want the color to be consistent and generally the same throughout that scene. If I do need to make individual adjustments, like let’s say one shot is a little under-exposed, I’ll make those changes to that clip specifically.
This also helps keep everything uniform and consistent. Before I started using adjustment layers, each clip would have the same effects applied. If I chose to make a change further down the road, I would have to reapply that change to every clip again. That’s a lot of Control+C > Control+V. Often, in all the rush, I’d forget to paste the new changes and wouldn’t catch it until export, when a single shot looks quite different from the rest. Adjustment layers allow you to make blanket changes.
Creating and Working with Adjustment Layers
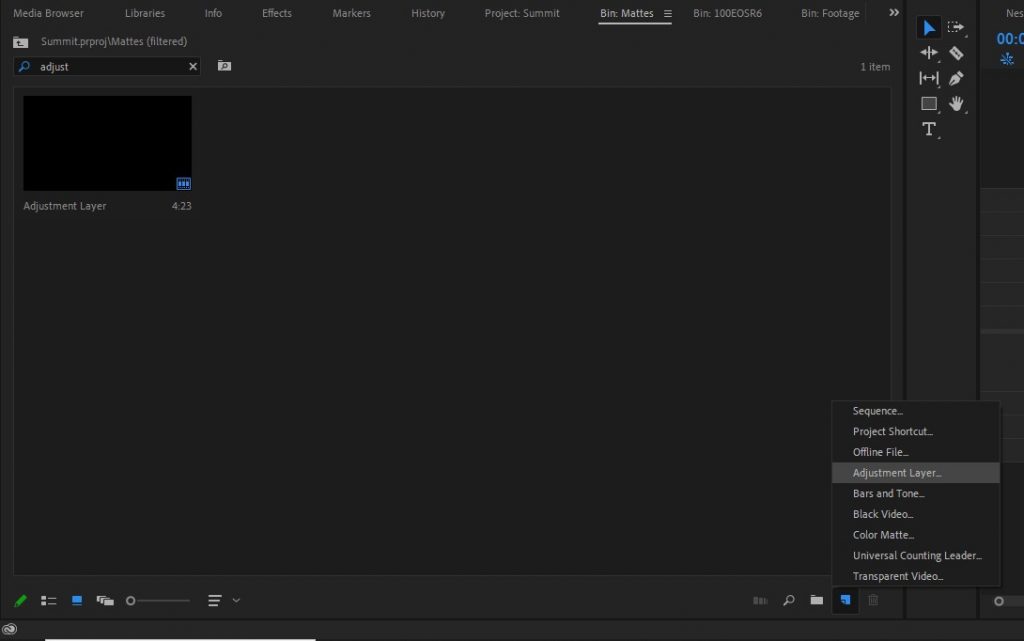
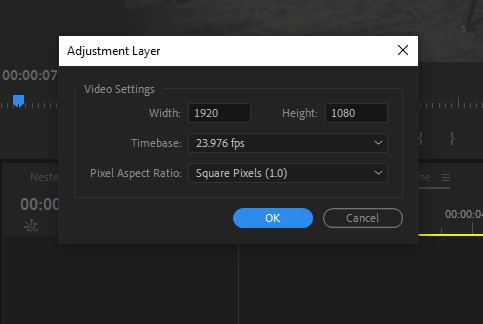
Creating adjustment layers is very simple. First go to the project’s media panel, typically on the bottom left-hand side — this is the location where your clips, music, and other media are stored. On the bottom right, you’ll see an icon that looks like a piece of paper with the corner folded (next to the new folder and trash bin icon). Click on where it says “Adjustment Layer”. You’ll then be prompted with a dialogue box with a few options, such as frame rate, pixel dimensions, and frame size. This should default to your current timeline specification, but feel free to adjust these as you see fit.
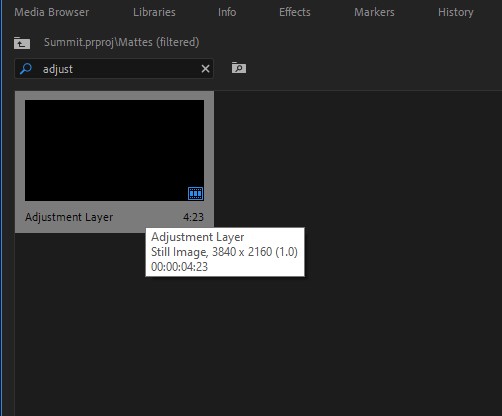
Once created, the adjustment layer should now be present within your project’s media pool. It will automatically be located in whatever folder you have open, but you can easily place it wherever you’d like to organize it. Personally, I like to keep these clips in a special folder so I don’t get them confused with other pieces of media.
If you double-click the adjustment layer, it will bring up the “effects” panel, similar to how a video clip would. Here you can add whatever effects you’d like. One caveat is that effects added here will be added globally wherever you place the adjustment layer. I like to keep my adjustment layers without effects until I place them where I want within my timeline. This also lets me place the same adjustment layer in multiple places but has unique effects on each one.
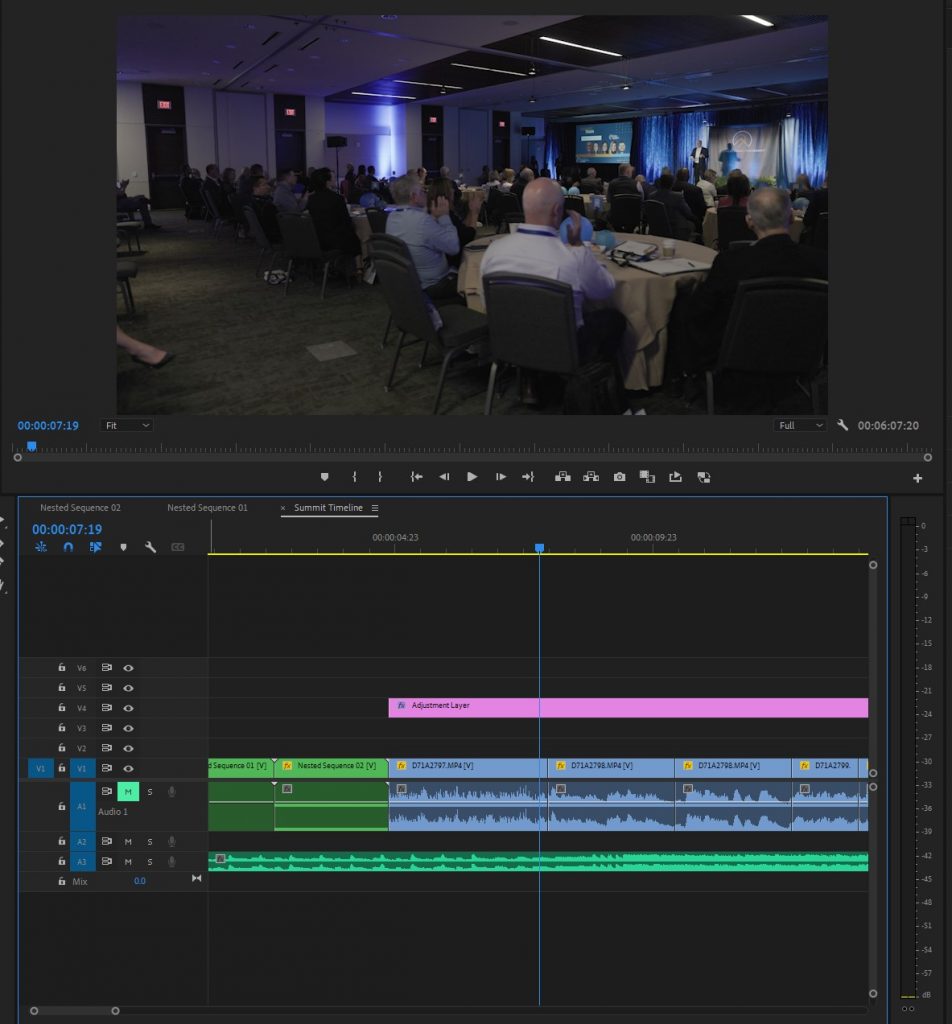
Drag the adjustment layer over to your timeline, and place it above the clip(s) you’d like to affect. Keep in mind that anything above the adjustment layer won’t be affected by it. Once it is lined up where you’d like it, feel free to start adding effects to the adjustment layer like you would a normal video clip.
Quick Tips
Adjustment layers also don’t have a specific length they’re required to be. You can extend or shorten these clips as long as you like. Down the line, if you’d like to add or remove a few video clips from your timeline, all you have to do is extend the adjustment layer to cover your new sequence.
If you’d like to audition an effect you placed on your adjustment layer, you don’t have to go into the effects panel to toggle it. You can simply toggle a track’s output within your timeline. Each layer has a little “eye” icon on the left side of the timeline. Toggling this off disables that entire layer.
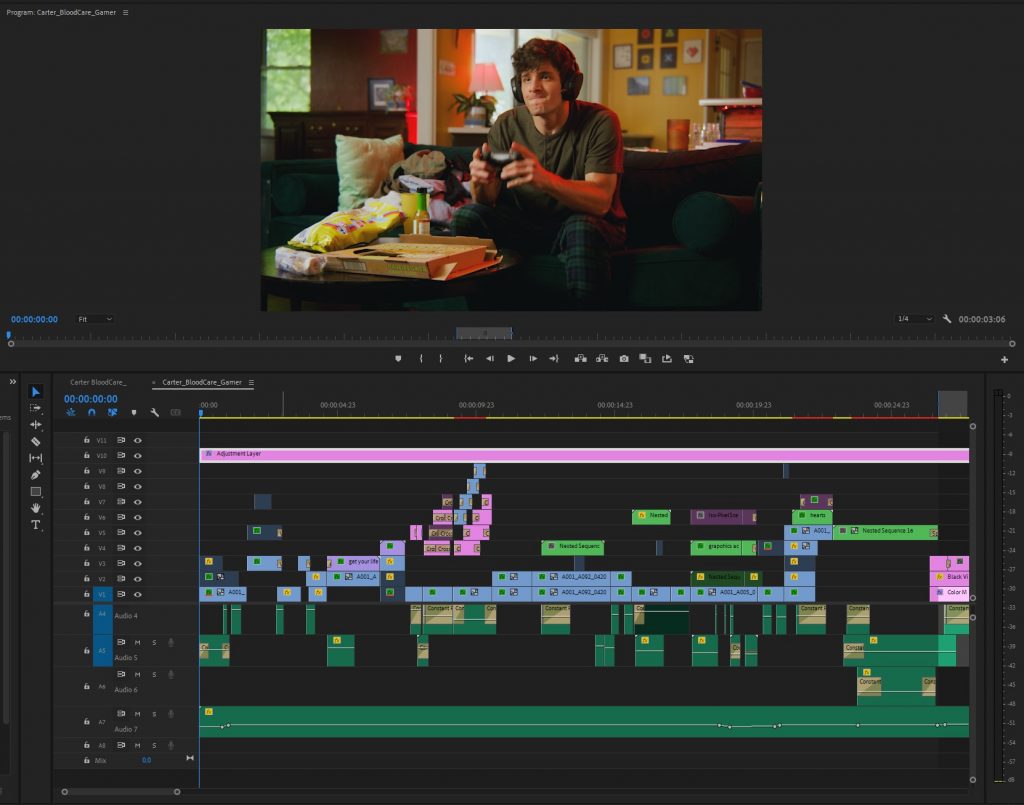
You can add as many effects to adjustment layers as you’d like, so don’t be afraid to go wild. Additionally, you can add as many adjustment layers together as you’d like, so having 4 or 5 adjustment layers over a clip is doable. If my experience, I do like to separate some effects into different layers to keep them better organized. A color correction may be its own layer, with color grade/effects being another layer, and special effects being its own layer.
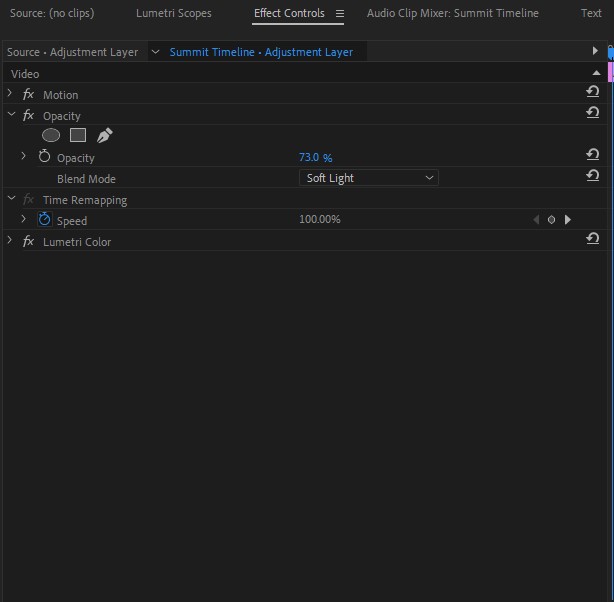
One special characteristic of adjustment layers is the blend and opacity characteristics. You can find this within the layer’s effects panel, under Opacity. This adds a lot more flexibility and control to how you can apply your effects to your clips.
Adjustment layers make editing and adding effects more efficient and more organized. Learning how to use them effectively is a great step in becoming a good editor.
Looking for filmmaking tips and tricks? Check out our YouTube channel for tutorials like this . . .