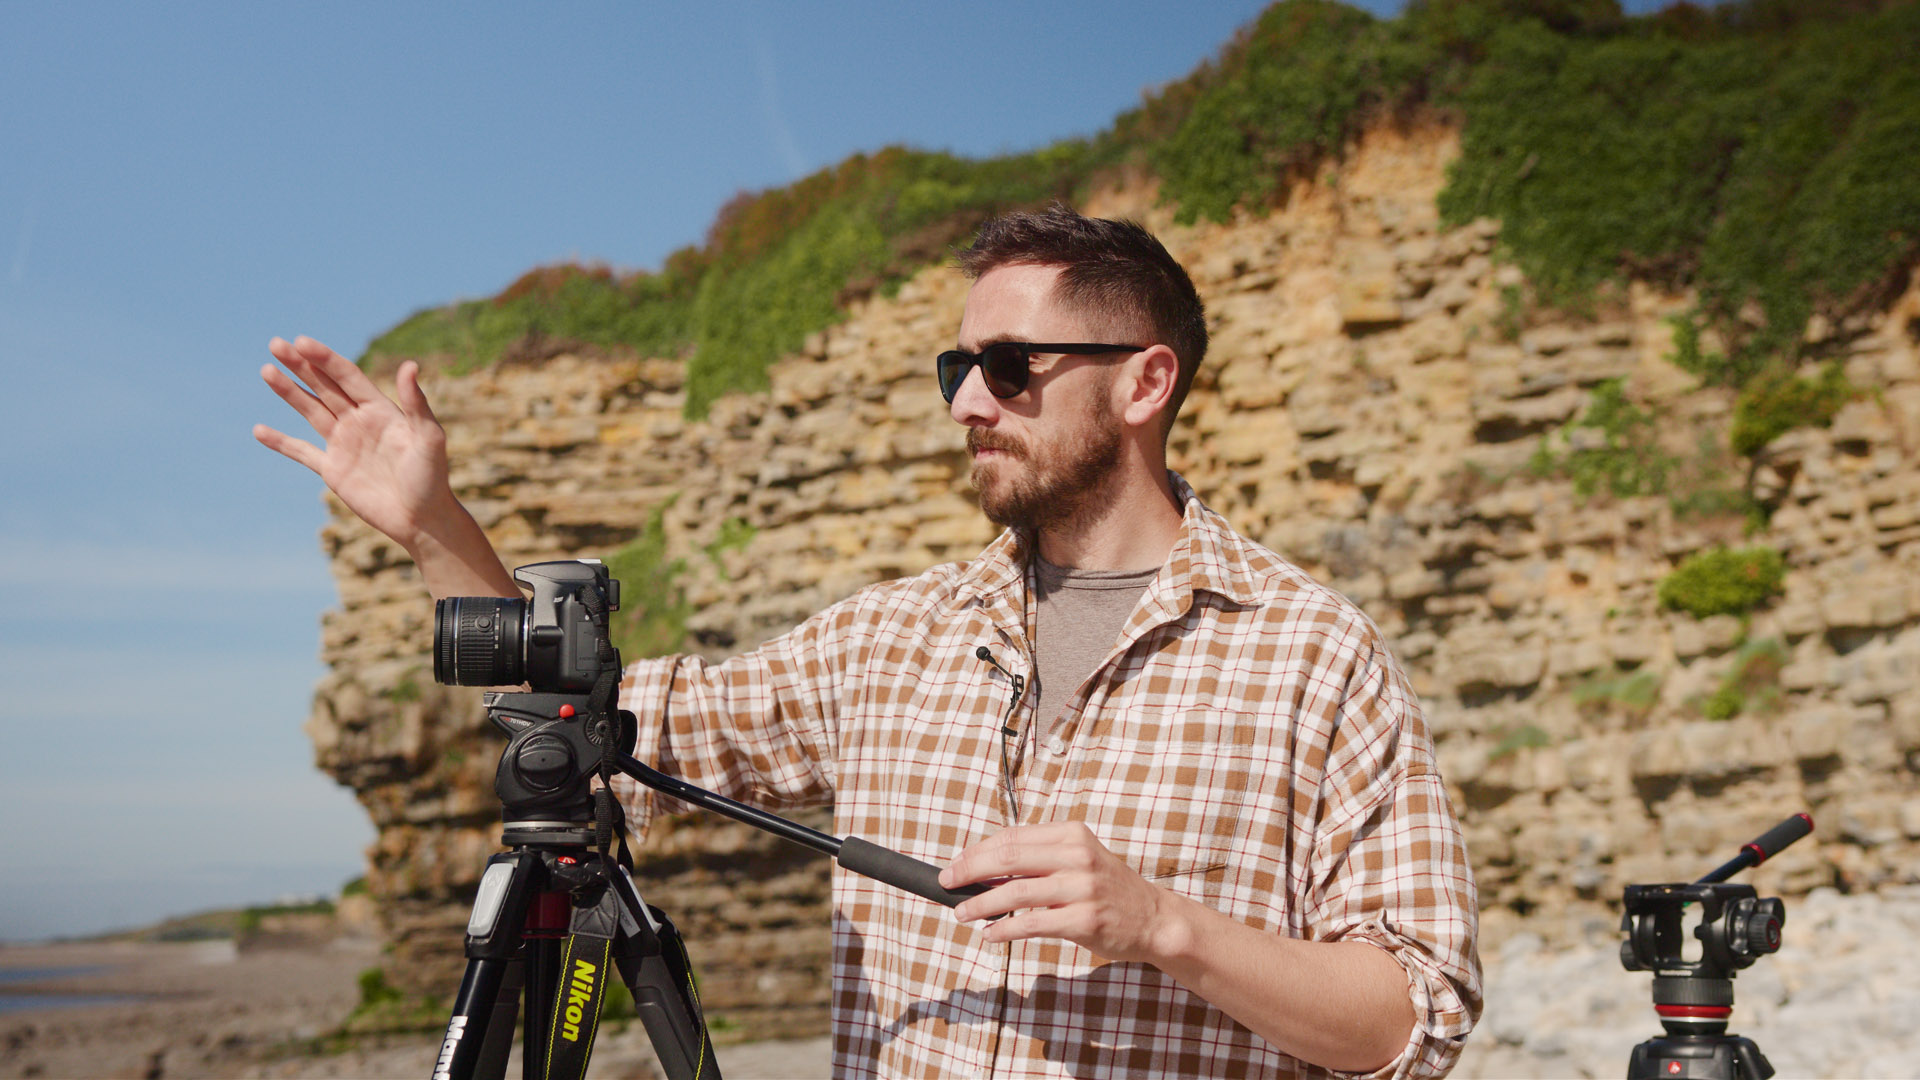
If you’ve ever had problems with your horizons while panning, here’s what causes it — and how to fix the problem.
Okay, hands up if you’ve ever set up your tripod, checked the bubble level to see if it’s centered, and found it is, only to start then panning the camera and discover the horizon goes wonky the further you pan left or right?
Raises hand
It’s a frustrating issue. And given the numerous Reddit topics discussing the same problem, it’s not rare. So, what causes this, and how can we prevent it? I delve into the reasons and solutions in the video and article below.
The Issue
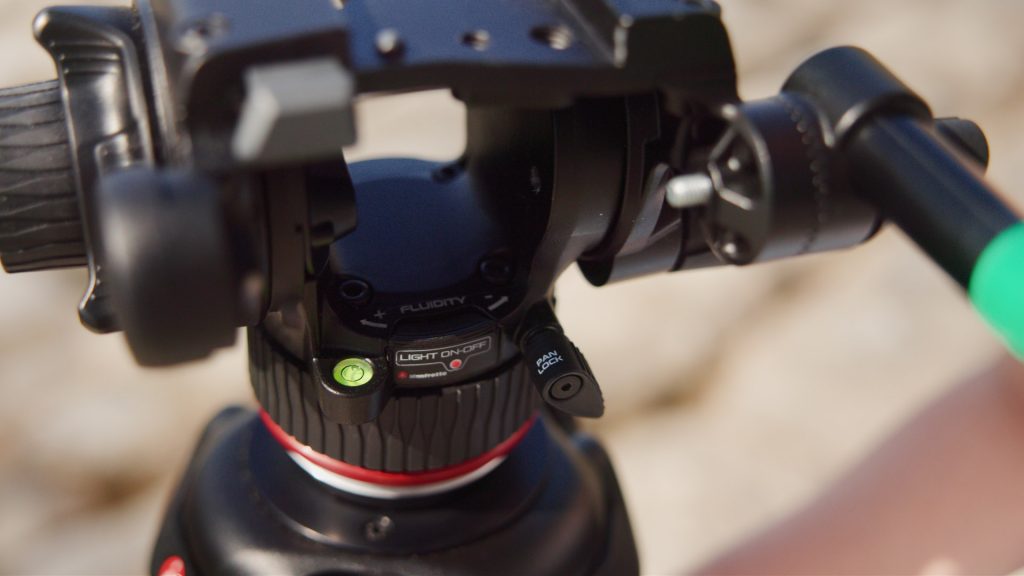
When this happens, it suggests that even though you’re diligently leveling the tripod, your tools might be deceiving you. The “U” shape indicates that either the bubble level on your tripod or the tripod head itself isn’t indeed level. When your tripod indicates its level, its head might still be slightly tilted forward or backward. As we can see in the image below, the tripod level is perfectly centered.
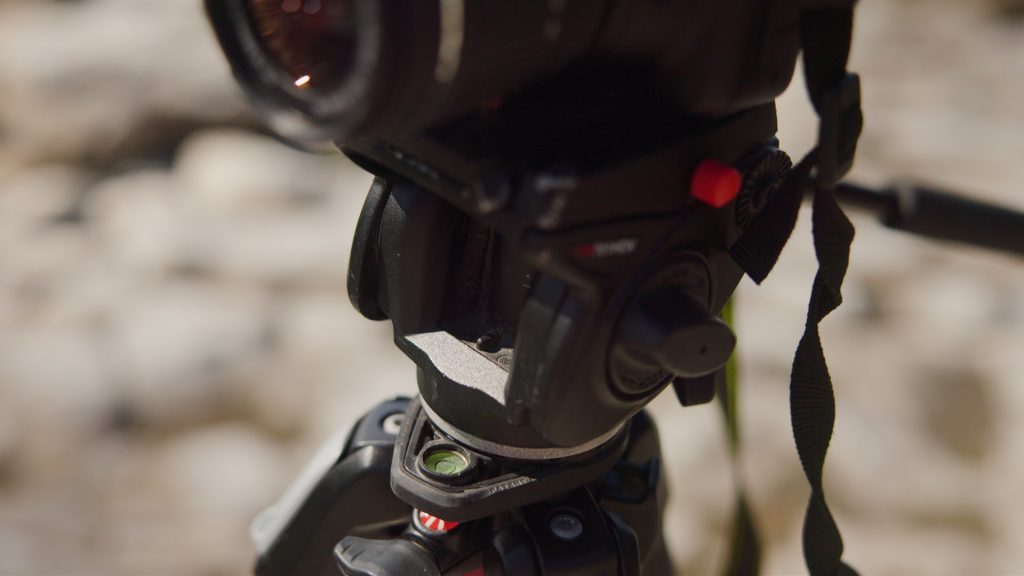
However, we can see from the profile view that the tripod head is slightly tilted back.
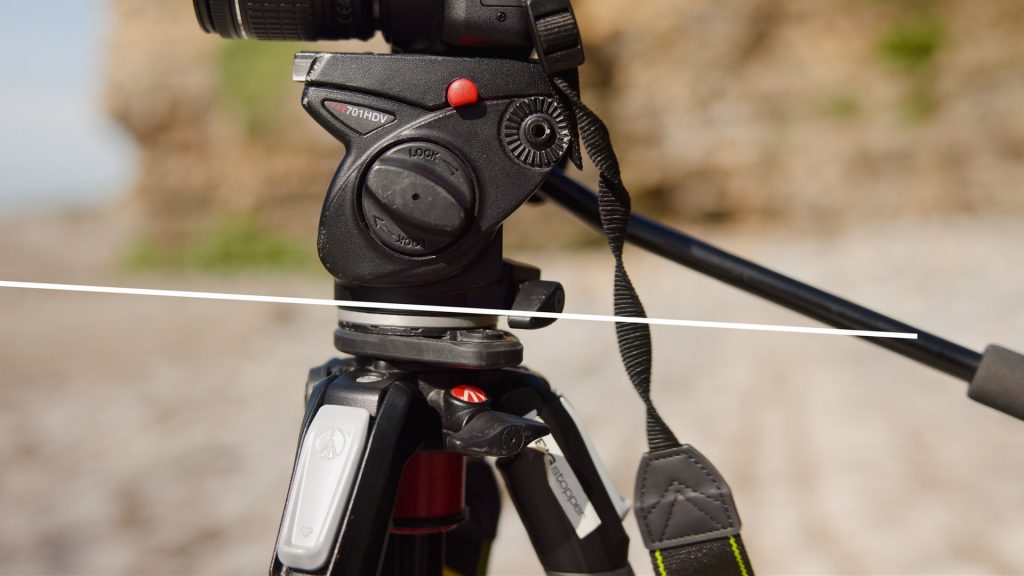
While the horizon remains flat in its starting point, with such misaligned properties, the moment we pan, we will start drifting off-course.
Now, you might wonder: if the bubble level shows that the tripod is level, how significant is a slight tilt? To demonstrate this without equipment, try tilting your head about 30° forward or backward. When you turn your head sideways, you’ll notice your eyeline moves in a U-shape rather than remaining straight.
Two main factors affect this: the tripod’s legs and the tilt of its head. Most of the time, it’s the legs.
A Deeper Look at Tripod Leg Extension
The legs of a tripod are crucial for camera stability. Even a slight difference in the lengths of the legs can introduce an undetectable tilt.
Factors affecting tripod leg extension include the following:
- Ground Surface: An uneven ground surface can skew the horizon, even if each tripod leg is equally extended.
- Tripod Leg Locks: Wear and tear can make these locks less efficient over time, causing slight slips in the legs.
- Measurement Errors: Human error or misinterpretations can result in minor differences in leg lengths.
- Bubble Level: More often than not, it’s simply that the bubble level is not that accurate.
Solutions
From a mechanical standpoint, there are solutions:
- Level Plate: An added level plate between the tripod and the head is an affordable fix.
- Ball Head: A tripod ball head is a pivoting mount that allows photographers and videographers to swiftly and precisely position their cameras at almost any angle
A ball head will sit independently of the tripod’s legs, allowing for precise refinement of the camera’s horizontal axis without adjustment of the camera legs.
Reducing the potential for error is critical. Investing in an accurate leveling tool can improve precision, repeatability, and setup speed. Some photographers further refine their setup using both a leveling base and panning base, rendering ball heads unnecessary unless there are particular artistic requirements.
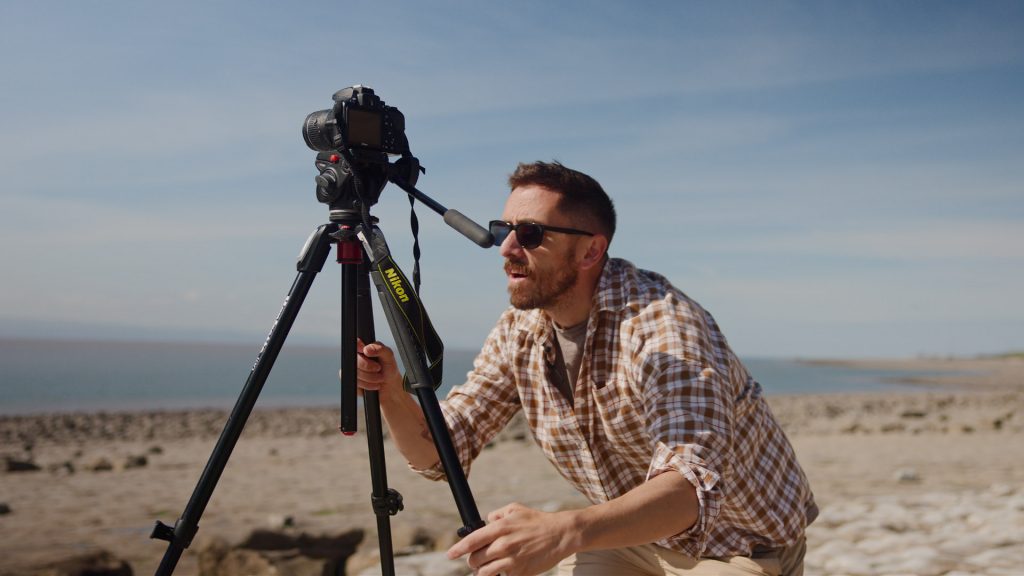
And without the mechanical solutions? Simply level the tripod head by eye. Many photographers rely on their tripod or camera’s bubble level, but an independent spirit level offers another verification point, as we’re ultimately concerned with the camera’s level, not just the tripod’s. As demonstrated in the video tutorial, a technique I find instrumental is to crouch down and level your eyeline with the horizon. Then, adjust the tripod so the tripod head sits flush with the horizon.
The bubble level will likely say the tripod is no longer level, but as you can see from the video footage, the results show that is not the case.
How to Level Footage in an NLE
Okay, so if you’ve clicked this video hoping to learn how to level the horizon on existing wonky footage. That’s okay; we can still help.
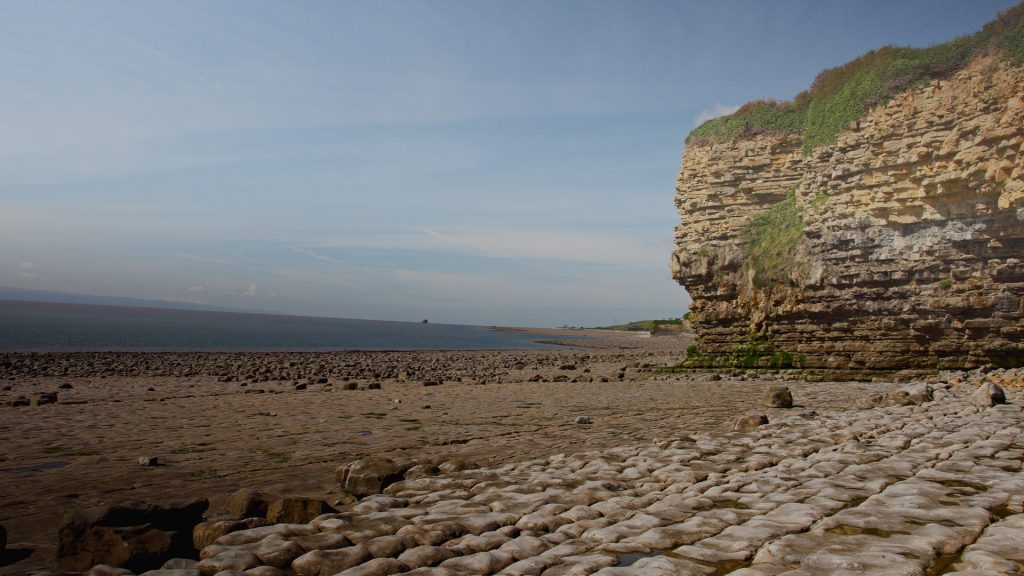
I have this shot. It’s a captivating shot of Normandy Beach in France. However, as we pan right, the horizon begins to lift noticeably.
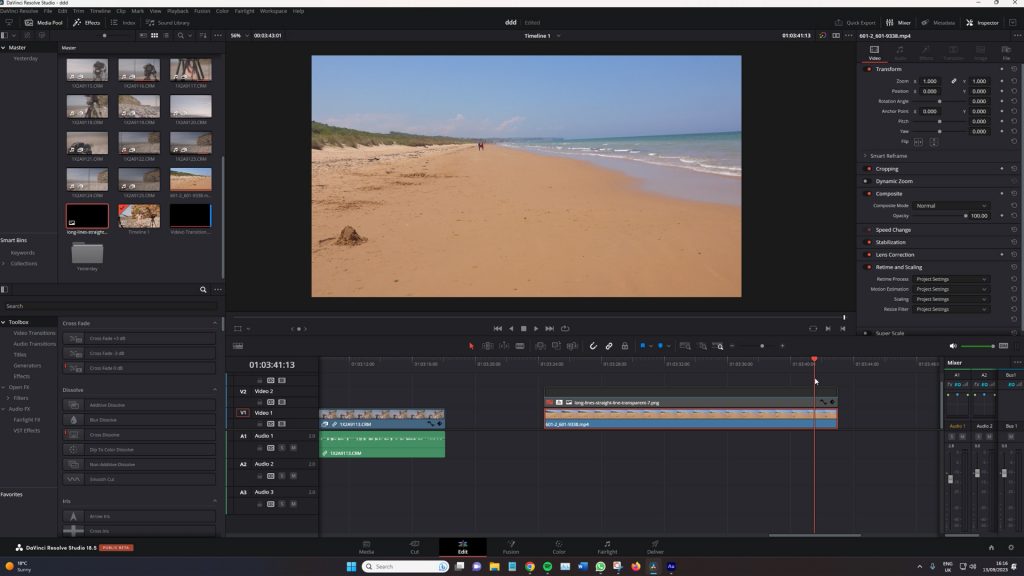
I believe that this distortion stems from the tripod’s setup. The front leg is tilted slightly downward, and the camera’s head has been tilted upward. This configuration leads to the U-shaped pan. Again, this is a common oversight. The camera operator probably checked the tripod’s level at its starting point, observed the bubble level indicating a balanced stance, and then proceeded to hit record. Yet, the horizon’s linear nature makes any discrepancies starkly evident when you begin to pan.
There are two methods to address this. The straightforward approach is to adjust it by sight, but let’s run through the step-by-step process.
- Source a Reference Line:
- Search for a straight-line image on Google or create one in Photoshop.
- Import this line into your video editing software and overlay it on your video.
- Identify the Water’s Edge:
- Use the straight line as a reference to clearly determine where the water’s edge or the horizon begins.
- Review the Current Horizon:
- Play the clip to identify areas where the horizon deviates from the straight line.
- Adjust Rotation:
- Pause at the beginning of the video clip.
- Navigate to the “rotation angle settings” within the inspector or its equivalent in your editing software.
- Add a keyframe option for rotation at the start.
- Align with the Reference Line:
- As you advance through the clip, adjust the rotation so that the horizon remains in line with your reference line.
- This adjustment will ensure that as the camera pans, the horizon remains perfectly straight.
- Zoom to Hide Adjustments:
- Due to the rotation adjustments, some areas beneath the video may become visible.
- To hide these areas, zoom into the video just enough so they are no longer visible.
- Note: This may cause the white line to be slightly off-center, but the horizon alignment will be accurate.
- Final Steps:
- Once you’ve made the necessary adjustments, remove the white reference line from the overlay.
- Play back the video to ensure a smooth pan with a straight horizon.
- This adjustment is mainly based on a rotation keyframe, so ensure it’s saved properly.
Conclusion
Okay, let’s run over our discussion.
The tripod head must also be level if you rely on the tripod leg’s bubble level. But, often, this isn’t achieved. Any compensation, like tilting the camera to ensure the horizon appears level, inadvertently causes a skewed horizontal pan. One could use a ball head to independently level the camera to counteract this. Conversely, dismiss the bubble levels entirely and align the tripod head directly with the horizon. If natural straight edges are elusive, consider getting a hot shoe attachment or even employing your iPhone for leveling. Beware, though: if you solely rely on the built-in leveling system of the tripod’s legs, this issue will likely recur.
Looking for filmmaking tips and tricks? Check out our YouTube channel for tutorials like this . . .


