In this article, we’ll take a look at how to use Photoshop’s Generative AI to extend vertical videos.
Another week, another AI trend—but this one is fun! Take a look . . .
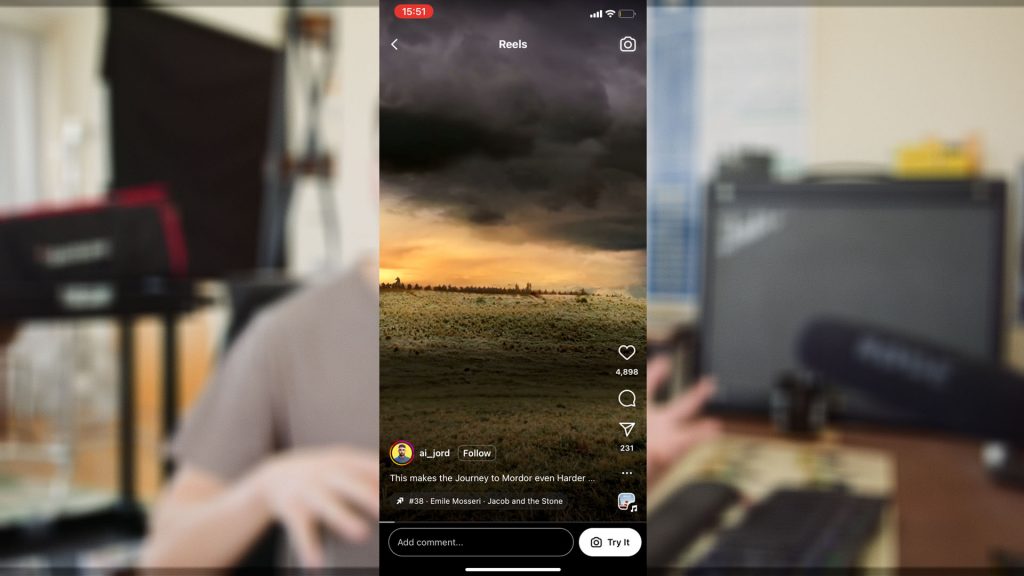
In this article, we will delve into a new social media trend that involves taking a 16×9 film in its original widescreen horizontal format and fitting it into a 9×16 vertical social media composition.
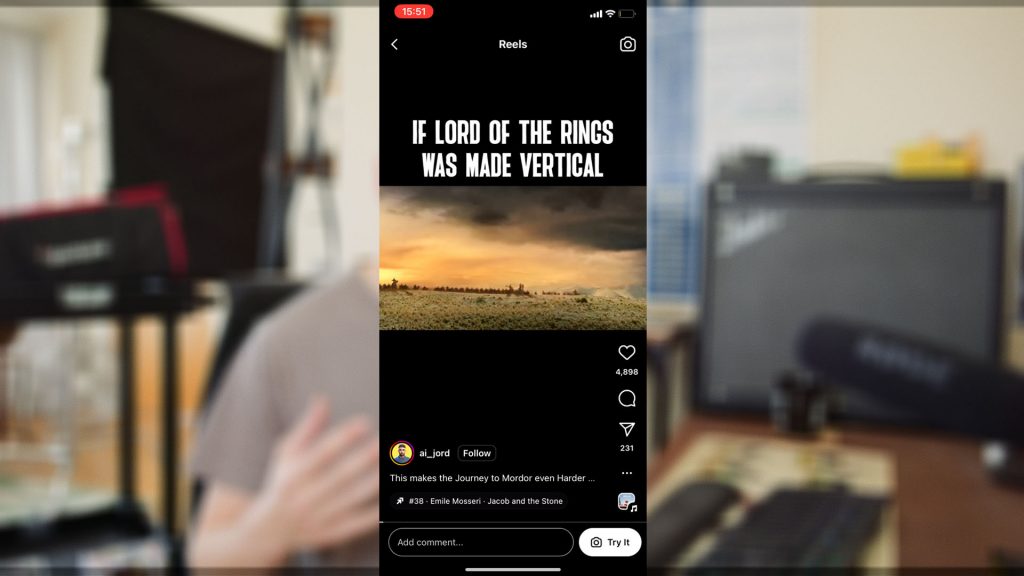
But, instead of resizing the video to fill the entire frame, users leave the bottom and top areas blank and then use Photoshop’s generative AI to fill these areas.
Is it something I’m fond of? Well, it’s harmless fun. It’s not what the cinematographer intended, but then again, filmmakers probably didn’t intend to have their films viewed on a smartphone screen. So, I’m not going to launch an anti-AI tirade. Instead, we’ll jump into DaVinci Resolve and walk you through the process.
The Setup
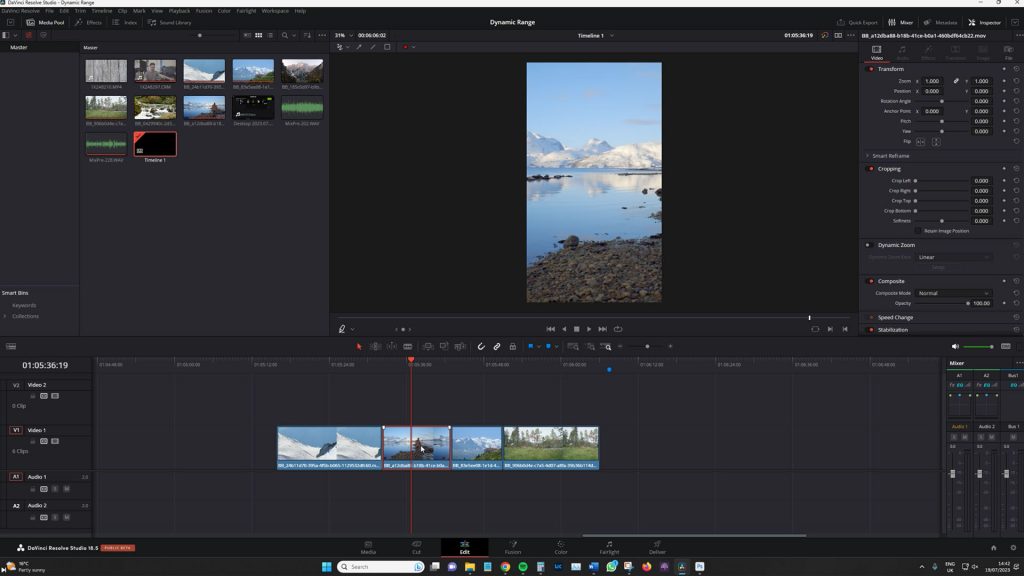
So, here we are in DaVinci Resolve. It doesn’t have to be DaVinci Resolve; it can be Premiere Pro or Final Cut Pro. The NLE you use doesn’t actually matter. You’ll want to import all your video clips, and, to clarify, we’re not working with clips from a feature film. These are just some fantastic clips from the Videvo library that I’ve chosen for their similarity to the Lord of the Rings aesthetic, which was the example displayed in the video.

When selecting your video clips to enhance the vertically generated properties, there are two things you need to keep in mind:
- The clip must be static, meaning there’s no camera movement — no tracking, panning, tilting, or handheld motions. It needs to be locked off completely.
- While you can have movement within the frame (like a subject moving from the lower third to the upper third of the composition), you don’t want any movement that goes out of the frame. This is because the generative fill won’t be able to create a convincing water effect, for instance.
Once you’ve chosen your clips, you’ll want to grab a screenshot of each piece of media you’re working with. In DaVinci Resolve, you can grab the still and export it, while in Premiere, there’s a little camera icon you can click to grab a screenshot. Another simple solution is to fullscreen the video and press Print Screen.
Generative Fill in Photoshop Beta
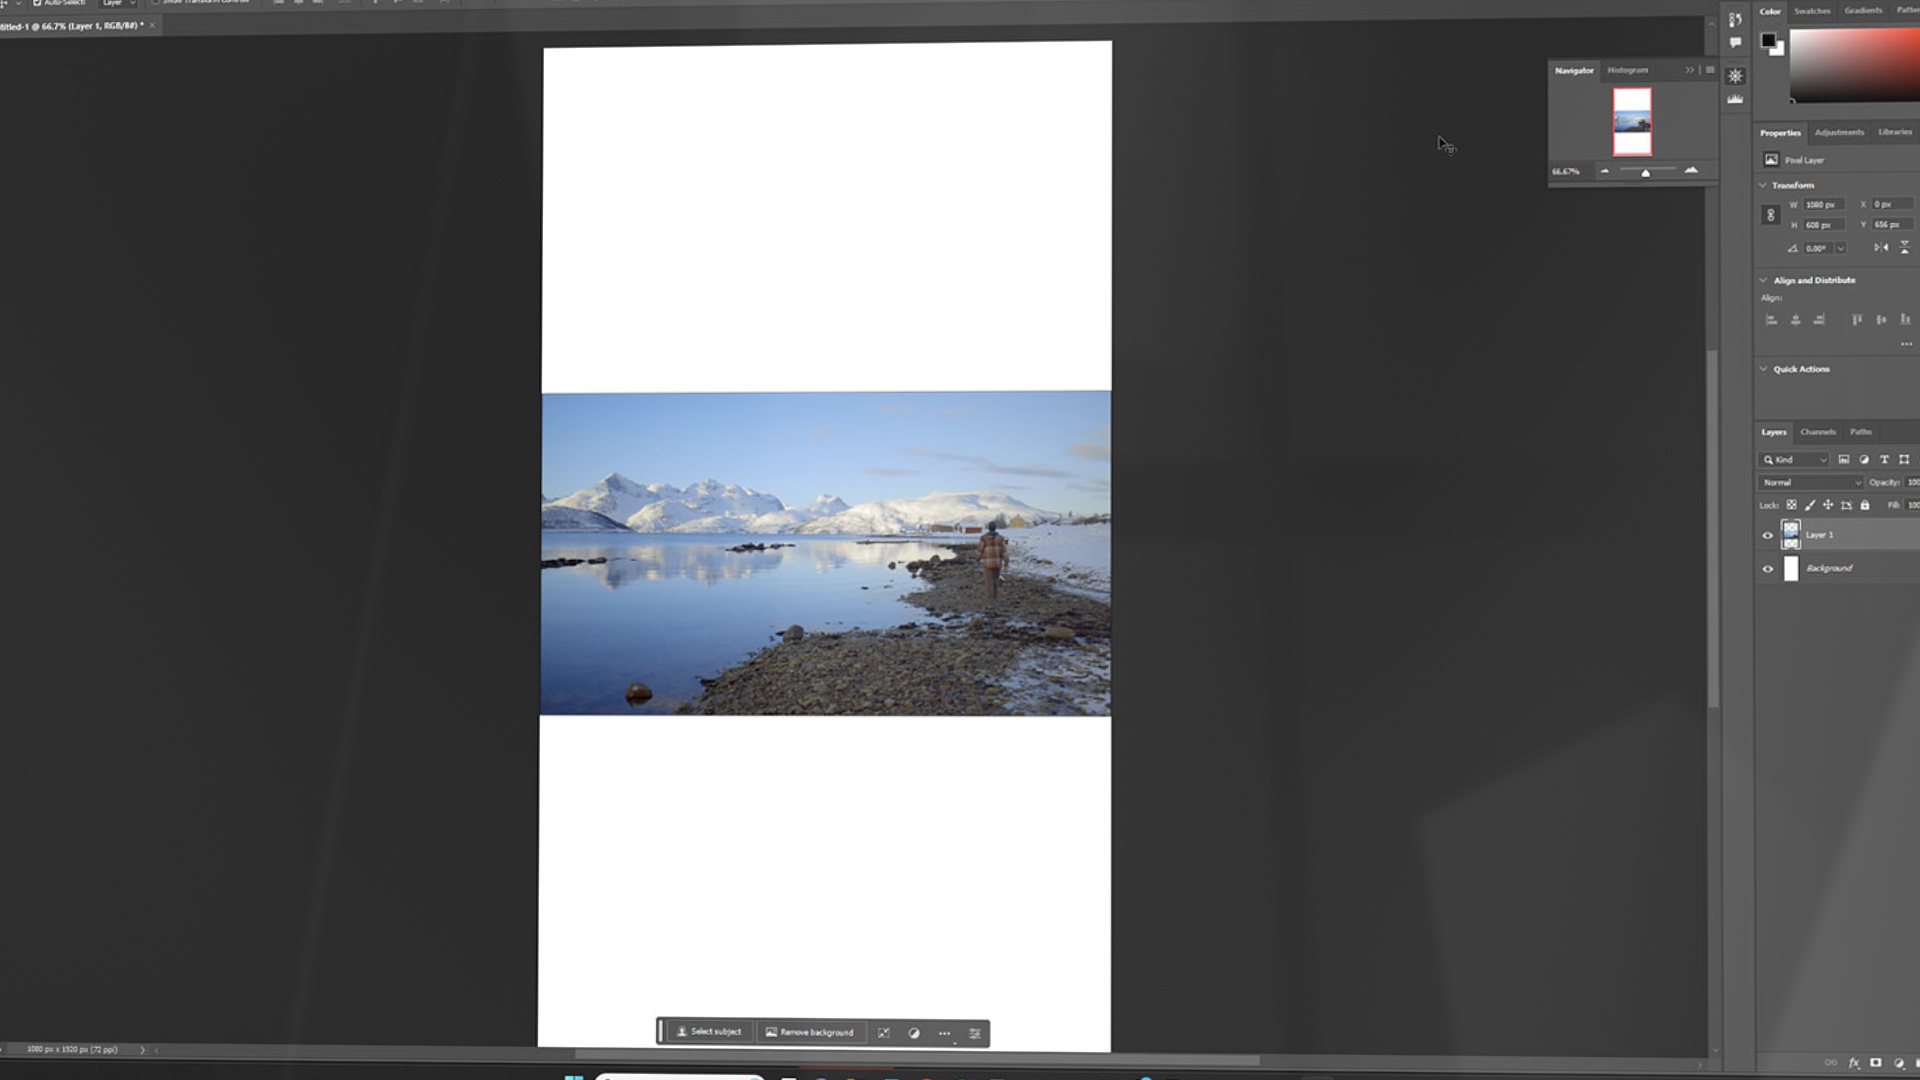
Next, we’ll move over to Photoshop Beta. Create a new file with 1080 by 1920 resolution to make a 9×16 vertical composition and paste your screenshot. When you resize the image (Control + T for Transform), make sure to grab it from the midpoint anchor. This allows the image to stay in the center of the frame as you decrease its size.
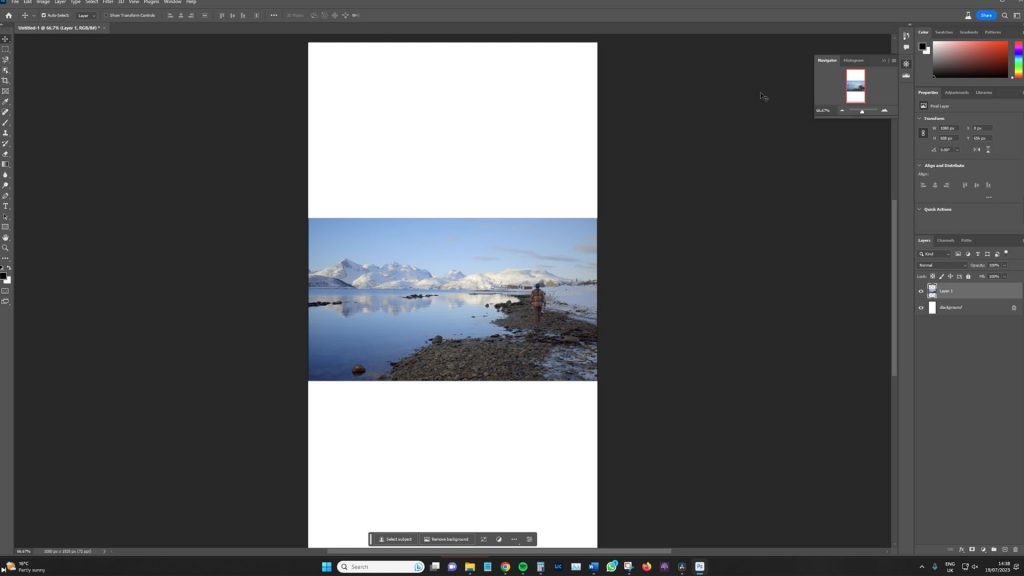
Once that’s done, grab the Marquee tool (shortcut M on the keyboard), create a selection while slightly overlapping the image, and select “Generative Fill.” You might have to run through the prompts a few times to get the right generated image, but it offers a wide range of possibilities.
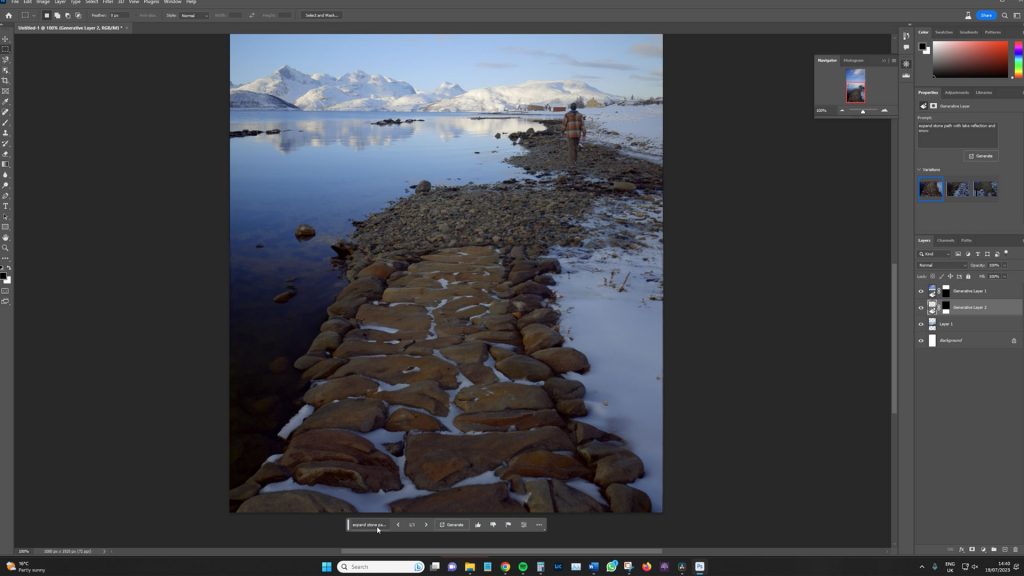
As seen in the video, I was lucky with the prompts, as they looked great right off the bat. You should follow the step above once more for the bottom segment.
When you have two generated fill segments, you will want to disable the original video screenshot and also disable the background layer, leaving the transparent background.
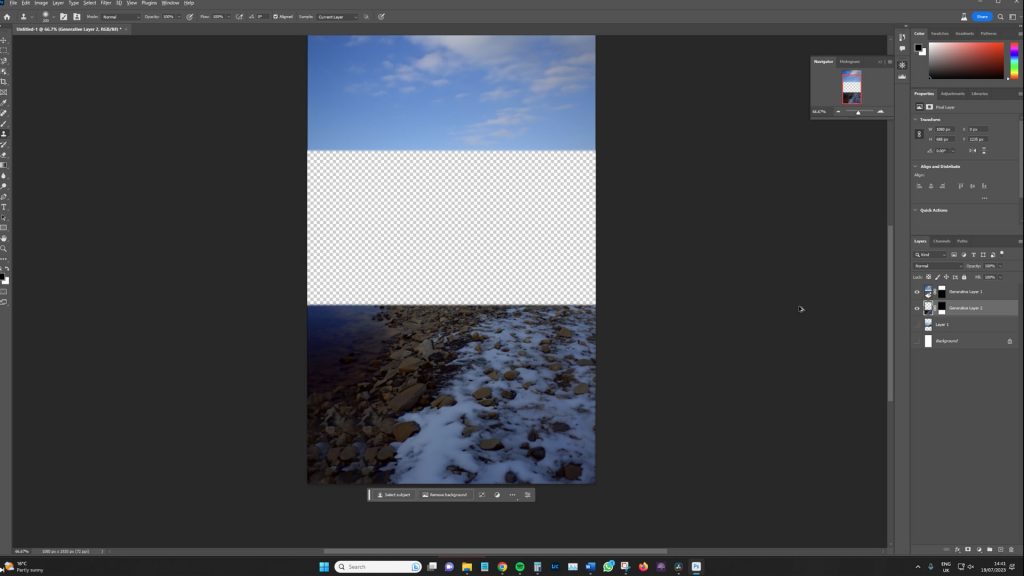
Then, save your finished product as a PNG and return to DaVinci Resolve.
Finishing up in DaVinci Resolve
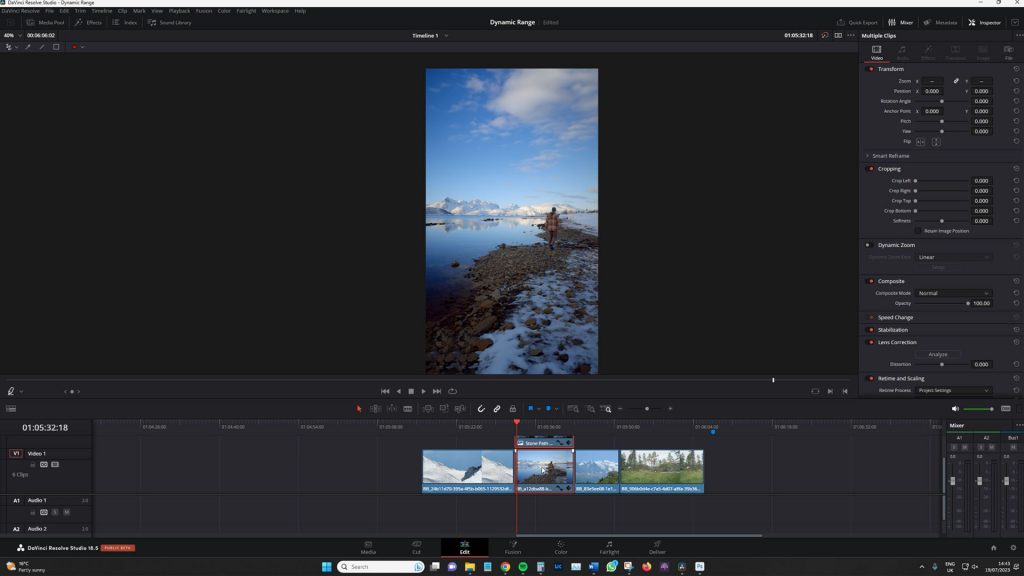
In Resolve, you can now change your timeline to 9:16. Change your timeline resolution by going to “Timeline,” unticking “Project Settings,” and ticking “Vertical Resolution.” By default, this crops your 16:9 footage, so you’ll need to zoom out until it fully fits the frame.
Then bring your PNG in, and expand it across the entire clip’s length, and voila! Your video is now ready for social media!
While there might be some minor issues with blurriness, these won’t be noticeable once the video is compressed for social media. If you want to add a finishing touch, combine your layers into a compound clip, go into the color page, and add grain to help blend the composites.
So, there you have it! Now it’s up to you to decide which film you will use this technique on. Remember, the camera must be static, and there should be no flow of motion in and out of the top of the composition. Photoshop Beta will be your best friend in this process, and we’d love to see your results! If you use this tutorial to create your work, tag us on social media!
Looking for filmmaking tips and tricks? Check out our YouTube channel for tutorials like this . . .


