There are multiple ways to affect highlights in DaVinci Resolve. Here’s how each one works.
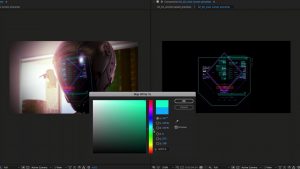
On DaVinci Resolve’s Color page, there are many tools and parameters that one can use to adjust and grade their image correctly. Some tools, like the color temperature adjustment, do one thing and one thing only. However, other tools can become confusing as they seemingly do the same thing.
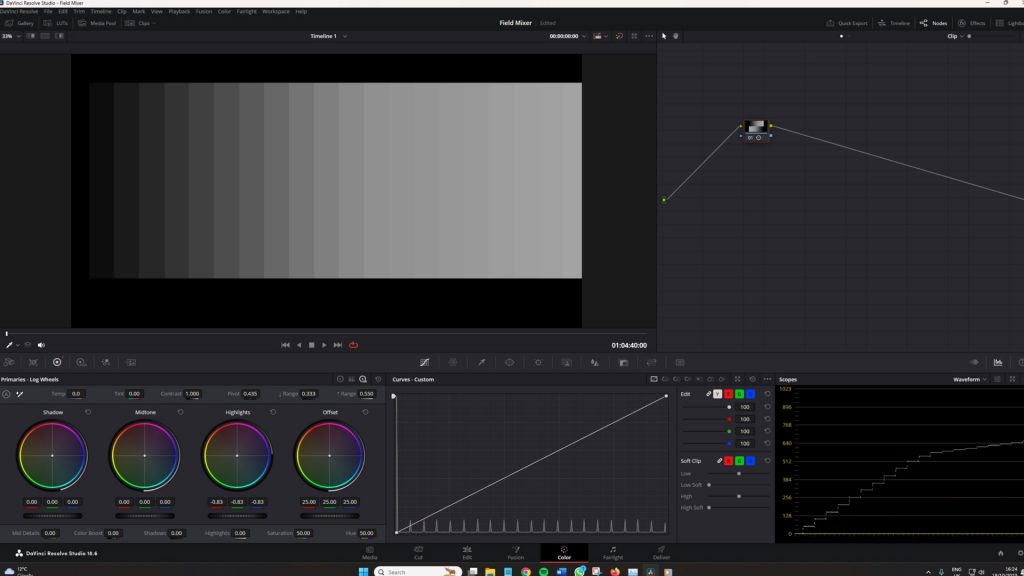
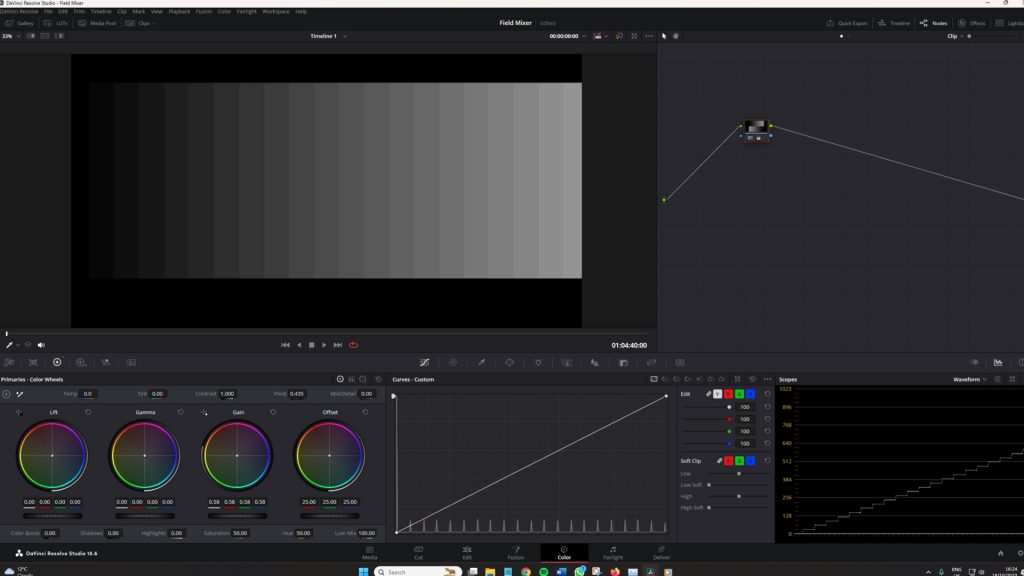
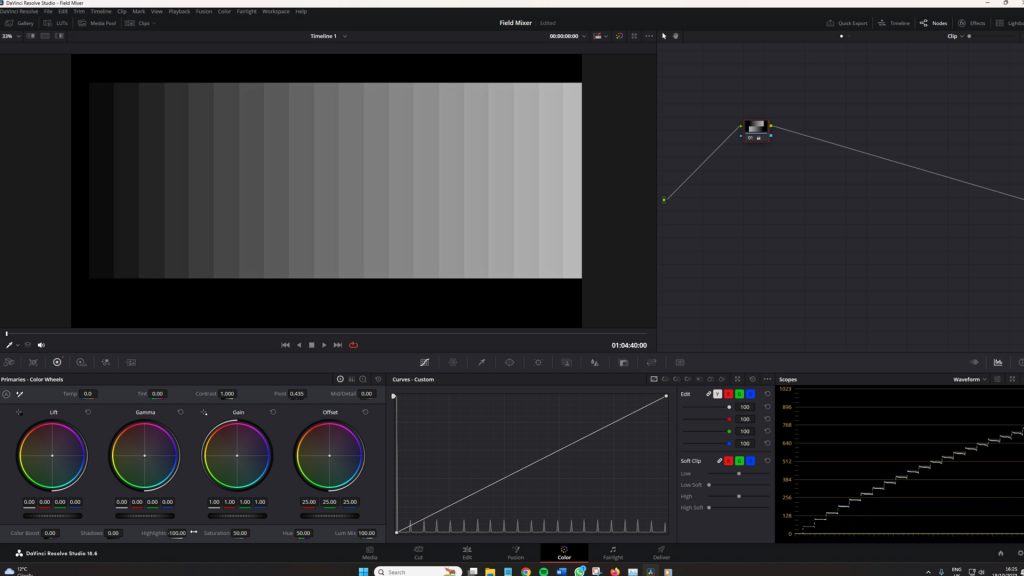
For example, today’s video focuses on not one but four ways to adjust the brighter parts of the image within the Primaries panel. We have the Gain adjustment on the Primary Wheels panel, another on the Primary Bars, a highlights control in the Log panel, and a highlights slider on the bottom of all panels. As the bars and the color wheels work similarly, we will focus on the color wheels, the log wheels, and the highlight slider.
The Test Subject
So, let’s look at this in action.
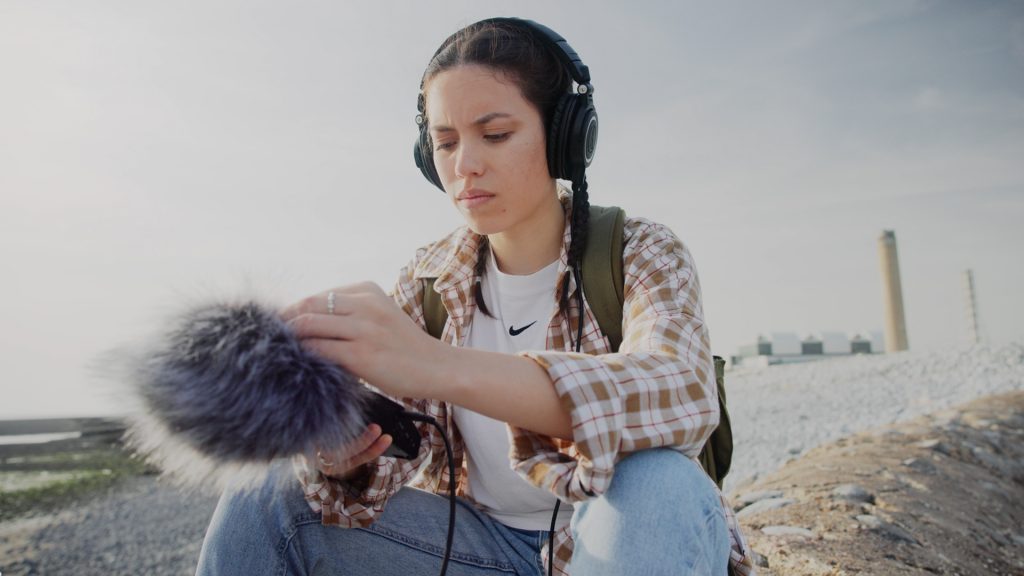
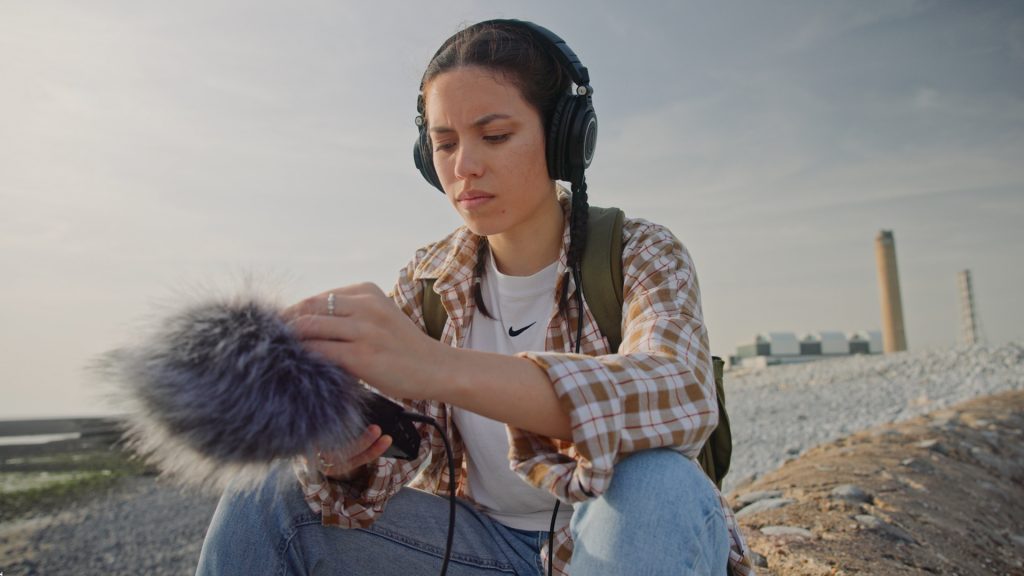
We have this shot of a woman holding a handheld recorder.
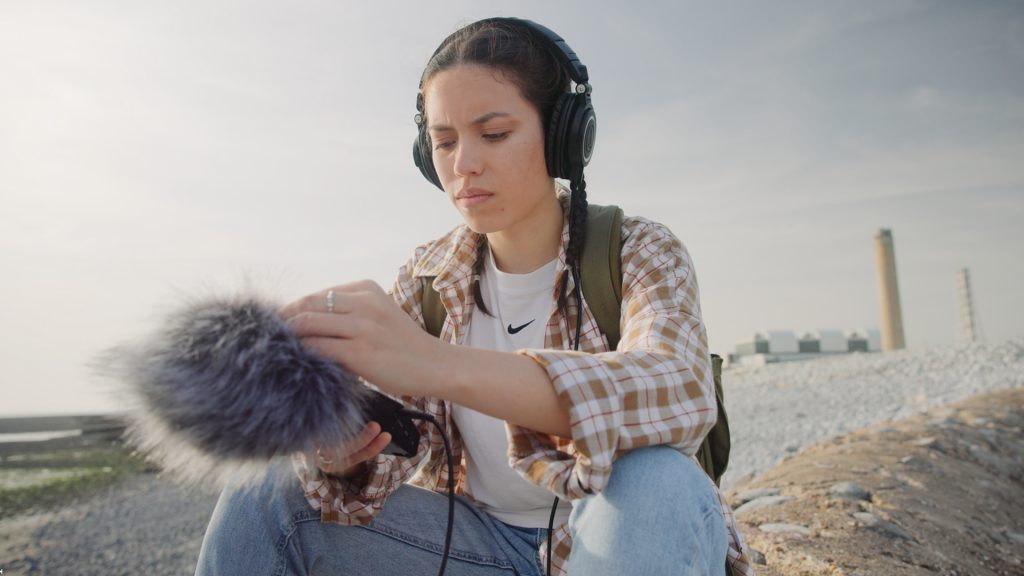
The image is nice, but that left corner is slightly too bright. So, let’s look at lowering the brightness values across these three methods.
The gain wheel adjustment.
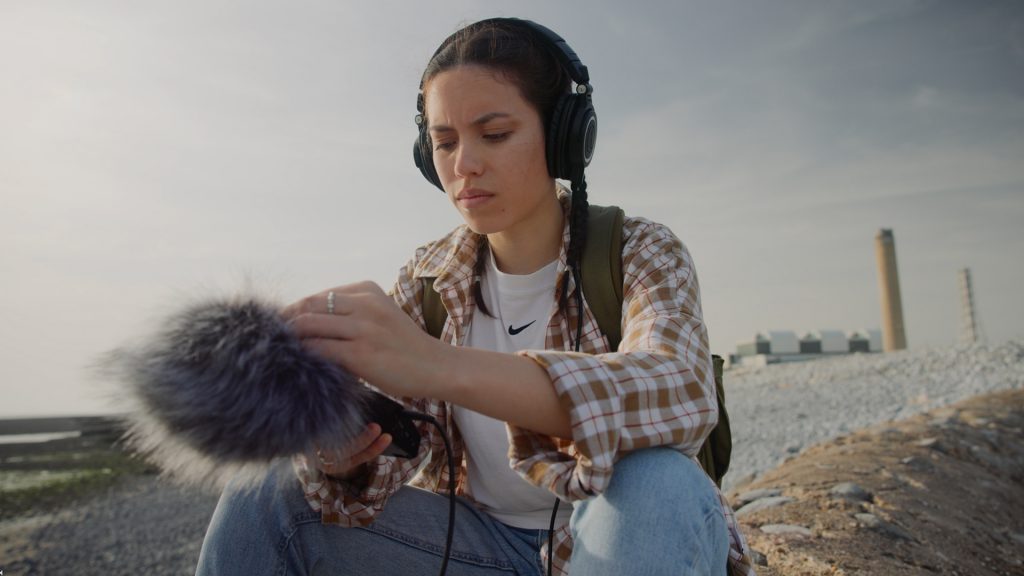
The log highlights wheel adjustment.
The highlight slider adjustment.
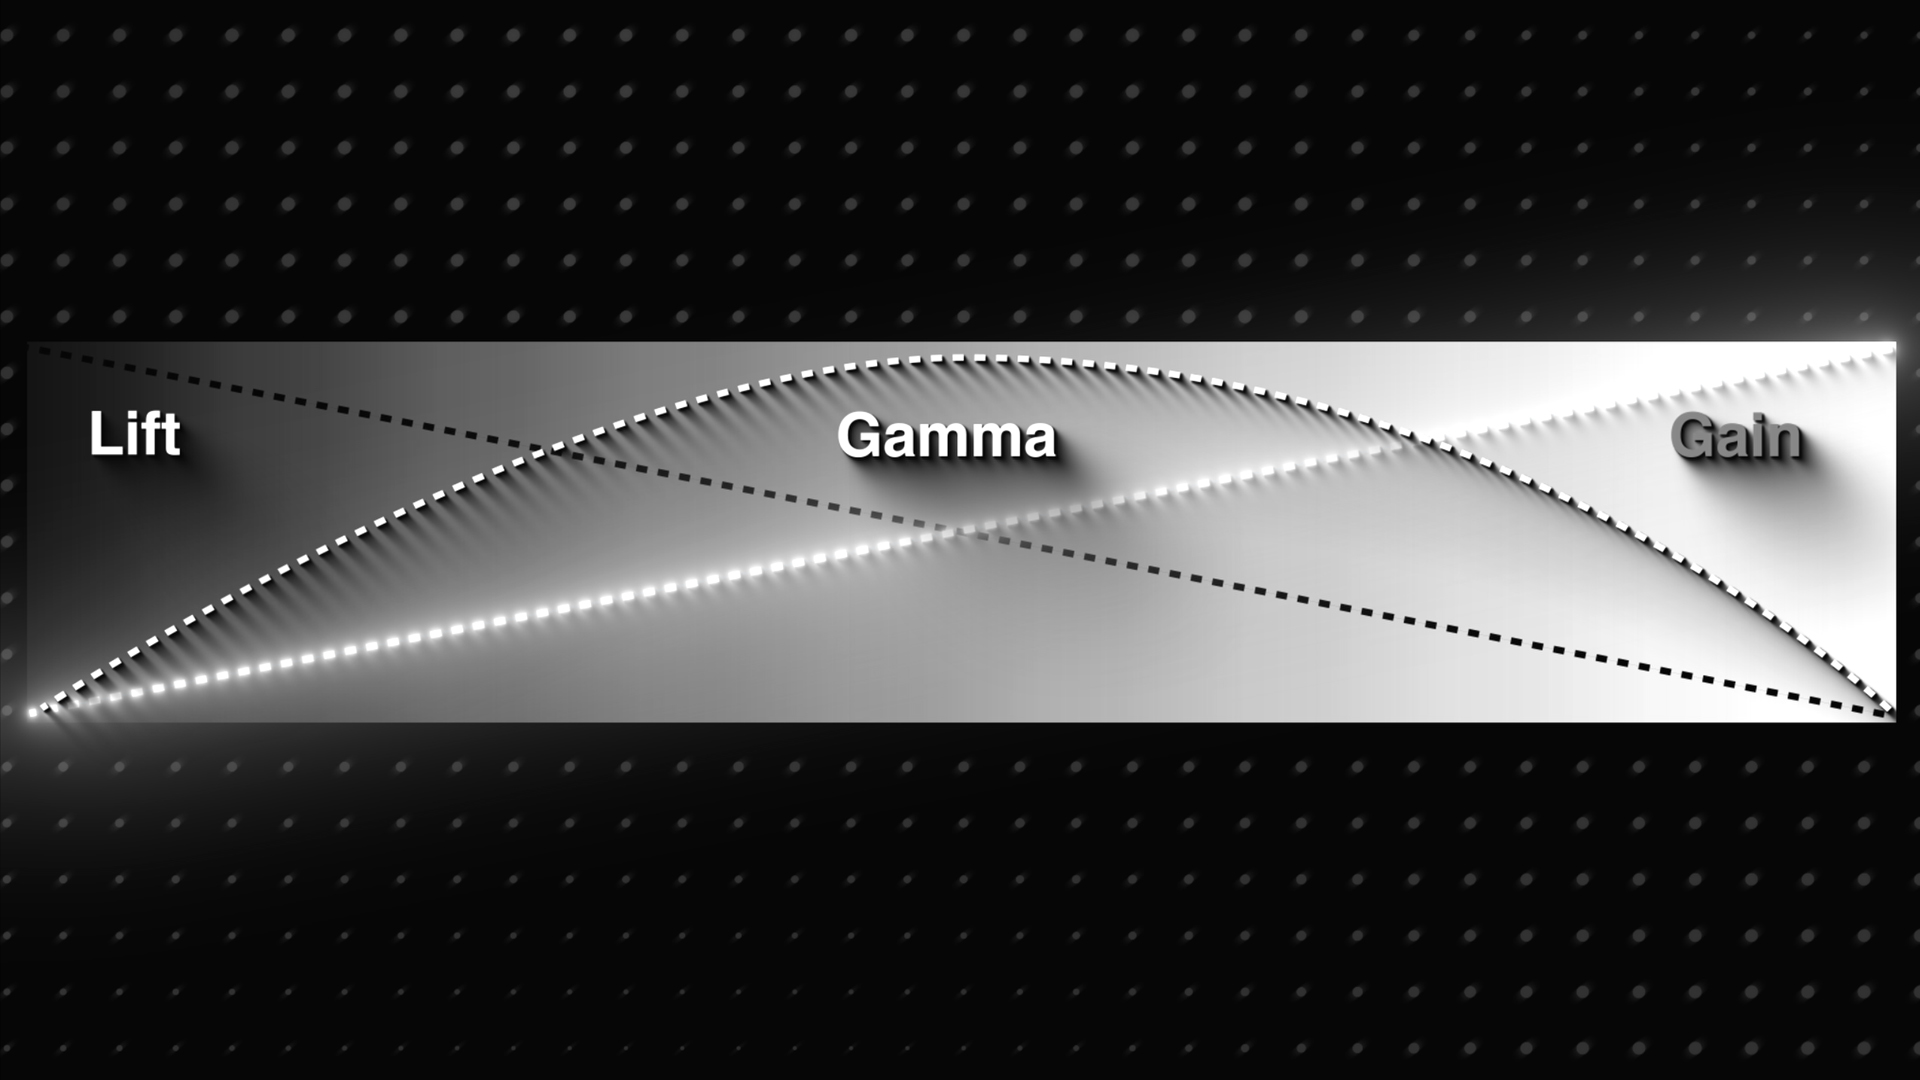
So, as we can see, the three methods all lower the brighter values of the image, but they do so in different ways. First, let’s look at the color wheels vs. the log wheels and see how these differ from one another. I’ll also bring up this graph to see exactly how the wheels work.
Gain vs. Highlights
With the gain, it primarily controls the overall brightness or luminance of the entire image. And as we can see in the graph below, when you reduce the gain, it’s not just the brighter areas we are adjusting; we are also globally darkening or brightening the entire image as the gain curve runs right the way through the tonal map—but the adjustments come from the brighter regions of the image.

If we go back to the image (see the video), you can see we can actually make the image completely black by lowering the gain. Therefore, If you have something too bright, this can fix it, but it does affect the overall exposure of your video, making it brighter or darker as needed.
Now, if we look at the graph for the log color wheels, the highlights control does not intersect nearly as much.
When you reduce the Highlight wheel in the Log tab, you specifically target and adjust the highlights of the brightest parts of your image. And usually, this adjustment is often used for fine-tuning the highlights without significantly affecting the midtones and shadows. It allows you to retain more detail in the brightest parts of your image. As we make a large adjustment with the log wheel, you can see it zaps all highlight information out of the image and the scopes.
The key difference lies in the scope of the adjustment and the tonal ranges they will affect.
Highlight Slider
Well, what about the highlights slider? Because wasn’t that doing the same thing? Well, yes, but it’s also a mix of how the gain and highlight color wheels operate.
The manual says, “Makes it easy to selectively retrieve blown-out highlight detail in high-dynamic-range media by lowering this parameter, and achieves a smooth blend between the retrieved highlights and the unadjusted midtones for a naturalistic result.”
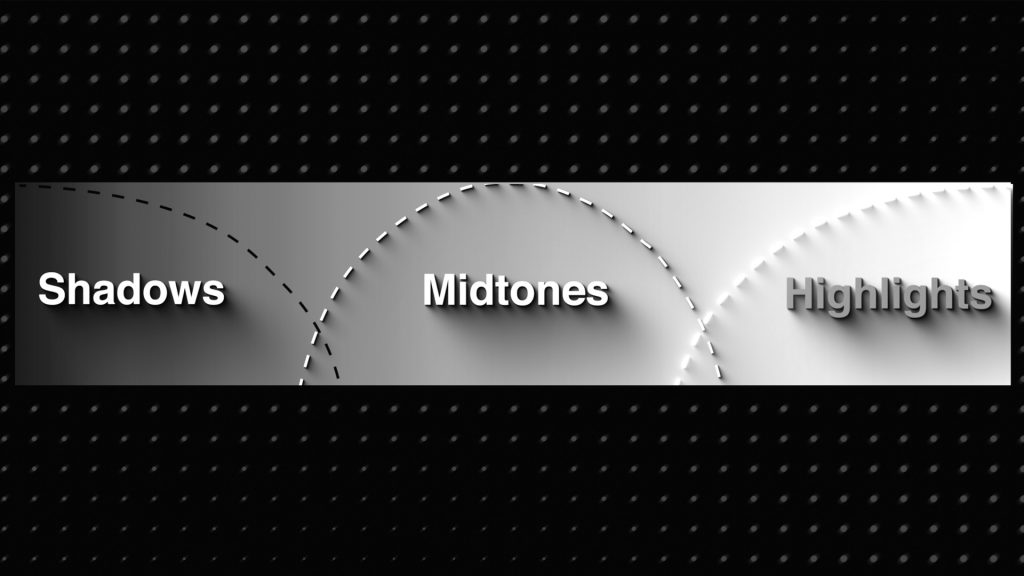
But we need to find out how it works and what it does. To see how the highlights work, let’s go to this grayscale graph, and in the waveform, we can see every incremental step from black to white.
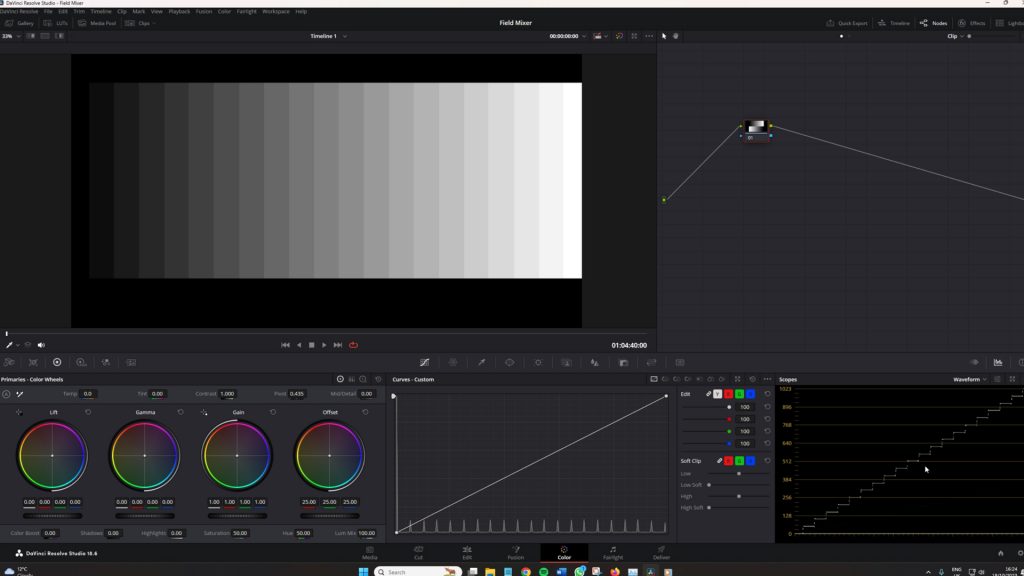
Now, if I lower the highlights log wheel, we know that this should only affect the brighter region of the image. And it does. As I adjust the highlight wheel, we see a slight curve to the adjustment, which is better for rolling off highlight adjustments, but it gets to a point where the curve becomes horizontal, and we’ve washed our highlights completely, and the area becomes gray.
With the gain wheel, we know this should adjust the entire image, starting from the brighter region. And it does, as seen in the scopes and the grayscale itself. The brightest parts of the image get adjusted first and also remain the last until crushing all of the image data is done.
Now, the highlights slider does something interesting.
It moves both like the gain and the highlight wheel. As you can see in the scope, the highlight slider does slightly adjust all tonal regions—like the gain wheel, but the brighter region is the most dominant adjustment—like the log wheel.
But unlike those two, it creates a nice curve after the midtone region into the highlights. This is very important information because when correcting elements that are too hot, like a sky, the adjustment will roll off gradually and keep details nicer than soft clipping in many situations.
So, with this visual information from the curve created on the grayscale graph and with what is stated in the manual, this feature may serve its best interests when used to smooth blown-out areas of the image.
If we go to this wide shot, the sun is in the background, and when I reduce the gain or highlight wheels, my result isn’t that pleasing. But when I reduce the highlight slider, we’re lowering the highlight region, but we’re not doing so linearly, so as a result, we’re getting this nice smooth roll-off into the sun.
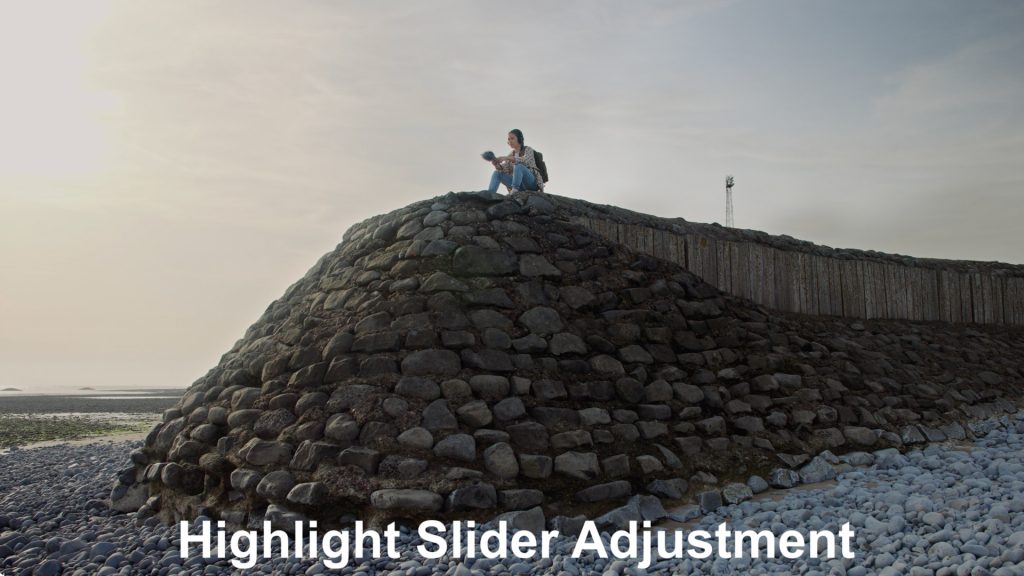
This is where the highlights slider works best.
However, it’s worth noting that there is a difference in the saturation in the image when the highlight slider has been used, as well as the sharpness. This is because the highlight slider (as well as the shadow slider) are spatial tools. This means they will uniformly impact all color channels in an image. Their spatial nature implies that they consider neighboring pixels when applied. When strong settings are used, high-contrast edges can lead to the introduction of halo artifacts. Shadows/Highlights can modify the image’s perceived sharpness due to this spatial processing.
Now, with this information, you should know how each tool works. While they serve to adjust the brightest areas of the image, they all do so in their own fashion, which will produce different results.
Looking for filmmaking tips and tricks? Check out our YouTube channel for tutorials like this . . .