In this video tutorial, we’ll show you how to create your own speed warp effect inspired by Marvel’s Spider-Man 2.
The highly anticipated video game sequel to Marvel’s Spider-Man (2018), Marvel’s Spider-Man 2, was released last week, and in just a few short days, it’s already become Sony’s fastest-selling exclusive.
As an After Effects artist and an avid video game fan, I love to see what I can re-create when I start playing a new game, and Marvel’s Spider-Man 2 has an interesting effect.
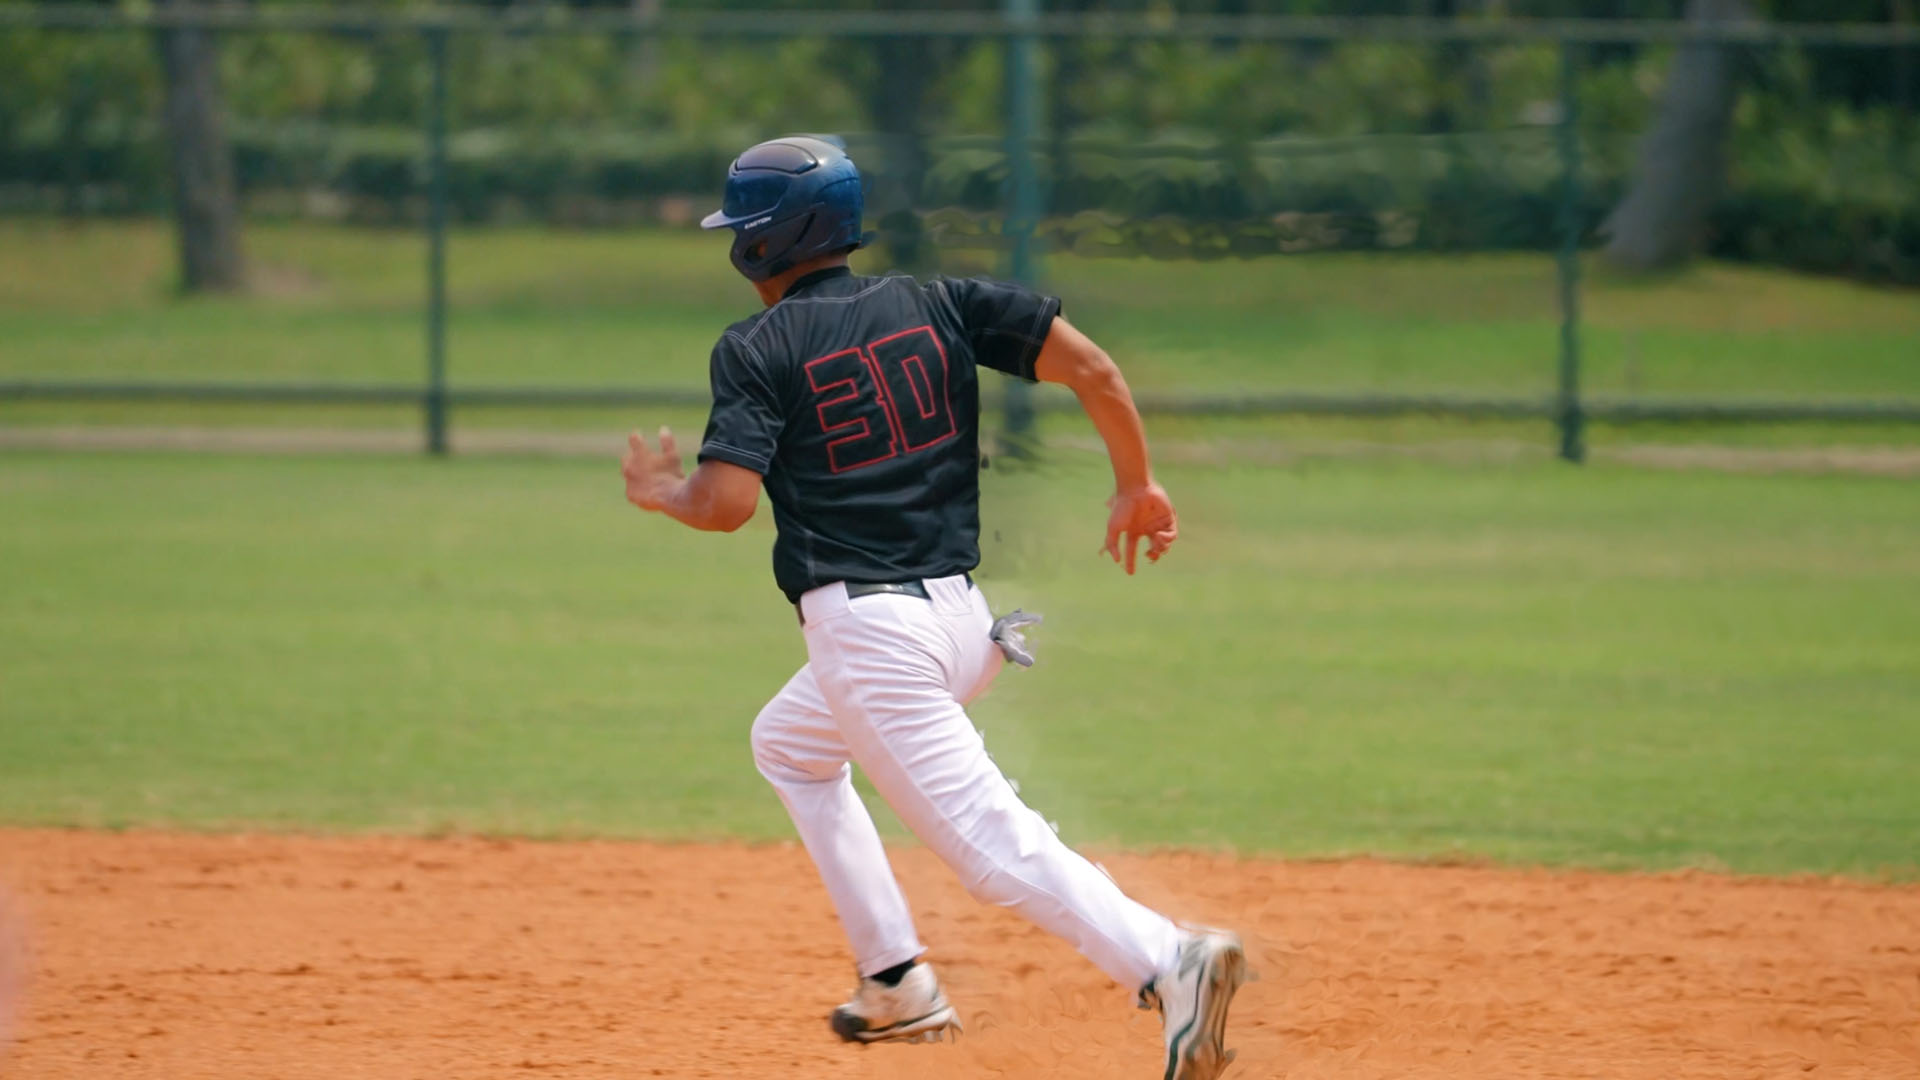
When playing as Spider-Man and you’re gallivanting around New York, whether using webs, free-falling, and most prominently when using the new web wing feature, you can see his arms produce this distorted warp. It’s not that noticeable, but it insinuates that Spider-Man is traveling at high speed, and it has a somewhat heatwave look to it but trails off after Spider-Man’s movement.
In today’s After Effects tutorial, I’m going to show you how you can do just that.
Step-By-Step Guide
First, we want to bring our media into After Effects and create a new composition. We will double the layer, name one Background Layer, lock it, and the other, Main Subject.
Then, selecting the Rotobrush, we’re going to double-click our layer titled Main Subject and bring it into the layer panel. Here we can now start to roto our main subject. Whether it’s a person or a fast-moving vehicle, you don’t need the rotoscope to be pixel-perfect — just a solid general outline that excludes gaps made by the person’s arms and legs is sufficient.
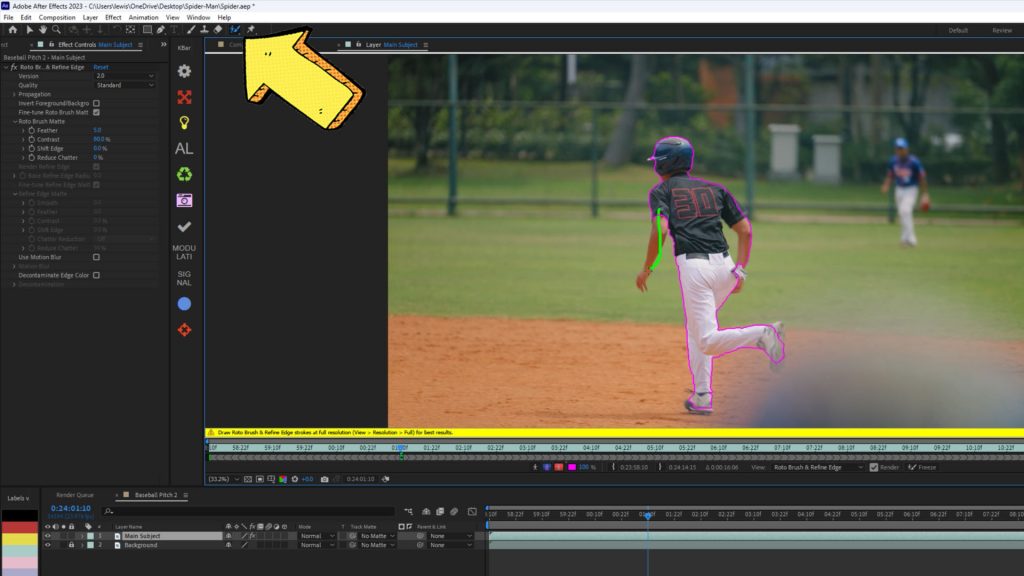
Once done, be sure to skim through the entire clip to correct any areas where the Rotobrush has failed. When refined, go back into the primary viewing panel and check out your rotoscope. You can then use the effects controls to refine the mask further.
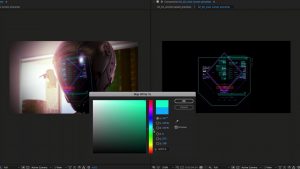
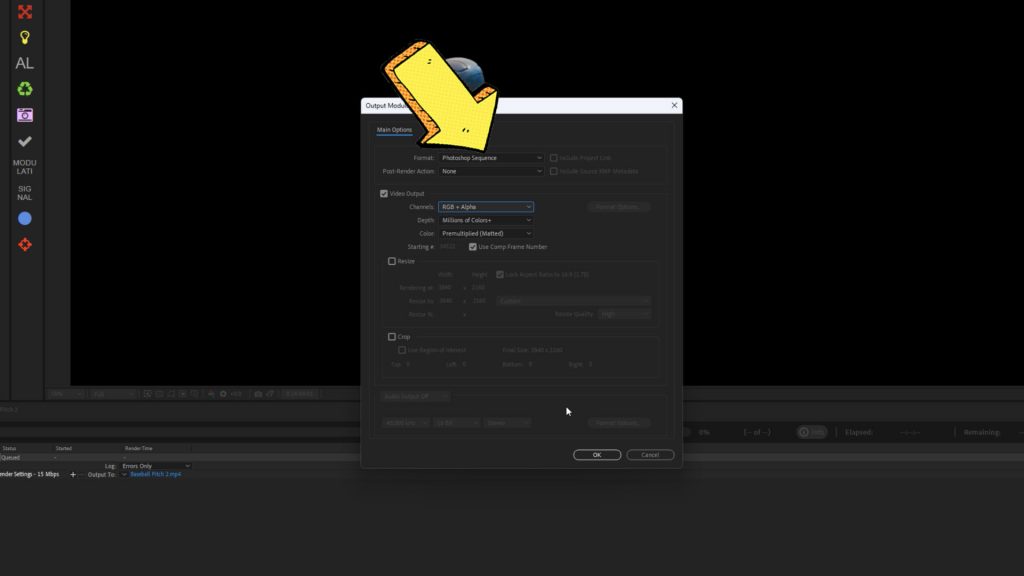
Here, we now need to export this sequence as a PSD sequence. So add this composition to your render queue, change the format to Photoshop sequence, and then ensure that the active channels are RGB + Alpha. Now, hit render.
Now, go into the destination folder, and import the sequence back into After Effects; it’s essential to select the check button Photoshop sequence. Then, when asked to interpret footage, make sure premultiplied – matted with color is selected. You’ll also have to right-click, select interpret footage, and ensure the framerate is the same as the timeline. With that done, place the sequence on top of all the layers in the composition.
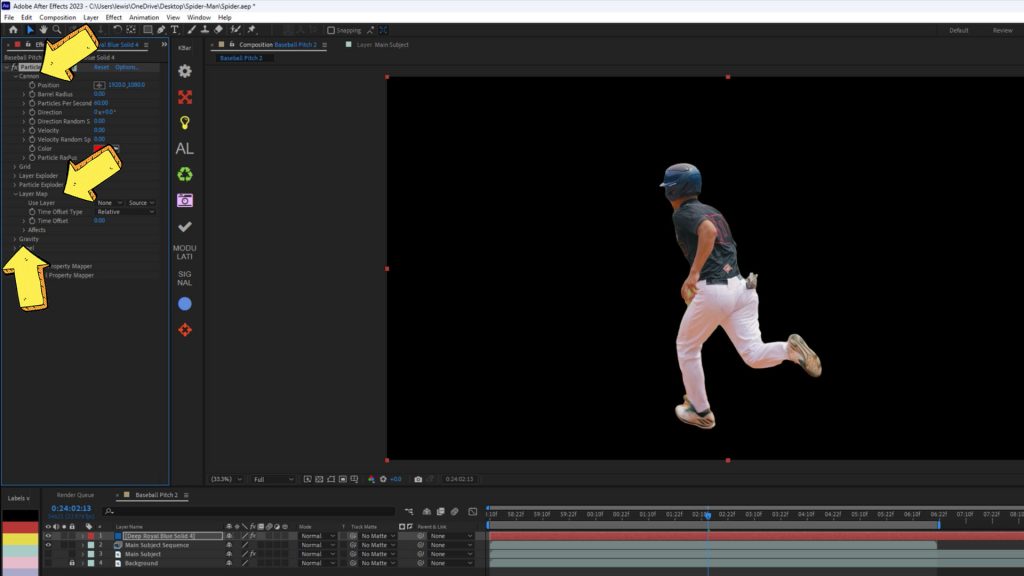
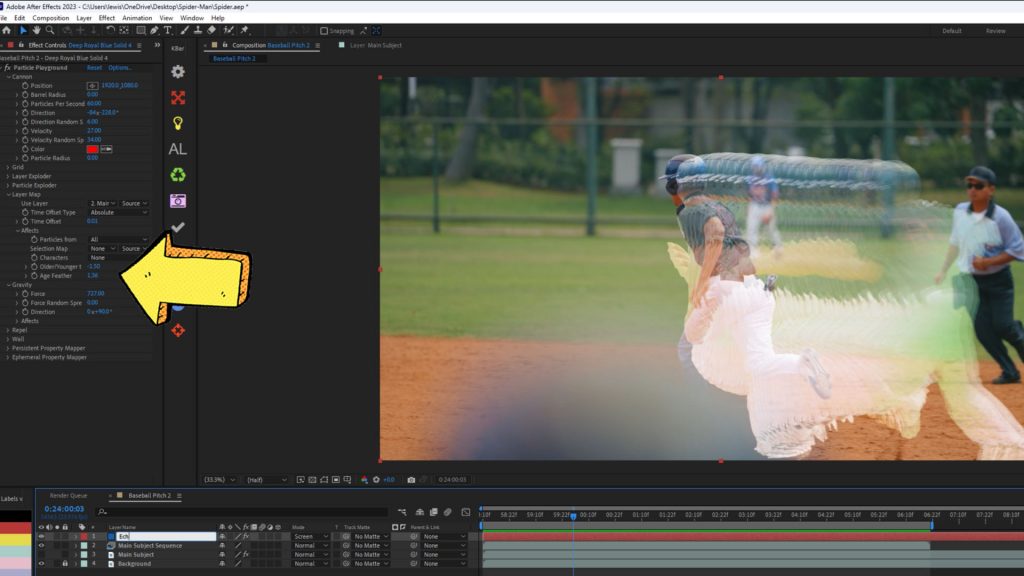
Now, we need to add Particle Playground to a solid layer. This effect with numerous settings is somewhat complicated, but we need only three of them: Canon, Layer Map, and Gravity.
To begin, let’s set parameters in the Canon section. Set the values in these parameters to zero:
- Direction
- Direction Random Seed
- Velocity
- Velocity Random Speed
- Particle Radius
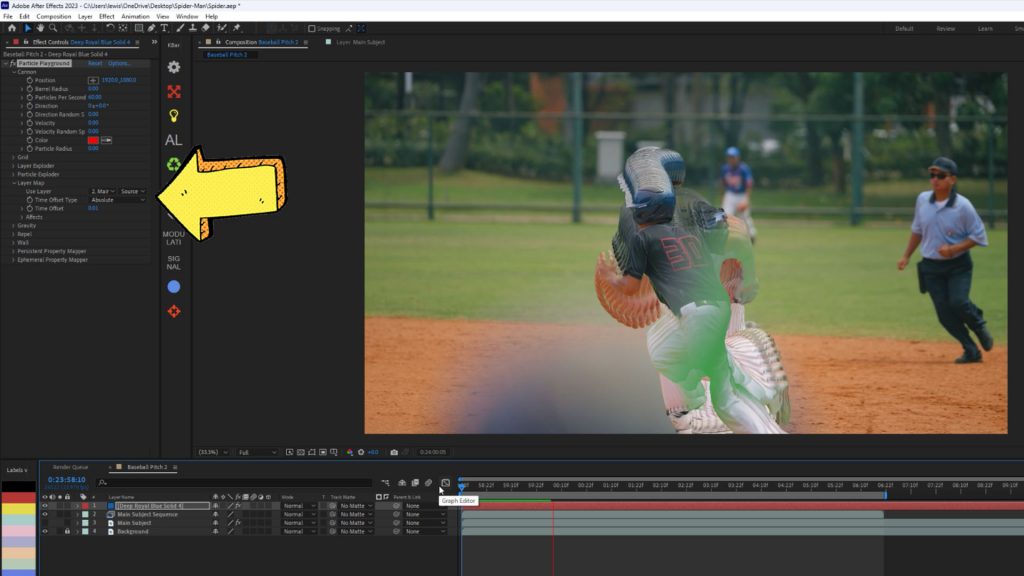
Select the sequence layer as a map in the Layer map section. Set “Absolute” for Time Offset Type. Now, particles are generated as freeze frames for every frame of the sequence. To make the particle source follow the Character, fine-tune the value in Time Offset. It is better to do it in the last frame. Less is more in this effect; for example, I’m quite literally using the next value after 0 – 0.01. At this point, I would also recommend switching the blending mode to screen mode so we can see behind the subject.
Now we need to adjust the gravity force and the direction. Both of these effects will be dependent on what your character or subject is doing in the composition and the way in which they are traveling. At the moment, we don’t have a trail, so to speak. If I hit play, he has this weird delay echo around him. But if I alter the direction to 90 degrees as the guy is running left., we now have the particle delay processing in the correct direction.
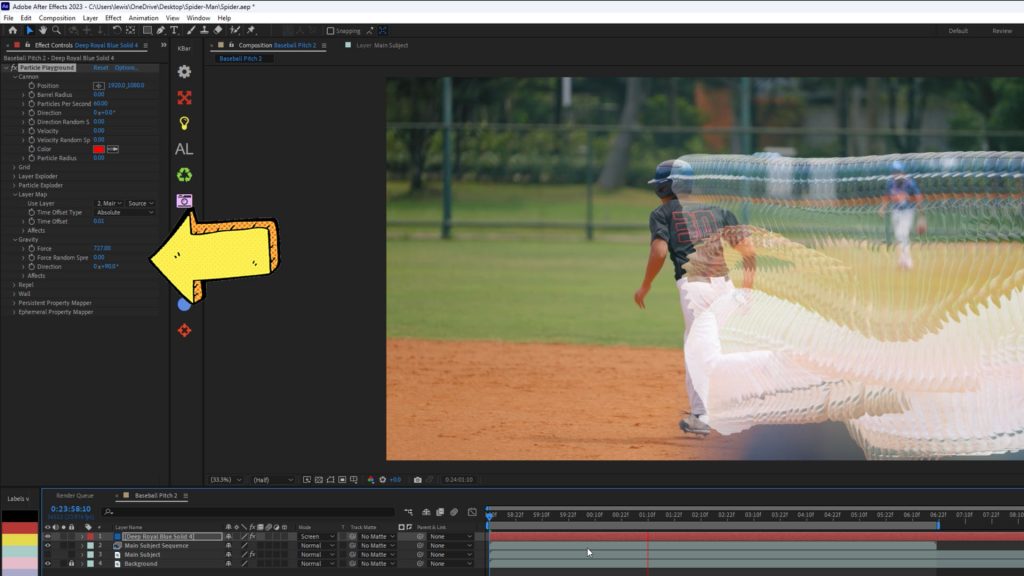
But the delay isn’t too visually pleasing. Therefore, we now need to adjust the gravity force. The force tool will help give the particle mass so it is gravitationally pulled in that direction. I have no number to provide you with because it will be highly dependent on what your subject is doing, how fast they are moving, etc. But, I will say, unlike the time offset parameter, in this case, usually the more, the better. I’m going to dial mine in at 772.
Now, when I hit play, we have this echo spreading out, and it’s looking solid for the foundation of where I want this speed warp to appear. It certainly seems like his motion trail. But we need to refine it. To do this, you want to play around with the settings in the canon parameters, such as direction, direction random spread, velocity, and velocity random spread. Again, the parameters here will require some exploration on your behalf.
One of the critical features we now also want to adjust is the older/younger than and the age feather. This will ensure that the speed distortion dies out as the character moves through the frame. Again, this setting requires just a small adjustment to get the look you want.
So, if we hit play, it currently looks like this (refer to video). I’m sure at this point, we could have some decent effects with this if we wanted, but we’re only using this as the foundation to distort the background.
Making The Mirage
So now, we’re going to turn off the visibility of this layer, and then add an adjustment layer, and then add the CC Vector blur to the adjustment layer.
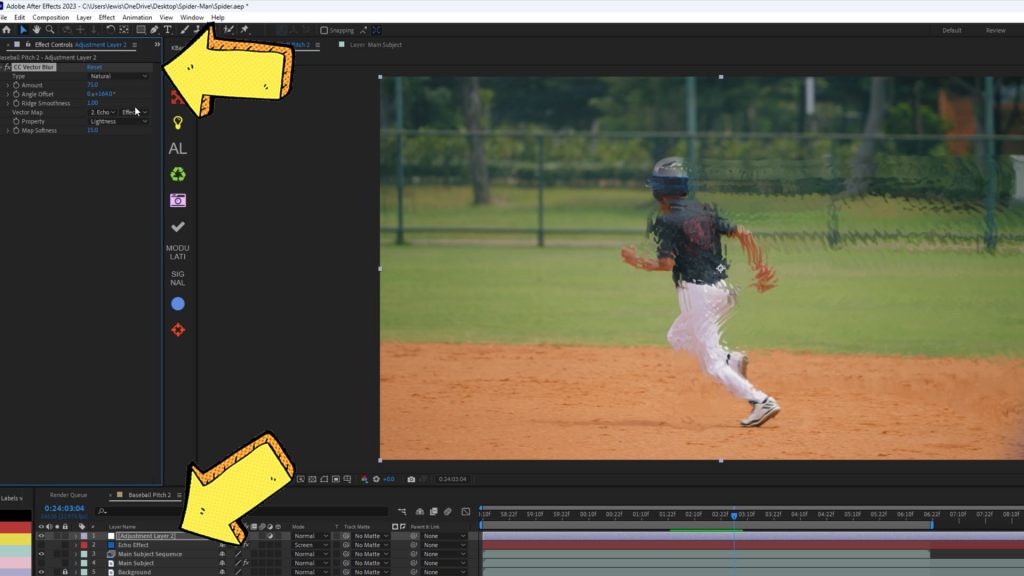
We want to select trail as our vector map and switch the type to effects and mask. Here, I would recommend increasing the amount significantly and changing the angle offset to a degree that makes sense to the motion of your character’s movement.
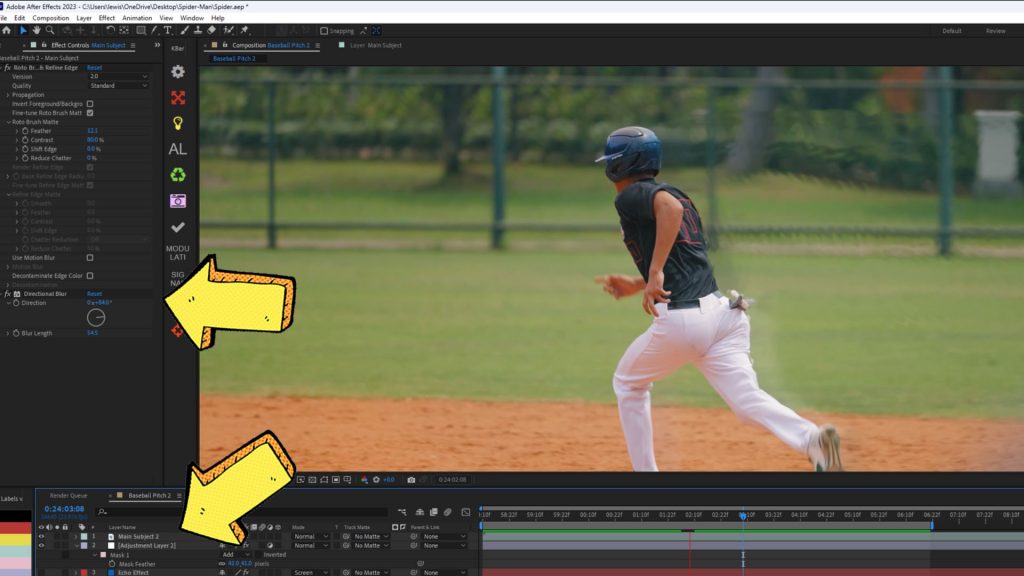
To finalize, you’re going to want to increase the ridge smoothness to decrease how prominent the ridges may be. We now have this soft speed flow coming from the back of the subject, and if we look at that Spider-Man 2 clip, it’s pretty much on par; there’s a slight distortion to the background after the character moves, somewhat like a heatwave, and it certainly insinuates that the character is moving fast. I would say it’s not highly noticeable, but I think this effect works when we’re not drawing attention to it. Currently, there are a few things we need to do to clean this effect up. First, on the adjustment layer with the vector blur, let’s mask the speed warp so it does not appear in front of the subject as they wave their hand forward. I think a nice feather to the mask will also work well in making it more natural.
Next, we will take the original rotoscoped layer, duplicate it, and move both layers to the top of the composition. Turn on the top layer. This will now stop the speed warp from appearing on top of the subject. Now, with the second copy of our subject, we’re going to place this underneath the adjustment layer with blur and slightly offset the position; just a touch will do. I’m then going to add directional blur and smear out the visibility of the subject. Finally, I’ll reduce the opacity down to 20-25%. This adds that mirage feel when something is caught up in a heatwave, and it distorts light.
Again, adding to the notion that this person is moving fast. So this is the final result.
Now, I think that looks cool, but it’s quite an exaggerated use of the effect. Perhaps without a superhero film, you wouldn’t want to dial it in that much. However, we can reduce the amount of vector blur to create a more subtle effect. For example, if we wanted to convey this pitch having some speed to it, it starts to look a lot more powerful as it causes this visual distortion.
Looking for filmmaking tips and tricks? Check out our YouTube channel for tutorials like this . . .