In this video tutorial, we’ll cover how to add subtitles to your project in Adobe Premiere Pro.
In today’s social media landscape, ensuring your video contains proper and legible subtitles is a must in order to retain viewers. Let’s walk through the steps on how you can simply add subtitles to your video edit in Adobe Premiere Pro.
What Are Subtitles?
Subtitles are a form of text on screen that helps the viewer read what is being said, rather than solely listening to the dialogue. Subtitles usually transcribe what the subjects on screen are saying, word for word, and sometimes they clarify what kind of music or sound effect has been played. Subtitles can also be referred to as captions.
There are multiple reasons why subtitles should be included in a video or film. The primary reason you may be familiar with this is to assist the hearing impaired and ensure they can still understand the action in the video without needing to hear it.
Secondly, there may be portions of the dialogue that are either in a different language or are just difficult to hear. Subtitles will include the translation or clarify what the subject said, in case it wasn’t clear.
Most recently, subtitles have started to be included in most social media videos on YouTube, Tik Tok, and Instagram as a standard practice. Videos with captions get more engagement with their audience. If you’ve ever seen a Mr. Beast video, you’ll notice really quickly that they use a lot of subtitles in their style of editing. This is quick, engaging, and frenetic — to match his style of video. Audiences on these platforms also may be watching without volume and will rely on subtitles to understand what is being played.
Creating Your Own
Now that you understand why you’d use captions in your videos, let’s get into how to do insert them. Luckily for us, Adobe Premiere Pro has made subtitles/captions incredibly easy to incorporate into a video.
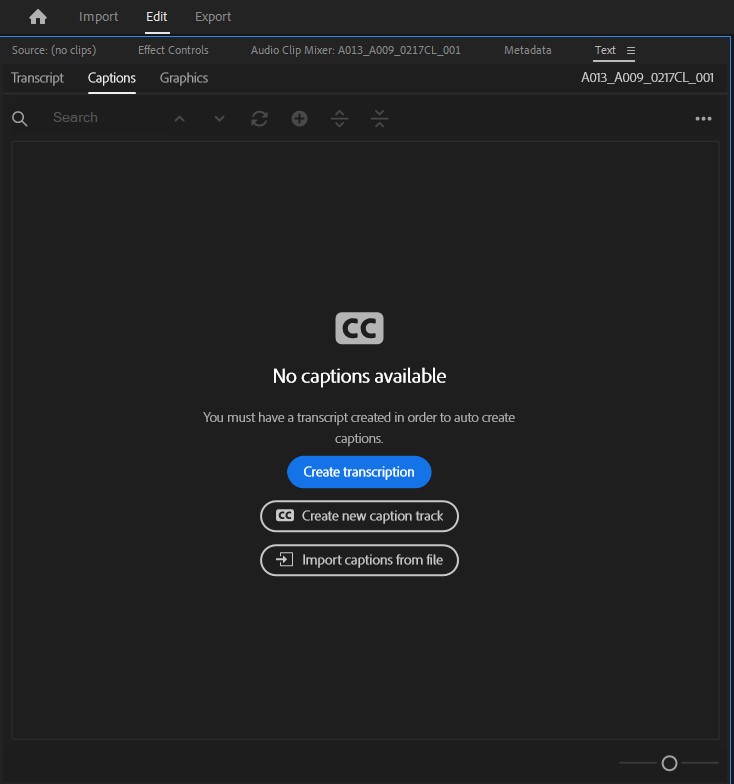
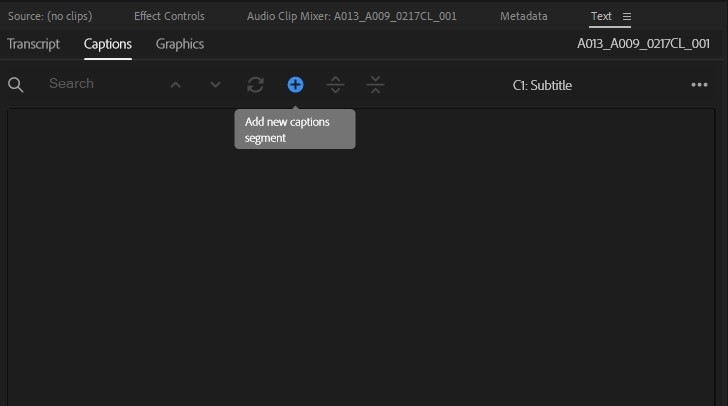
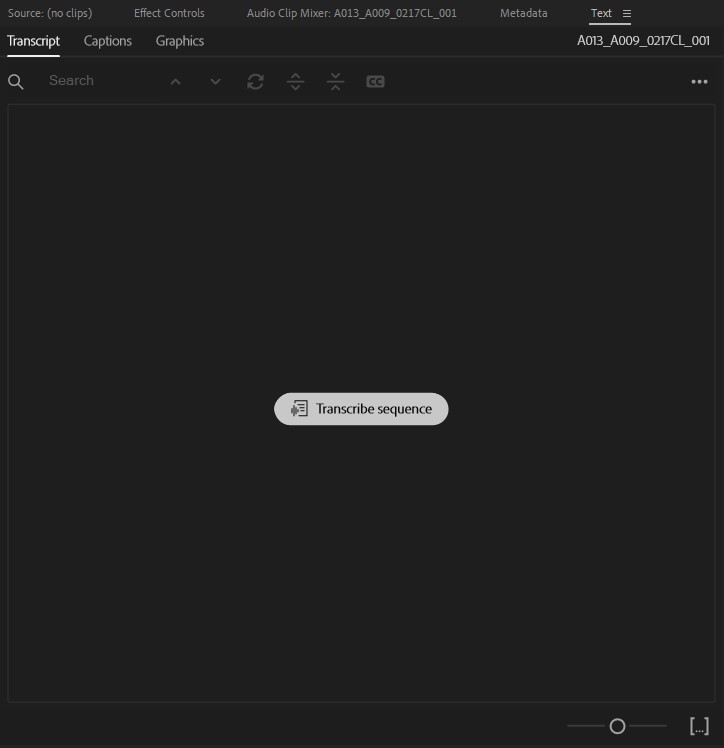
Once you have a video that is ready to subtitle, head over to the “Text” panel in your upper left window. This should be right next to Effect Controls and Audio Clip Mixer. Now select the “Captions” panel within the Text window.
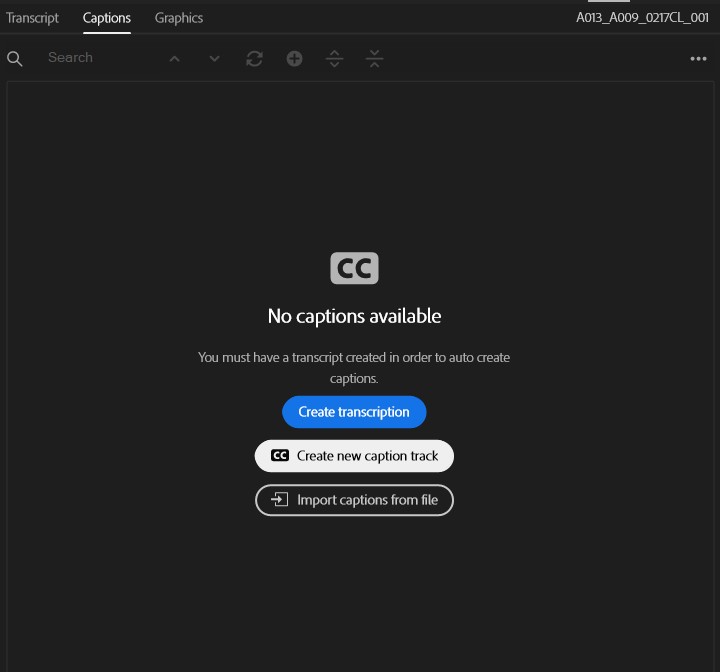
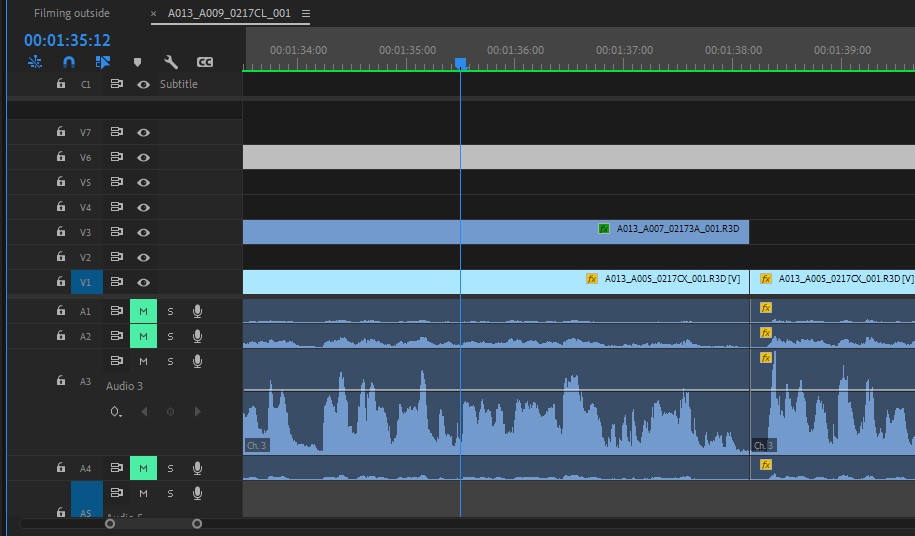
This should be empty, as we haven’t created anything yet. First, we’ll need to “Create a new caption track.” This will create a layer specifically for captions above your video editing timeline. Click ok on the pop-up box, as the standard options are what we’ll want to use.
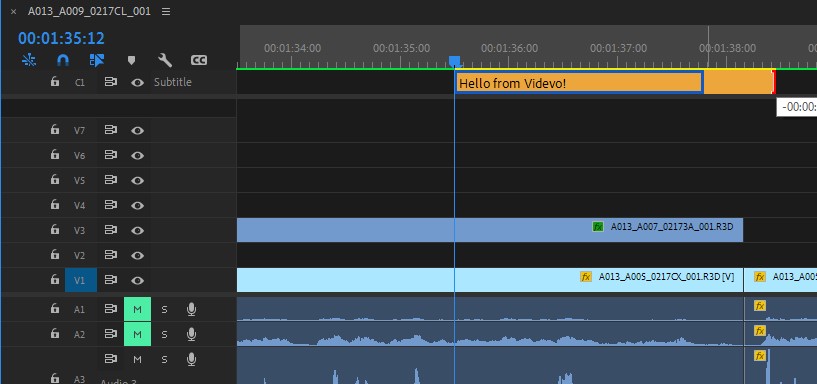
Line your playhead at the start of the sentence you’d like to subtitle in the video, and then click the “+” icon to add a new caption segment. You’ll see a small clip placed in the subtitle section of your timeline. Type into the segment what you’d like the subtitle to say, and realign the clip in your timeline to match the dialogue. To make a new segment, realign your playhead and do the process over again.
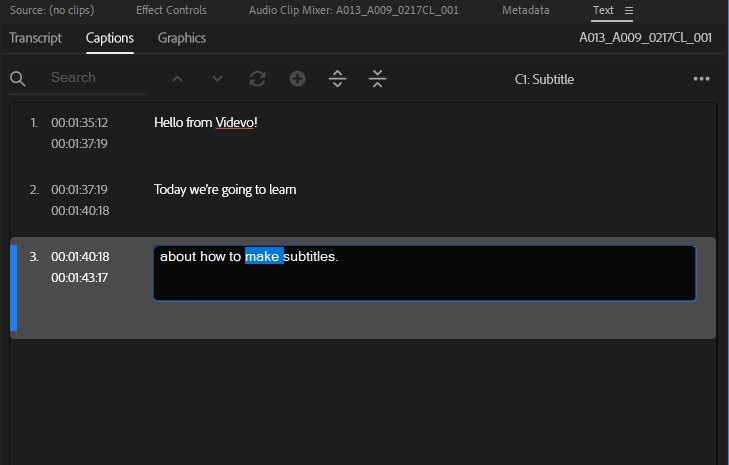
If you made any mistakes in your transcribing, you can easily edit the text from the captions window. This window has a few other handy features, like being able to split a captions clip, merge clips, and display exactly where in the video the captions start and end. Via the same window, you can also export the captions you created, in case you’d like to use them as an embedded file on YouTube, for streaming, or for another platform.
The Easy Way
Adobe Premiere has made subtitles easier than ever and can caption an entire video in mere moments with just a few clicks.
Instead of clicking “Create new caption track” at the beginning as we did before, we’ll click “Create captions from transcription.” This will use Adobe Premiere’s technology to generate a transcription automatically from the speaking voices in the video, without the need for tedious typing, and it will place the subtitles right into your video’s timeline.
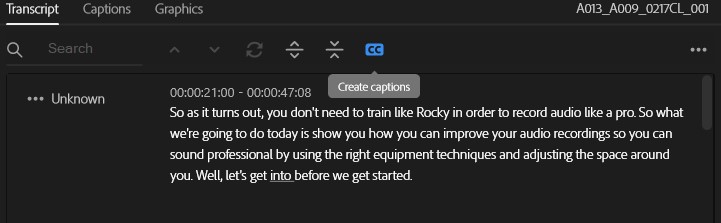
Everything will be synced up, neatly organized, and fairly accurate. I haven’t had any major issues using auto-captions in my work, but you should still do a couple of passes over the subtitles to ensure they’re accurate.
With the transcription created, you can also browse through the video looking for keywords in the edit. Simply clicking on the word will take you right to the frame where that word started.
Exporting
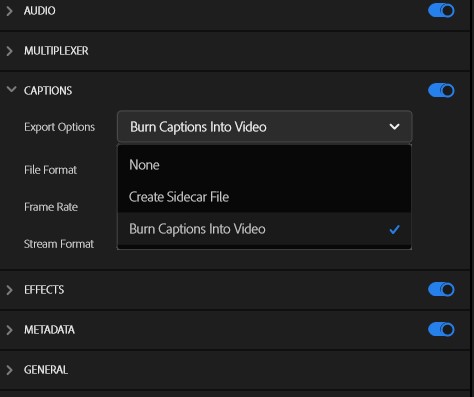
Now that you’ve created captions, how are you going to make use of them? When you’re ready to export, there will be an option for how you want to include captions in the final export. “None” won’t include any of the subtitles you created. “Create Sidecar File” will create a separate file that can be uploaded to the platform along with the video so that captions can be toggled freely. “Burn Captions Into Video” will permanently add the captions on top of the video, without the ability to hide them later. Select which option works best for you and the platform you’re planning on sharing.
Using subtitles is an important part of being an editor and creating videos for all audiences to enjoy. As you can see, creating captions can be as easy as a few clicks in Adobe Premiere Pro.
While Adobe Premiere has a lot of great built-in tools and features around subtitles, there are still a few outside sources that could improve how you create them. Let’s show you a few tools you could be using to create and improve your subtitles.
Trint — Transcription and Subtitle Creation
Trint is a plugin that can essentially do exactly what the built-in Premiere auto-transcribe can do but with a few more features. This extension gets built right into your editing workflow and can also be edited right within your browser.
A few features I like the most are the Word Catalogs and the cross-project compatibility. With the catalogs feature, you can create a bank of words that you’d like Trint to recognize whenever they’re present in your work. This can be extremely helpful when your dialogue has slang, unique proper nouns like Videvo or names, or industry terms that a program wouldn’t easily be able to decipher.
Each project that you transcribe is also cataloged and easily referenceable through their platform, meaning you can see previous projects you’ve worked on, make quick edits or downloads to them, and keep everything in an orderly fashion. In Premiere, your transcriptions are locked to that specific Premiere Project, so having cross-project compatibility can be useful for complicated projects or long-term edits.
The Subs Plugin — Animations and Styling
Want to create TikTok and flashy subtitles easily? The Subs Plugin might be right for you. This plugin will take your pre-transcribed dialogue and create unique-looking captions in just a few moments, with stylized fonts, colors, and highlighting.
This can save you a bit of time if you’re trying to animate each graphic yourself and trying to find the right visual style. Once the subs are created, you can still edit, tweak, and change the text after the fact.
The plugin is a bit steep at $25/month, but if you’re cranking out Youtube or TikTok videos, the investment might be worth the time savings in the long run.
Youtube Hack (FREE)
If you’re trying to be frugal, Youtube can get you covered. Long before auto-transcribe, I had to add subtitles to an hour-long video and didn’t want to type 100,000 words on screen. Luckily I found Youtube. Any video you upload to Youtube will auto-generate subtitles and allow you to download these subtitles in a text format. This text file can then be linked directly to your edit within Premiere and used on other platforms. The best part is that it will do a lot of the work for you and is pretty accurate.
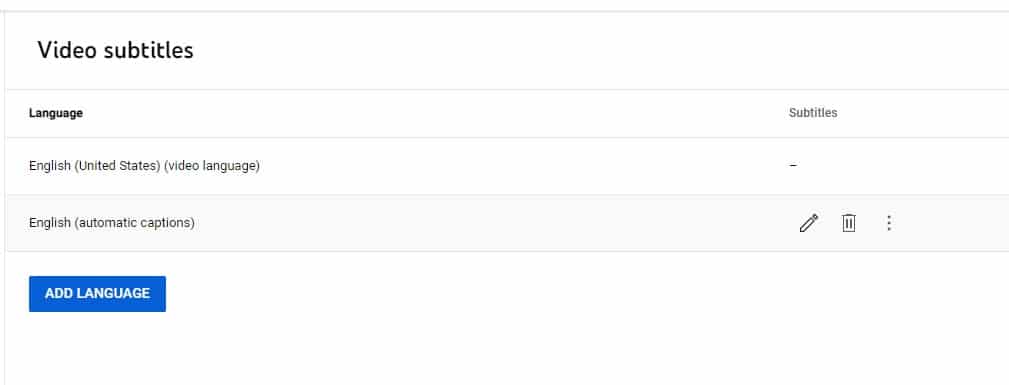
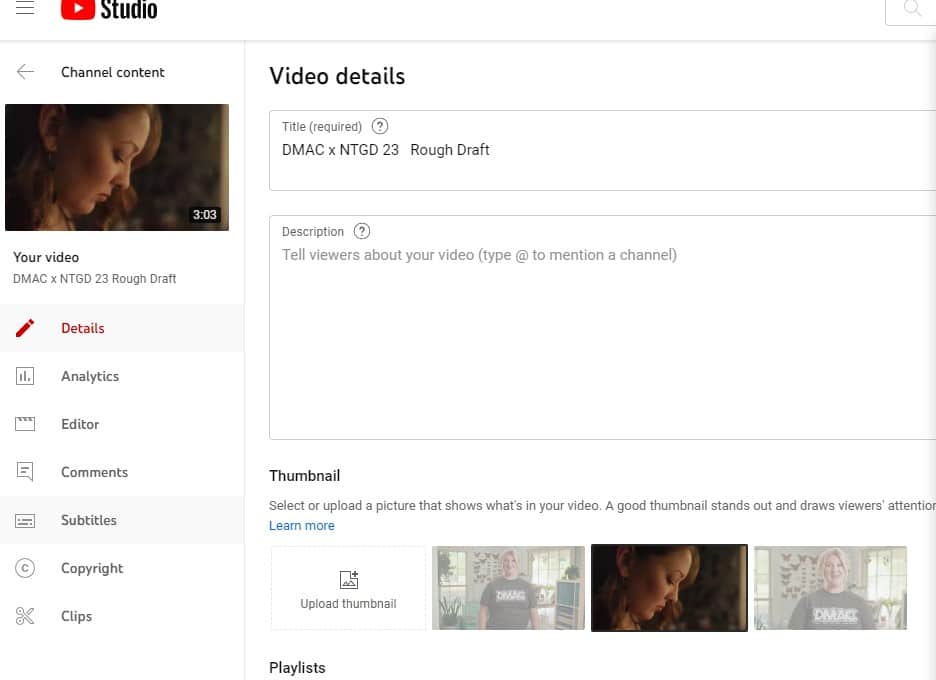
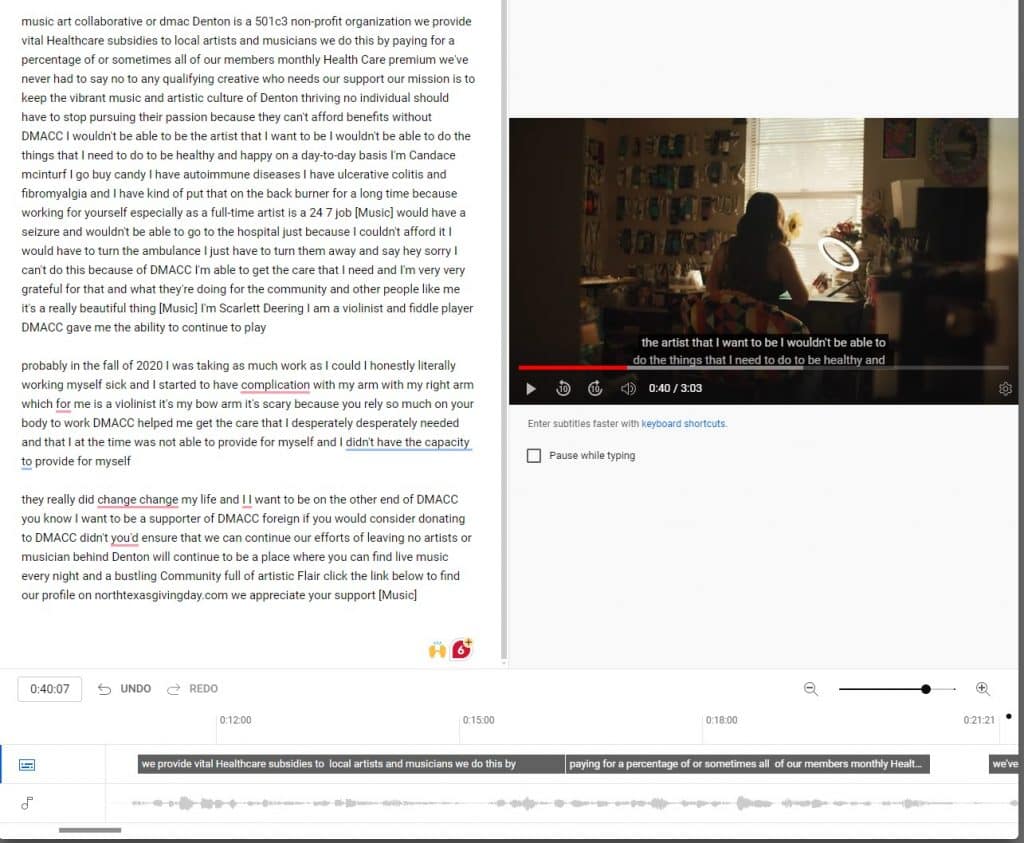
Once it’s ready, you can find the subtitles in the video options setting. The entire transcription will be written in paragraph form but can also be edited to coincide with the timings in the video. If your video is living on YouTube, you can just make changes directly here. If you’d like to have it available on other platforms, you can simply download the subtitles file here as well and import it onto the platform or Premiere later.
This article was updated on February 13, 2024 to reflect updates in the industry.
Looking for filmmaking tips and tricks? Check out our YouTube channel for tutorials like this . . .