Cropping is an important aspect of video editing — here’s how to do it in Adobe Premiere Pro.
We’re not talking about ears of corn or heads of lettuce. Cropping is a key tool in video editing for creative purposes, video delivery, and ensuring clips match your timeline. Let’s go through ways you can crop videos using Adobe Premiere Pro — as well as some tips to improve your cropping.
What Is Cropping?
The term “cropping,” as we know it, started in the world of photography. The term means to trim an image of unwanted areas or excess parts of the frame that you would not like to present to the final viewer.

This makes your image a bit smaller, as you’re cutting away pixels, but it can be immensely useful. Maybe there’s just a bit too much in the frame and you’d like to focus on a bit less, or maybe you want to cut out that weird uncle of yours from a group photo — there are many reasons cropping might be necessary.
Cropping is so universal and ubiquitous, the tool can be found in essentially every photo editor, photo app, and social media platform.
Reasons to Crop in Video Editing
Now videos are a bit different than stand-alone photos, and there are various reasons why you’d like to crop a video.
- Change the aspect ratio: With multiple different platforms for video delivery, there’s always a unique aspect ratio between them. With the rise of TikTok and Instagram reels, we’re seeing more videos in a vertical 9×16 format. A few years ago, Instagram posts could only be 1×1, and of course, video platforms like Vimeo and YouTube are still horizontal widescreen. Sometimes you’ll want to be able to post a project or clip across all of these platforms and have them look native. This is where cropping comes into play. You can crop a horizontal video to the vertical format so that it looks like it was meant to be played there, without space. Of course, you’ll lose a lot of the image, roughly 60%, but I still feel that looks better than having empty black bars letterboxing the video.
- Emphasize a subject or part of the image: Sometimes we shoot a bit wider than we need to. If you feel like the important part, the subject, isn’t filling enough of the frame, you can crop in to make it a bit larger than originally captured.
- Reuse a single angle: With higher resolutions now, 4k or higher, I find I’m often still delivering in 1080p. This means I can crop into a 4k image by 100% and still be using the video’s original pixels. To avoid a jump cut, you may be able to use a video’s full resolution for one cut, and then crop into that same clip for another cut, without it feeling like a jump cut. I find that this usually has to be at least a 50% punch-in, but it may depend on the original clip.
- Creative Effect: There are many great creative ways you can use cropping. You could start with a cropped image and then expand the frame to reveal something interesting. In the film, 500 Days of Summer, cropping is used to convey two possible outcomes of a scene that take place simultaneously. This is where you can let your creativity shine and have fun with the tool.
How to Crop in Premiere Pro
There are a few ways to crop in Premiere Pro, so your approach will depend on the purpose for your cropping.
If you’re simply trying to transform the aspect ratio, the easiest way to crop a video is by using the final video resolution in the project settings —for instance, if you’d like to produce a vertical video from a horizontal video.
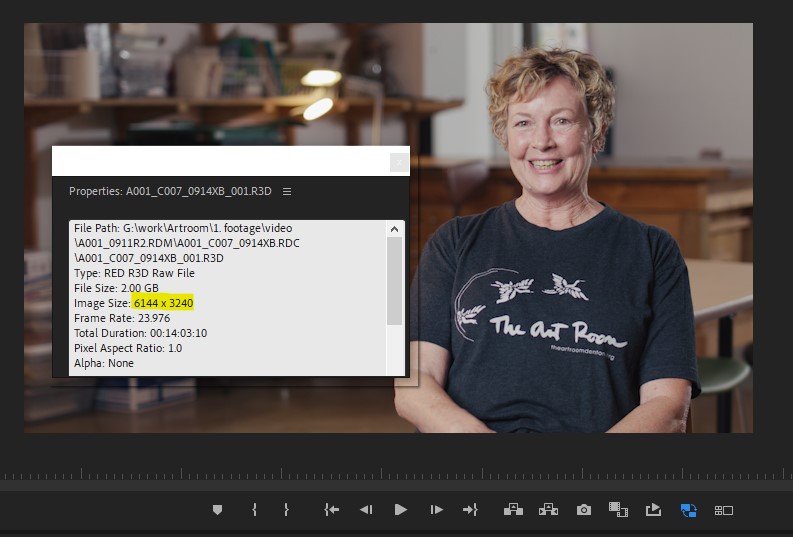
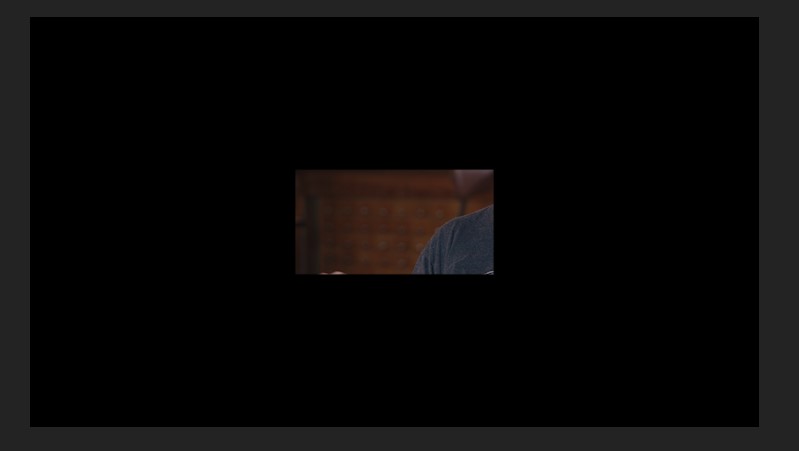
To start, this raw video was shot in a horizontal aspect ratio, 17×9.
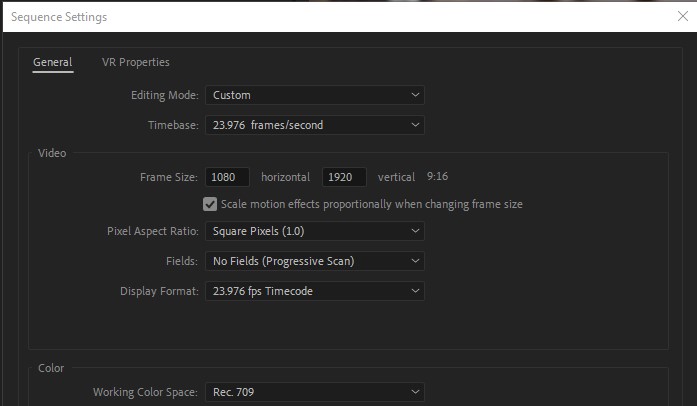
Next, create a new timeline for the new aspect ratio. For our purposes, we made it 9×16 at a 1080×1920 resolution.
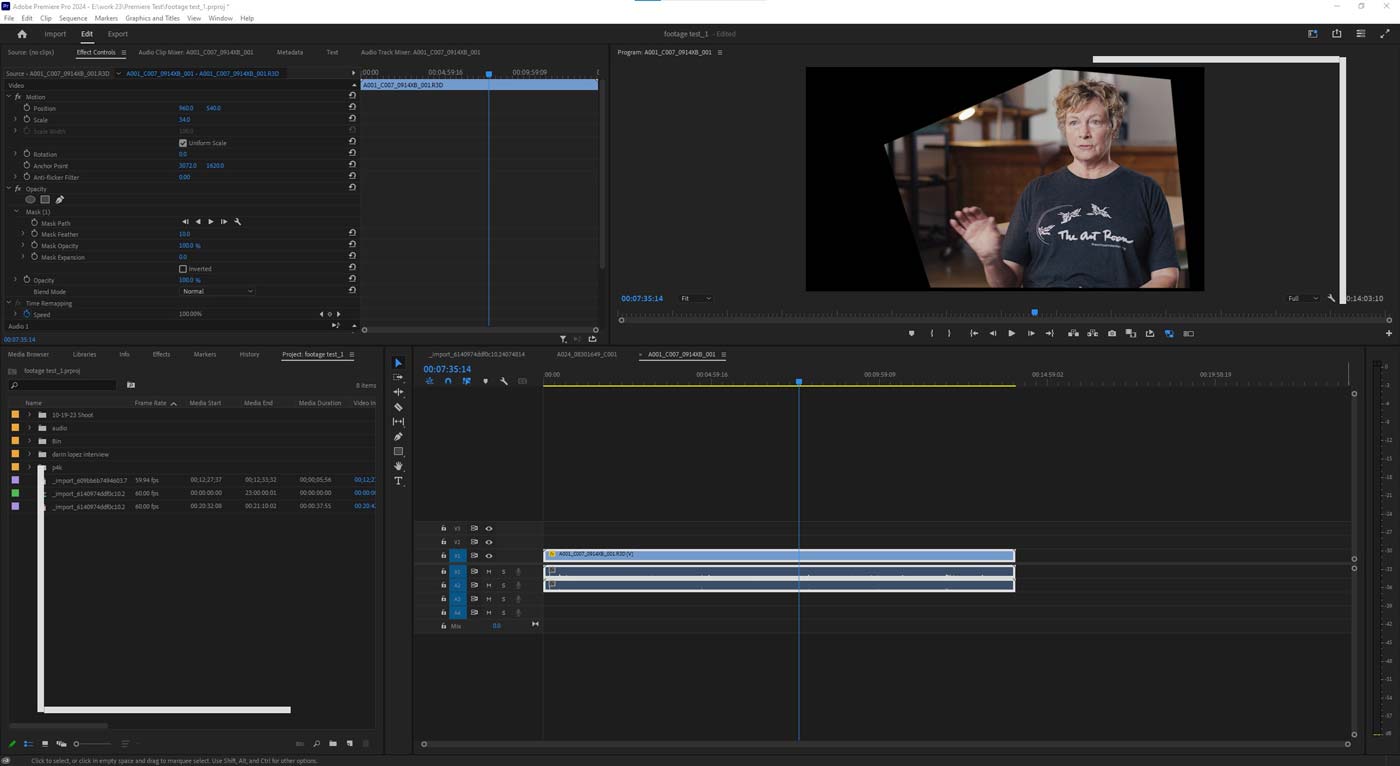
Simply drop the raw video into this new timeline. It may not be positioned how you’d like, so head to the Effects control panel and adjust the motion options to suit how you want it to be framed.
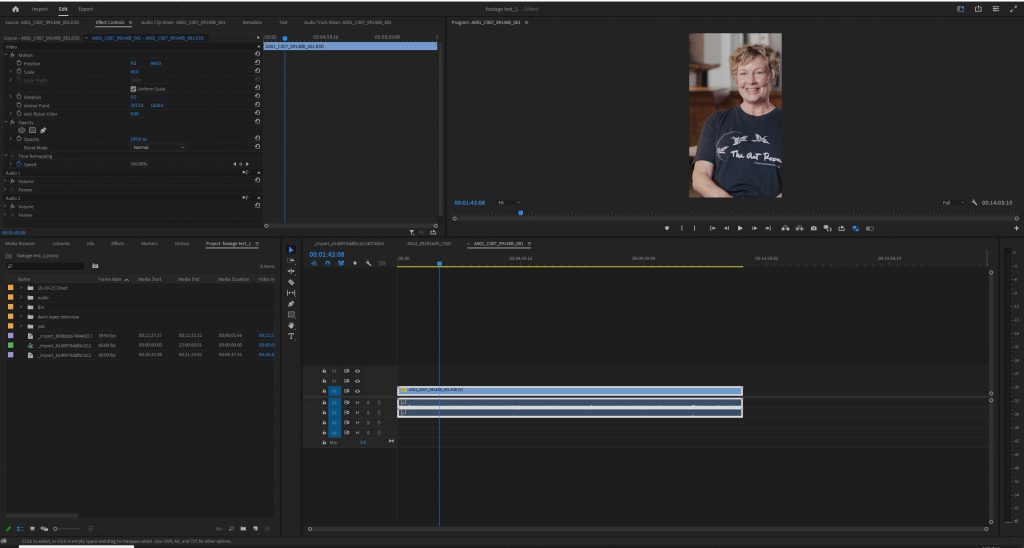
Now, simply export the video and you’ve effectively cropped your clip to a new aspect ratio.
Crop Using the Crop Effect
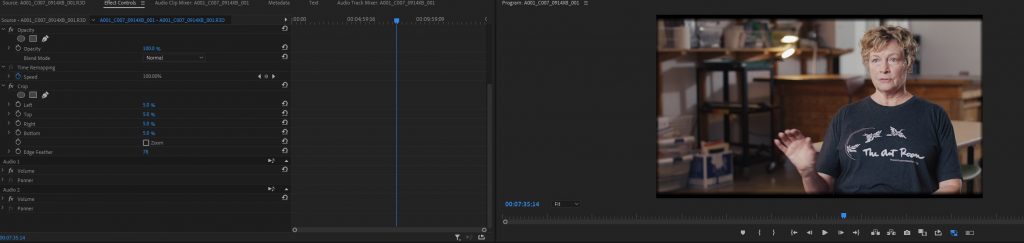
Within the Effects panel, there is a specific tool called “Crop.” Drag this effect onto the clip you’d like to crop, and head to the control panel to get started.
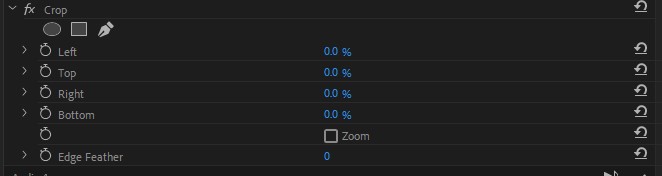
The crop effect works on a percentage basis and from the four main directions of the clip: Left, Top, Right, and Bottom. This is very useful for an exact and simple cropping effect.
This effect also has an edge feathering option, if you’d like the effect to be a bit more subtle. This option works outward from your crop point, so be careful that you’re still removing what you’d like to remove.
Cropping Using an Opacity Mask
If you’d like complete control and the ability to crop in interesting shapes, using a mask within the Opacity setting is the way to go. You’ll be able to add as many points to your shape as you’d like, place them exactly where you want within the frame, use bezier curves to finesse the shape and control the feather like you can with the dedicated crop effect.
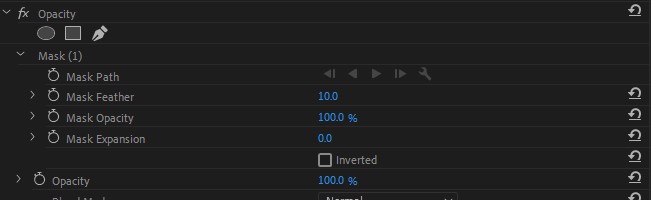
Once you have your footage in your preferred timeline, head to the Effects Control panel and head down to opacity. Click any of the shapes or pen tool to create your first mask. I prefer the pen tool because it gives me full control to start.
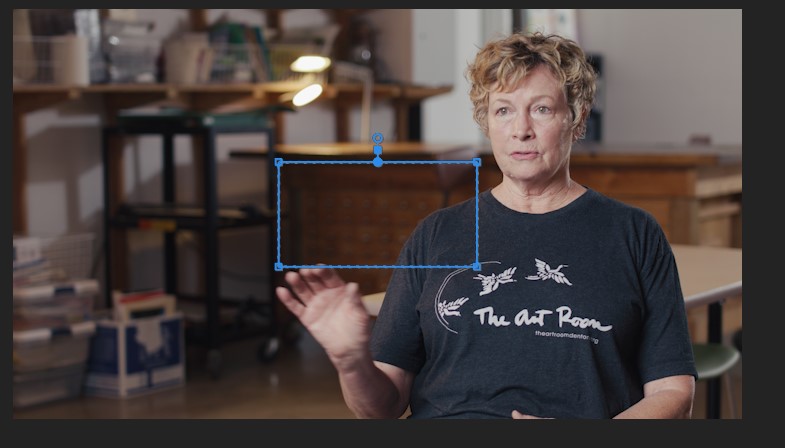
Clicking one of the shapes will automatically drop a circle or square on your footage, automatically applying a crop preset. You can still adjust these shapes and place them how you’d like. You’re also not stuck with that specific shape — you can add points to expand it whenever you’d like.
Clicking the pen tool will replace your cursor with a pen when hovering the program viewer. Click wherever you’d like to crop to within the frame. Once you’re ready, click back on the first point to close the shape, and a cropping effect should automatically be applied.
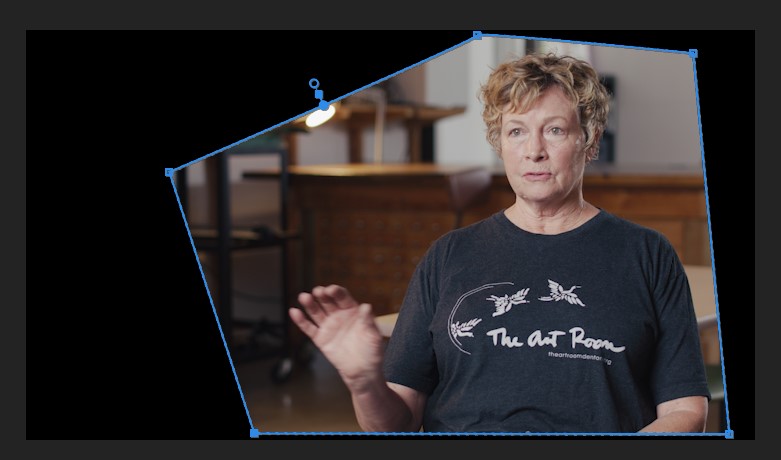
I love the mask option over the cropping tool because it’s built into every clip and cuts out the step of applying another effect to a video. Additionally, it allows full control of cropping, and you can crop in very specific shapes whenever needed.
The one downside is that it’s not very precise, and it’s difficult to make nice, clean shapes. The cropping tool allows you to work in exact percentages in very few directions, which is limited, but sometimes it’s what you need.
Cropping in Adobe Premiere has many use cases — it isn’t just a utility tool. There are many ways you can get creative with your cropping abilities!
Looking for filmmaking tips and tricks? Check out our YouTube channel for tutorials like this . . .