Learn how to use Photoshop’s Generative AI to enhance your videos using Adobe After Effects.
Unless you’ve been living under a rock these past few months, you’ve likely encountered Photoshop’s generative fill tool or, at the very least, watched videos or read articles about it (like ours, right here). This incredible tool can expand a photograph beyond its captured parameters, introduce elements not present at the scene, or even swap subjects for entirely different ones.
Imagine the potential to apply this technology to video — for set extensions, matte paintings, and more. Today, I will show you how, to an extent, that’s possible. If you’re a video newbie and have been tinkering with Photoshop, I will guide you through the basics of camera tracking in After Effects. This will enable you to integrate your AI-generated imagery into videos with motion, achieving a seamless final product. Let’s dive right in.
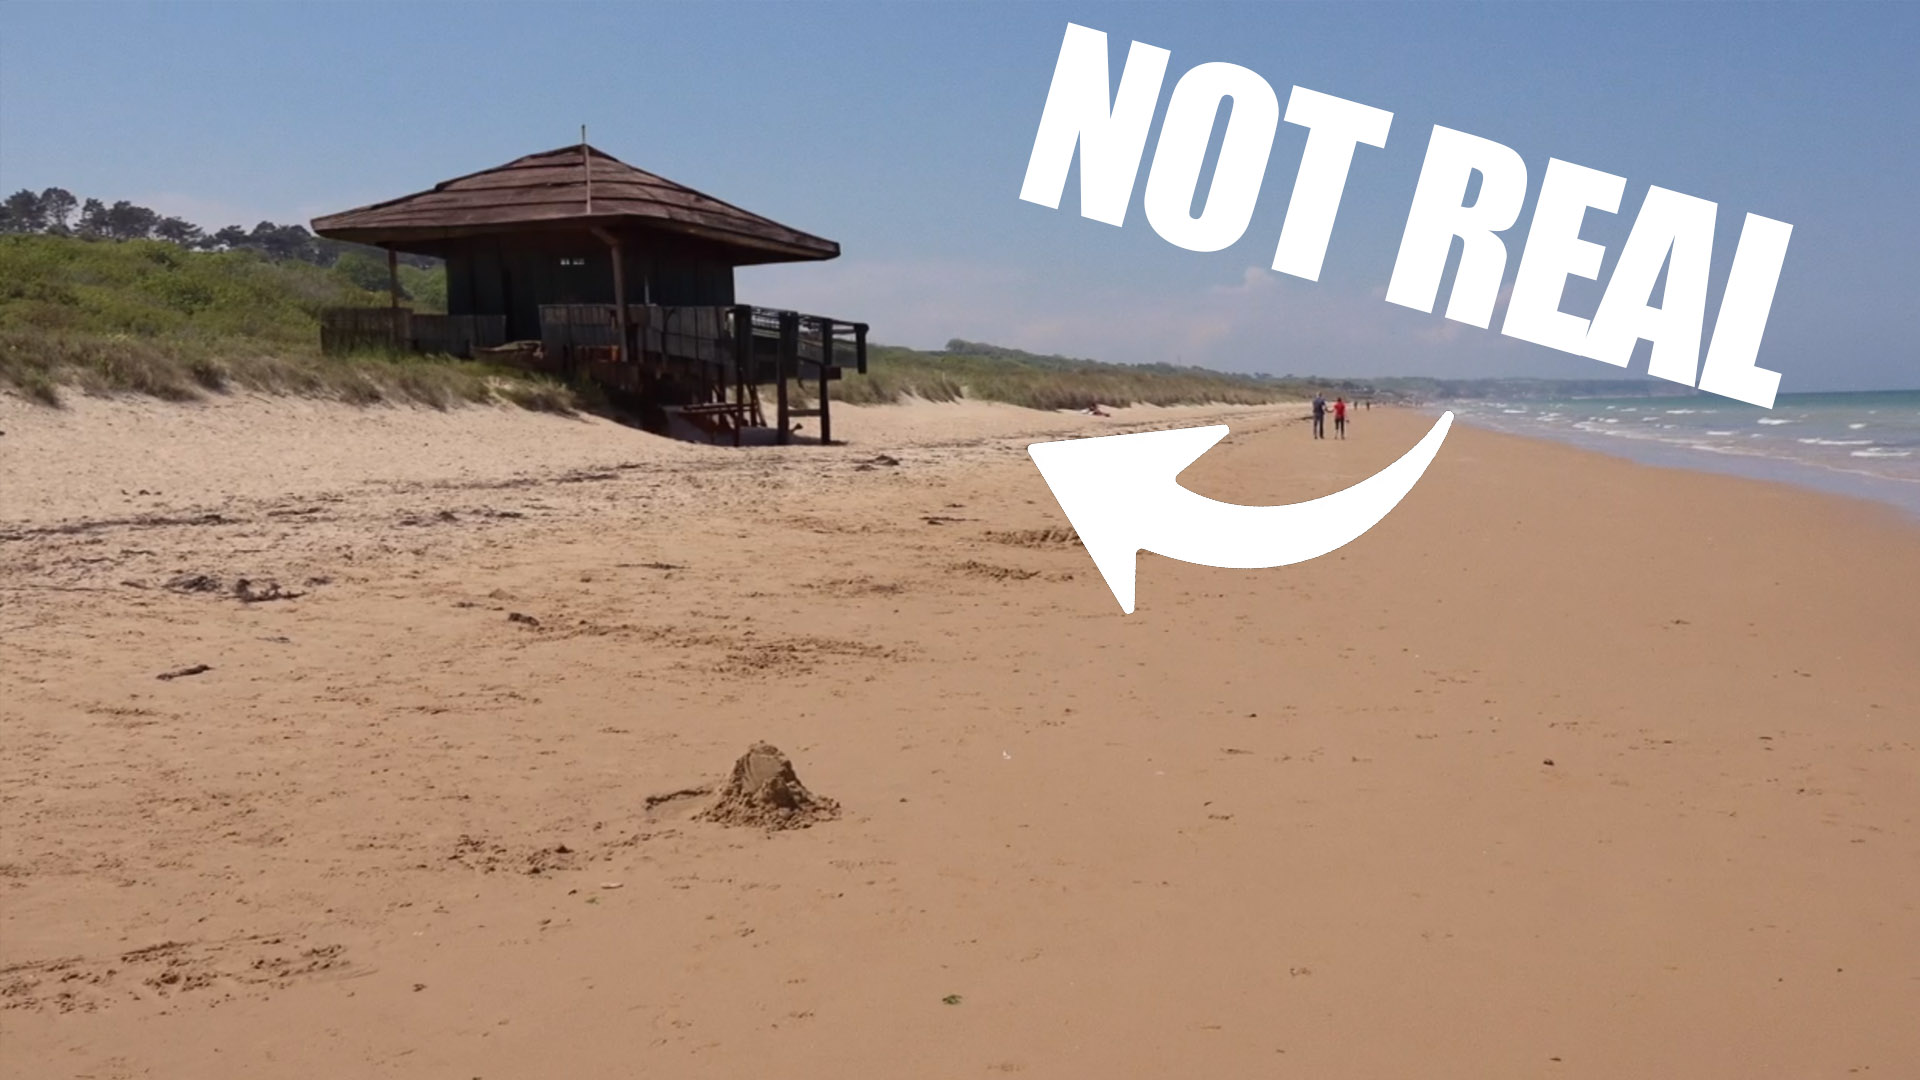
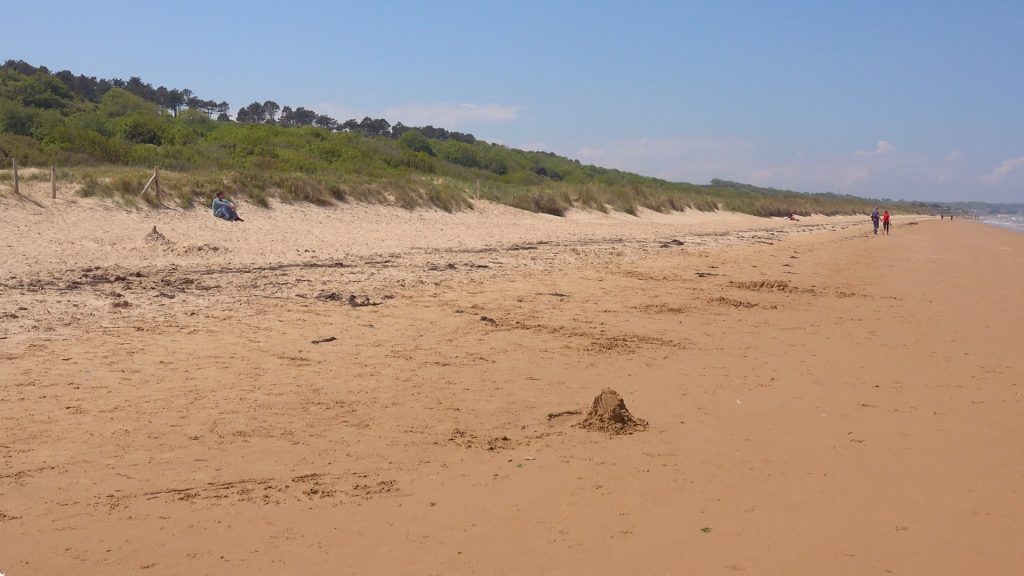
In the video, I’m using a clip from the Videvo library, showcasing Omaha Beach in Normandy, France—where the Allied Forces began their D-Day assault. But what if I wanted this scene to resemble California instead of Normandy? I’m picturing a wooden lifeguard beach hut on the sand banks to help sell this location. It’s essential to note that this is a pan shot. The camera pans right, moving past landmarks like sandbanks.
We’ll start at the frame where I want the beach hut to appear to export a still image. First, always ensure you’re working in the highest resolution to capture a still image from the video. The timeline is currently set at 1080, but I know this is a 4K clip. So, I’ll adjust the resolution to 4K.
For DaVinci Resolve users, navigate to the color page, and select “grab still.” Then, in the gallery, find your image and hit export. For those using Premiere Pro, look for the snapshot icon (resembling a camera) and click it to capture your still. Once you have your image, it’s time for Photoshop Beta.
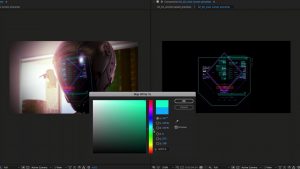
For those already acquainted with Photoshop’s generative fill, you might find this next part redundant. However, if you’re new, let me break it down. Make a selection using the Marquee or pen tool. I want to position a beach hut on the banks, so I’ll define my selected area, choose “generate fill,” input “Beach House made from wood,” and hit “generate.”
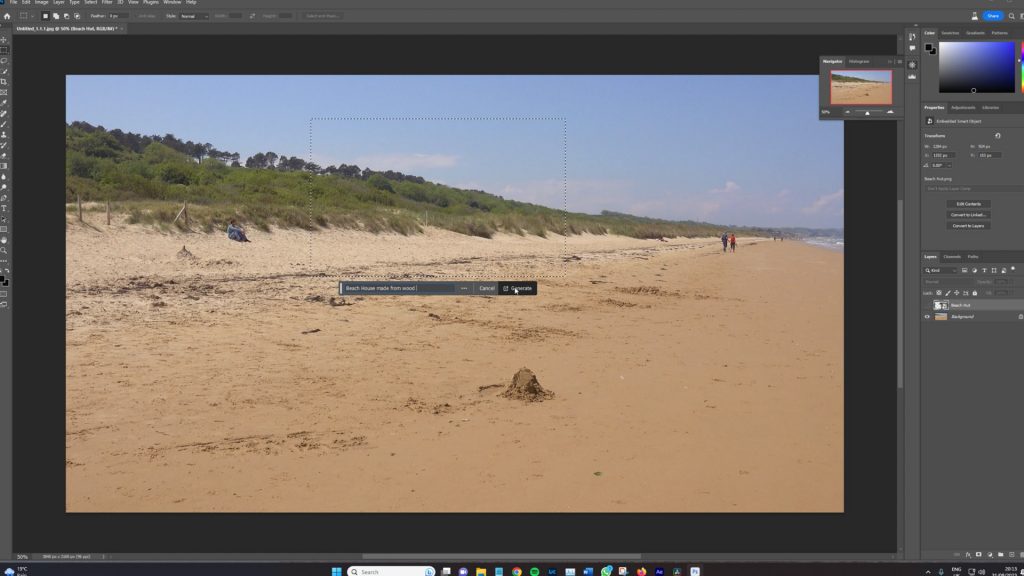
Photoshop’s AI can be unpredictable, so I’ve pre-generated an image as a backup. But looking at these new results, they’re quite impressive. The AI’s ability to blend the embankment with the house is especially noteworthy. After weighing the options, I’ve decided to stick with my pre-generated image due to its seamless integration with the embankment’s shadow.
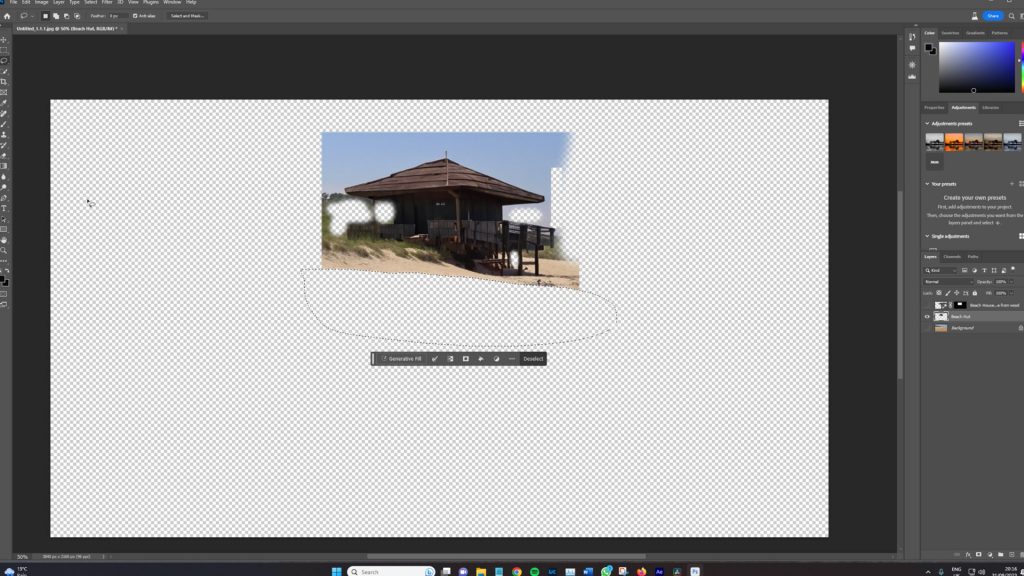
Once you’re content with the generated output — be it a beach hut, car, skyline, or whatever else — disable the background layer. Assess which areas are essential and which aren’t. In my case, I don’t need this extra sand. A bit of feathering and trimming gets the image just right. Now, disable the background, save your edited image as a PNG, and let’s move to Adobe After Effects.
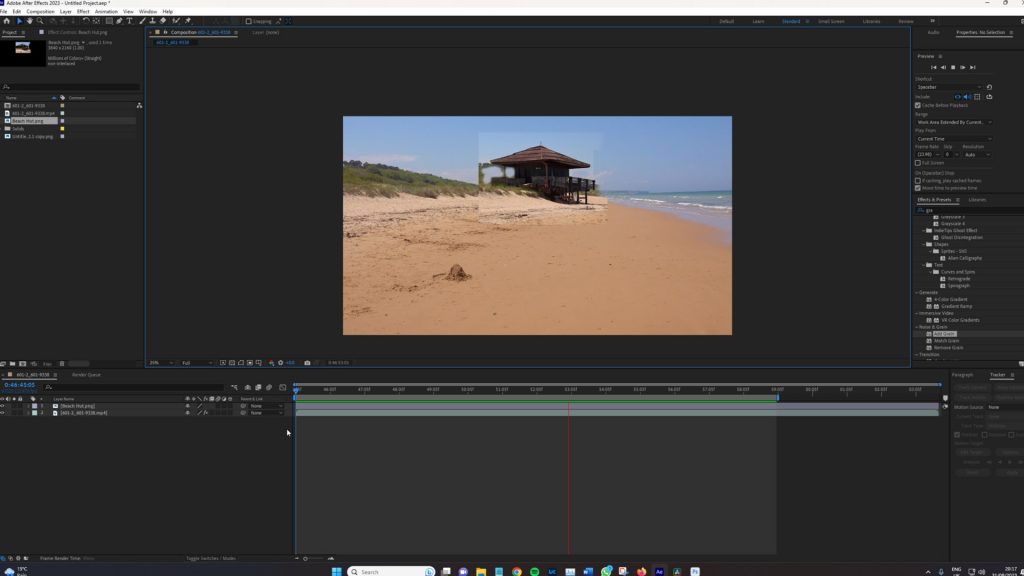
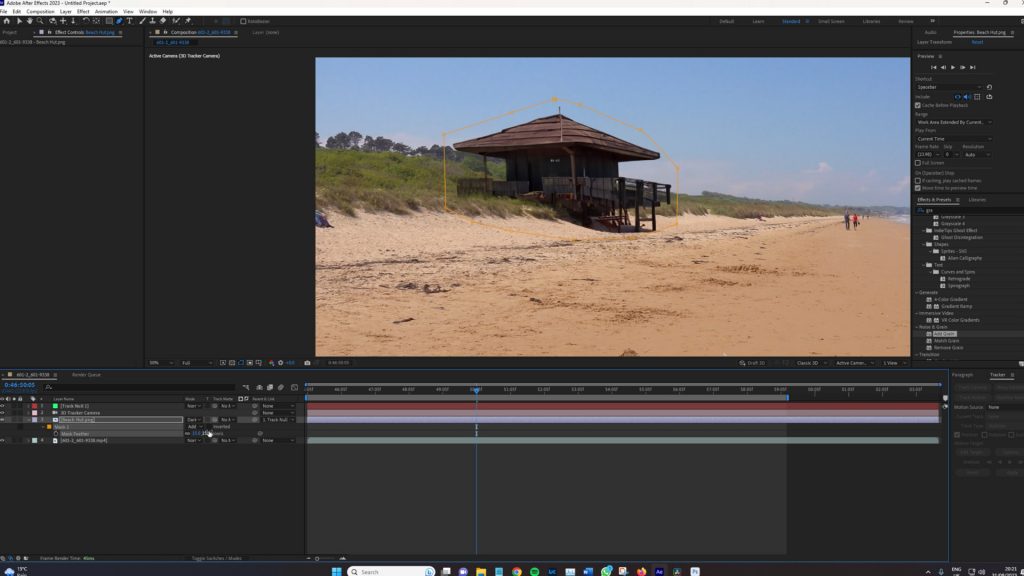
Without any camera tracking, adding our beach hut to the video as-is would look unnatural and jarring; we’re simply adding a still image to our video, which reacts as such.
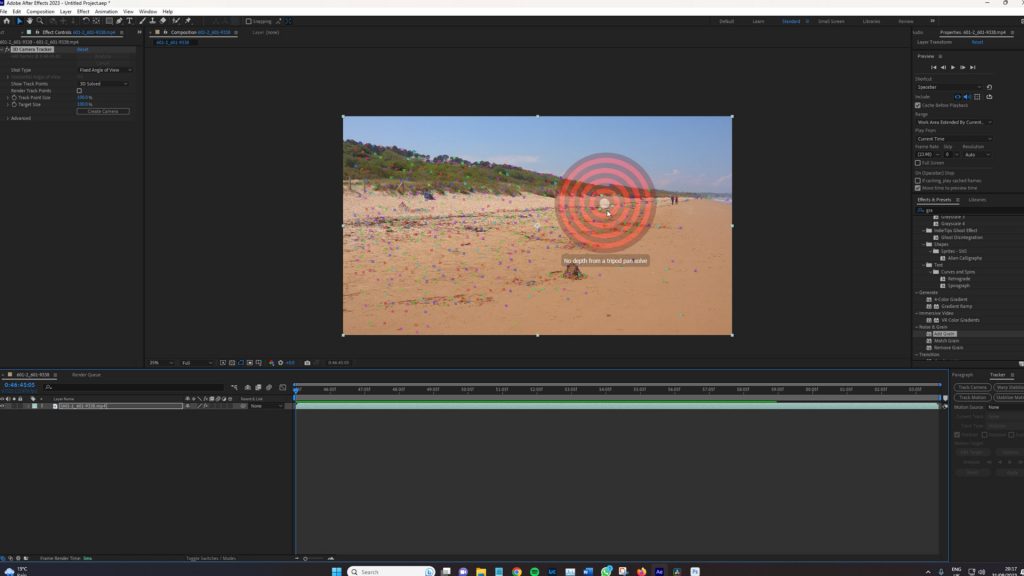
To resolve this, I’ll select the MP4 video file and choose “track camera.” After Effects then analyzes the scene, populating it with consistent track points throughout the clip. By right-clicking and selecting “create null and camera” on the track points near the sandbanks, we introduce a 3D camera and track null.
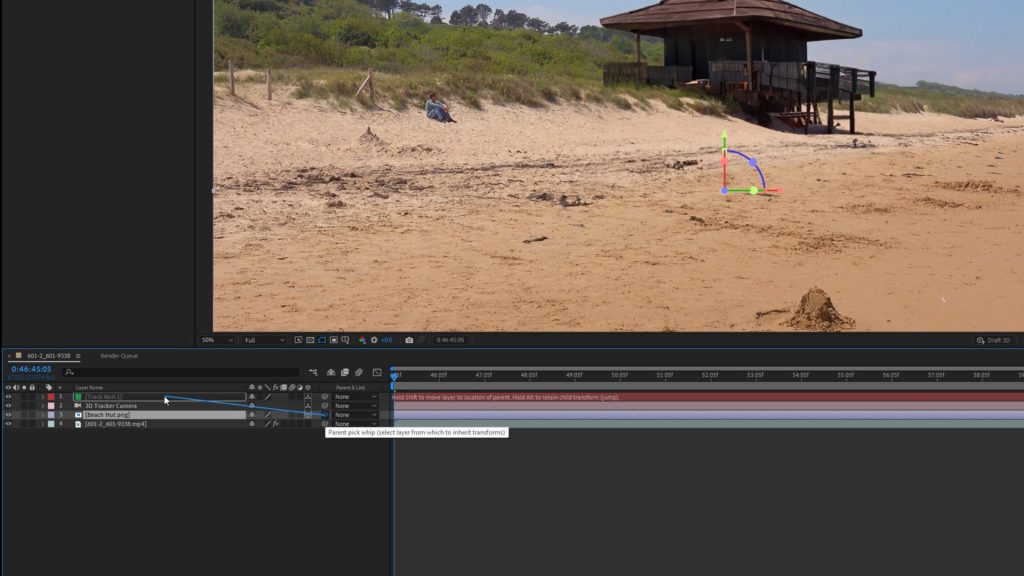
You change the PNG beach hut to a 3D layer, take the pick whip, and parent it to the Null Object. This 3D layering, paired with proper anchoring and parenting techniques, ensures our beach hut maintains its position in the scene.
Now, when play is pressed, the camera pans, and the beach hut remains in place as if it were a natural part of the scene (check the video).
However, as with most VFX tasks, there’s a catch. Being a 3D object, our beach hut can sometimes look out of place as the camera pans due to hue and brightness discrepancies. The solution? Blend modes and masking. We can achieve a near-perfect blend by switching to the “darken” blend mode and creating a mask.
Lastly, I would like to add film grain further to integrate our AI-generated image with the original footage. Using an adjustment layer and selecting a film grain preset can make the final composite even more cohesive. Our Normandy beach scene now feels more like somewhere in Orange County, or at least, how I imagine it (I’ve never been to California).
This was a basic run-through for a right-pan shot. Different camera movements may require additional steps, but you now possess the foundational knowledge to embark on this journey.
We’ve been exploring many AI tools recently and have more to discuss in the future, so make sure you stick around!
Looking for filmmaking tips and tricks? Check out our YouTube channel for tutorials like this . . .