Concept Buddy is a revolutionary AI plugin for After Effects, and it will change your workflow!
In this article, we’ll look at what I consider the best AI plugin on the market for After Effects. It’s called Concept Buddy, developed by BSKL, who also produced DiffuseAE, another After Effects AI plugin we have previously covered.
Concept Buddy introduces a revolutionary design workflow that seamlessly interacts with AI to help you realize your artistic vision while retaining direct user input.
I strongly encourage you to view the accompanying video to appreciate this tutorial fully. The video effectively showcases the dynamic, real-time interaction between the shape layers and the plugin, offering a clear and engaging demonstration of the process. For those who prefer a quick reference or are unable to watch the video, a concise summary is below.
Setting up Your Work Area for Concept Buddy
This guide provides a straightforward approach to using the Concept Buddy plugin in After Effects, ensuring an efficient workflow and correct composition structure. Here’s how you can get started:
- Create a New Composition: start by creating a new composition. Name it “edit.” You have the flexibility to choose your working size, from 1080 x 1080 to 4K or even 8K. Keep in mind that Concept Buddy is GPU-intensive, especially at higher resolutions, which may lead to longer generation times. Ensure your GPU can handle the load.
- Set up a Second Composition: next, name another composition “render.” Ensure that all the settings match those of the “edit” composition.
- Arrange the Workspace: to get both compositions on screen, similar to an NLE timeline with a media panel and timeline viewer on the right side, navigate to the View menu and select “New Viewer.”
- Manage Viewing Panels: unlock the viewing panel by clicking on the padlock icon, then switch to the “render” composition. Lock this setting in place. Repeat the process on the left side for the “edit” composition: choose “edit” and then lock it.
- Integrate Compositions: navigate to the “render” composition in the timeline and import the “edit” comp into it. This step involves bringing the “edit” composition into the timeline of the “render” composition, laying the groundwork for your image creation.

The concept of “foundation” is critical. Unlike platforms like MidJourney or ChatGPT, which generate images from text prompts and may source material inconsistently from other artists, Concept Buddy’s output heavily relies on the concept you, as the user, input. This approach allows for a more controlled and consistent creative process.
Building a Desert Scene
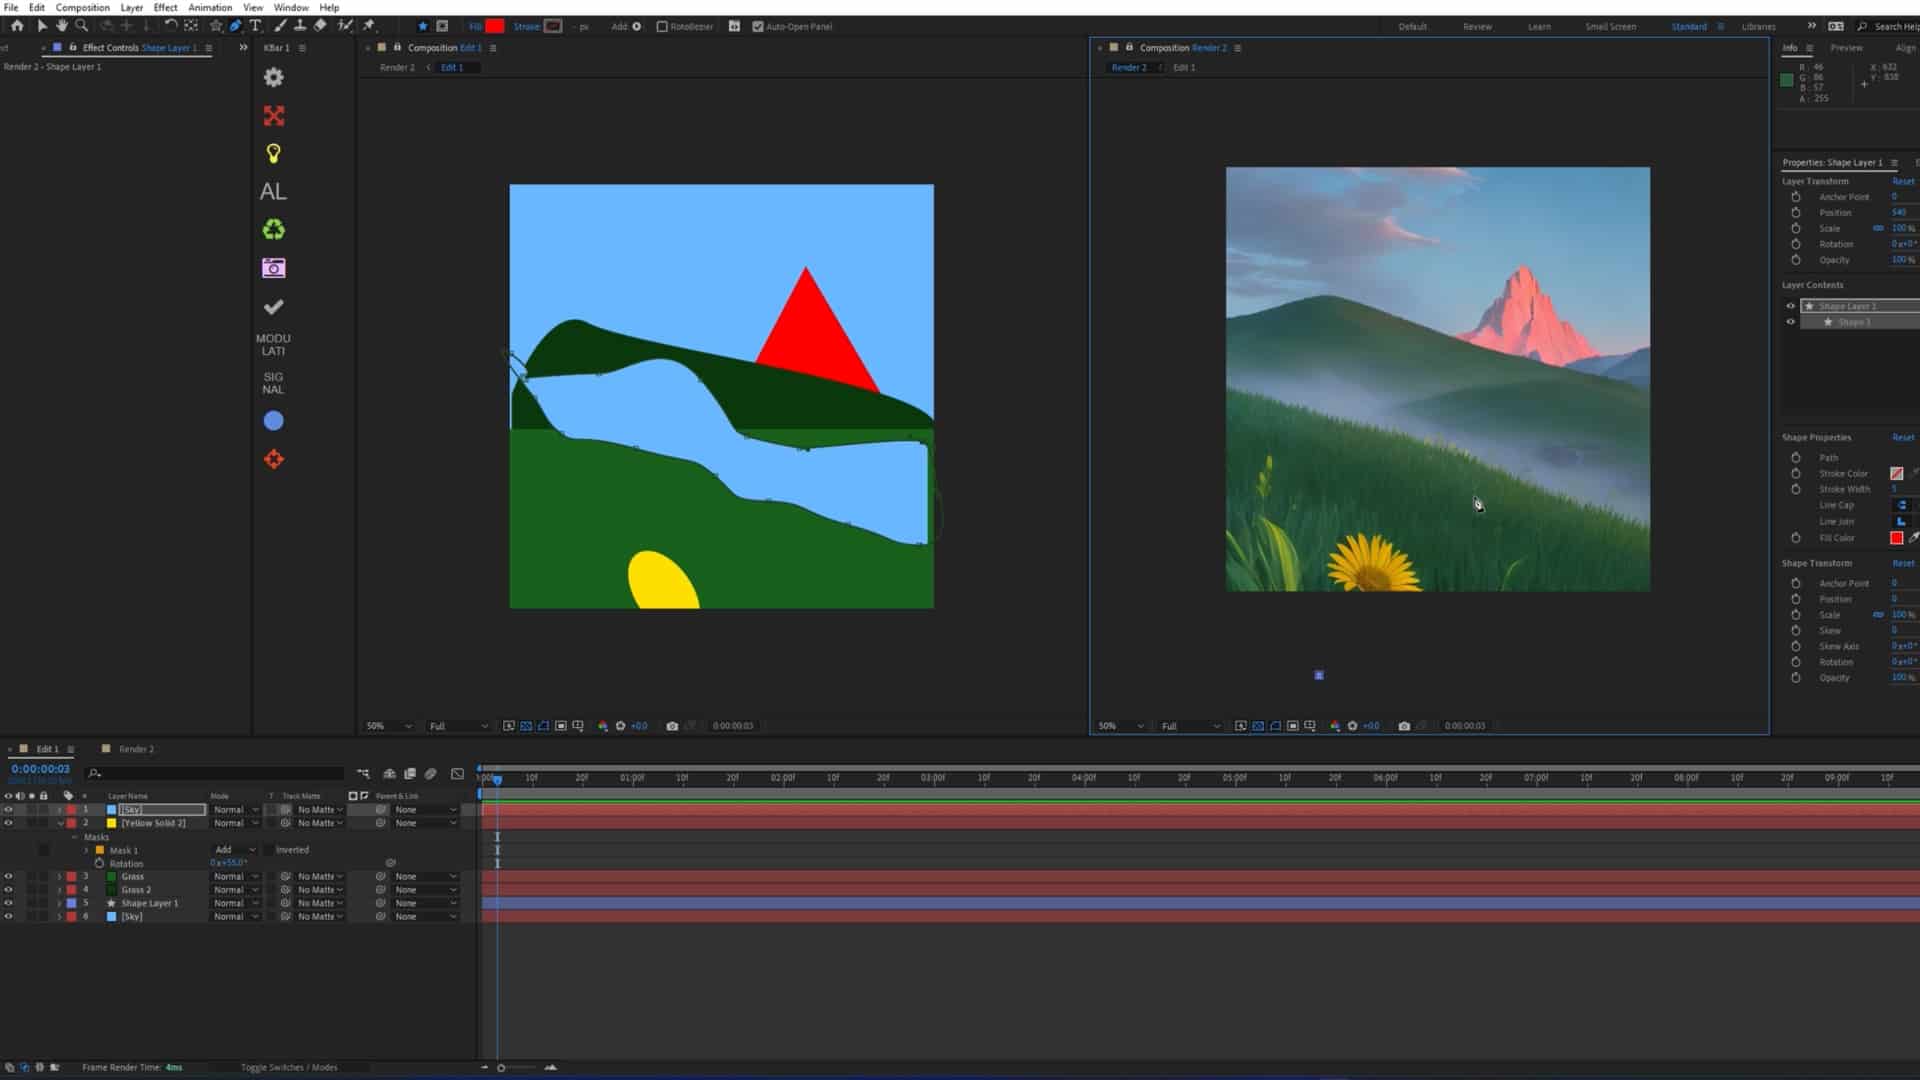
While you can create to your heart’s content, the rundown follows my steps in the tutorial, so let’s create a cactus in the desert at midnight with stars in the sky for this demonstration. We begin this by using solid color layers and shapes. Try to use colors that are general to the landscape you’re creating. Then, we can label each layer accordingly.
- Start with Solid Color Layers and Shapes: begin by selecting solid color layers and shapes that broadly represent the landscape you are aiming to create. This forms the basic structure of your scene.
- Choose and Label Layers: aim for a sandy color for the desert ground, which you can label as “sand.” Don’t worry if it appears too bright initially; it can be adjusted later. Next, create the night sky layer and label it “sky.”
- Add the Cactus: now, it’s time to add a cactus. Use the mask tool to create a slender cactus silhouette and position it against the sky layer.
- Establish the Core Foundation: what you have now is the essential foundation of your image. This stage involves stripping away intricate details and textures, leaving only shapes and colors. Your scene should now include the foundational elements: desert sand, the horizon, the night sky, and a cactus.
- Use Concept Buddy: to bring this scene to life, open the “Effects” panel, navigate to your “render” composition, and integrate Concept Buddy into the “edit” pre-comp in the render timeline. Go to the “edit prompt” section.
- Input and Generate: input the following prompt into Concept Buddy: “cactus in desert sand, midnight sky with stars, photoreal.” This is where the magic happens, as Concept Buddy transforms your foundation.
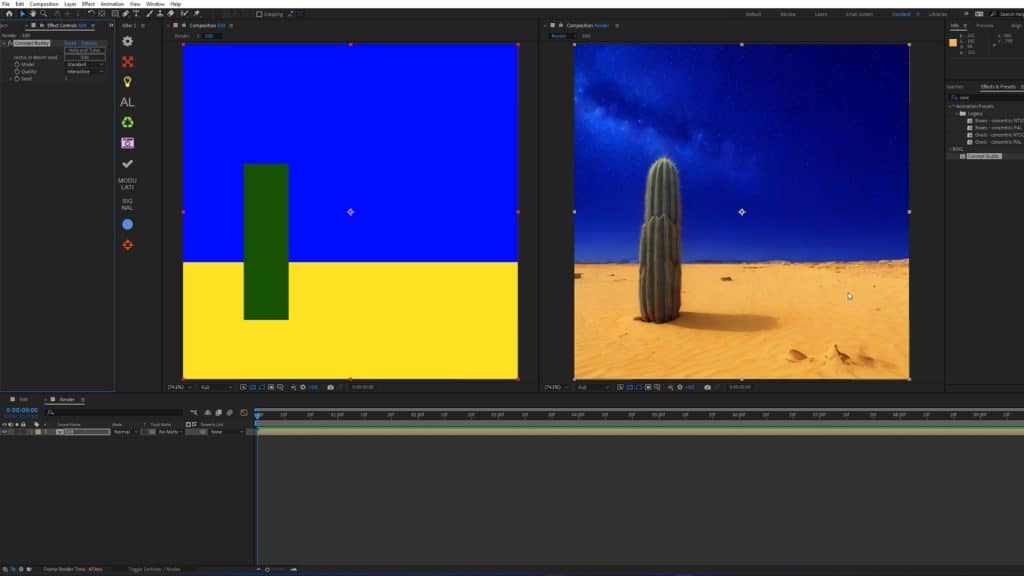
Concept Buddy’s generation is remarkably accurate, following what you’ve drawn in the “edit” composition. If you’re looking to change the position of the cactus, it’s as simple as moving it to a different location within the composition. Pay attention to how the cactus, sand, and midnight sky align at the horizon — it all reflects the foundational layout established in the “edit” composition.
Wondering if you need to create a new prompt to adjust the cactus’s position? The answer is no. Select the cactus and move it wherever you desire. If you want more sky or sand, adjust their positions accordingly — move the sky up to reveal more sand or bring it down for less. Concept Buddy dynamically generates the scene based on these changes.
Color plays a crucial role in this process. For instance, the sand might initially appear too bright for your liking. To adjust, navigate to the solid settings, select the color option, and choose a darker hue. The result? The sand now accurately reflects the night’s ambiance. Similarly, if the sky seems overly saturated, lower its brightness in the solid settings.
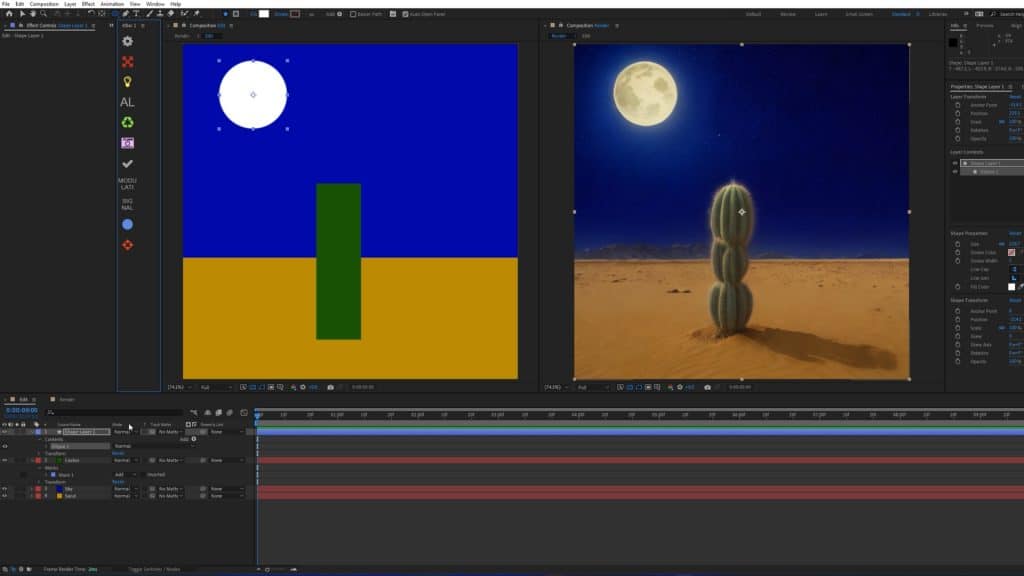
Adding more elements to your composition is equally straightforward with Concept Buddy. Want another cactus? Duplicate the layer, and voila — two cactuses. Or introduce something entirely new. For example, using the shape tool to add a white moon to the night sky brings a new element into play. However, reducing the moon’s scale might cause Concept Buddy to interpret it as a nebula or galaxy due to the absence of a moon in the original prompt. To correct this, update the prompt to include “with moon and stars.” The result is a beautifully composed night sky with a moon, enhancing the overall aesthetics of your creation.
And for me, this makes it one of the most intuitive plugins on the market, not only for After Effects but AI image generation in general.
Concept Buddy Overview
So, let’s have a look at the Concept Buddy plugin itself.
- Editing Tools Section:
- This section includes options for prompts and model selection.
- The “XL Option” is available, which accesses a larger database for more extensive generation possibilities. Note that using XL requires a more powerful PC.
- Quality Settings:
- “Polished”: select this for a more realistic rendition of your compositions.
- Seed Functionality:
- This feature bases the generation on different seeds derived from the “edit” composition.
- An extensive range of seeds is available, allowing for diverse outcomes.
- If the initial result doesn’t meet your needs, you can change the seed to alter the generation.
- Advanced Settings:
- Gain more control over the environment and the realism of the scene.
- “Strength”: this setting draws from the “edit” layer’s guidance. Adjusting the strength can increase or decrease the influence of AI generation on your composition.
- The reflectiveness of layers and shapes in the act sequence can be fine-tuned here.
- The strength setting can often be ramped up to 100 for significant effect.
In essence, Concept Buddy isn’t just another plugin; it’s a testament to the evolving synergy between human creativity and artificial intelligence. Whether you’re a seasoned professional or an enthusiastic beginner, this tool opens up a realm of possibilities, allowing your artistic flair to flourish without technical constraints.
And it’s not just built around shapes, you can use pre-exisiting assets to build a matte painting that may previously have been out of your expertise. Just like this example.
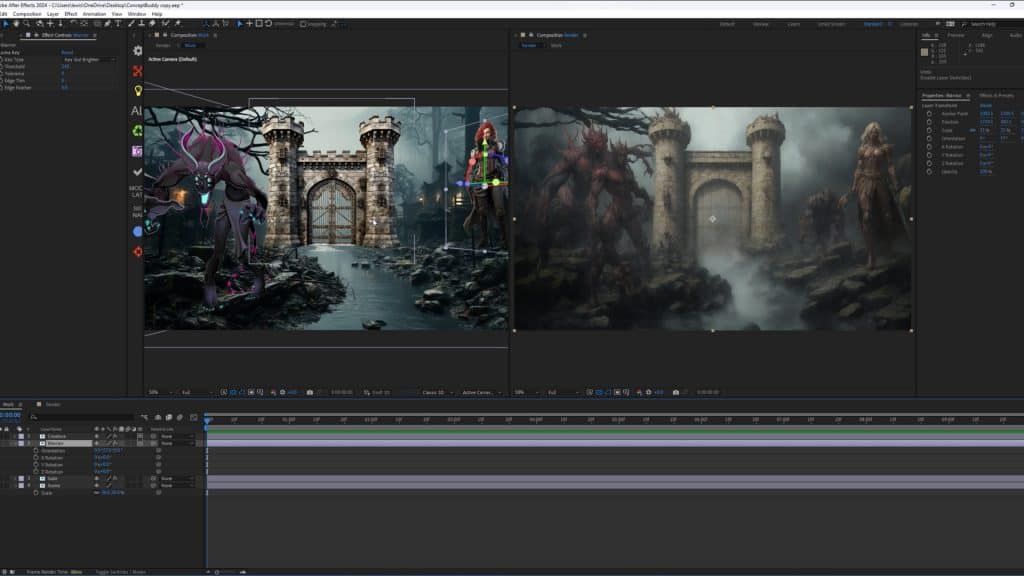
Want to see how that was done? Watch the video 😉
Looking for filmmaking tips and tricks? Check out our YouTube channel for tutorials like this . . .