
Need to put some polish on your dialogue audio? Here’s how to get started with EQ.
Need some tips for using EQ on dialogue audio? In this article, we’ll discuss some audio editing tips that will up your game when it comes to enhancing your dialogue. Understanding the core basics of the frequency ranges in correlation to the voice, and what types of filters to use, will result in professional-sounding dialogue in no time.
What Is EQ?
Equalization (also known as EQ) is an audio effect where frequencies can be manipulated to shape the sound signal. EQ can change the volume of frequency regions, either boosting certain bands or removing them completely.
EQ is commonly used to tackle issues like low-end rumble, resonant frequencies, sibilance and plosives which can improve clarity. Additionally, certain frequencies can be boosted to enhance the natural tone of your voice.
The best EQ to use is parametric EQ as this allows continuous control over the audio’s frequency content which is divided into bands or regions. In your DAW, there will be a stock EQ plug-in that is perfectly fine to use. Some may opt to purchase a third-party EQ as they tend to offer better features for better results. However, if you’re just starting out, then using what is available will work just fine.
Frequency Regions and Filters
It’s important to understand the different frequency regions in the spectrum and how they correlate with dialogue audio. Furthermore, when using EQ, you’ll need to use filters to cut away or enhance frequency ranges.
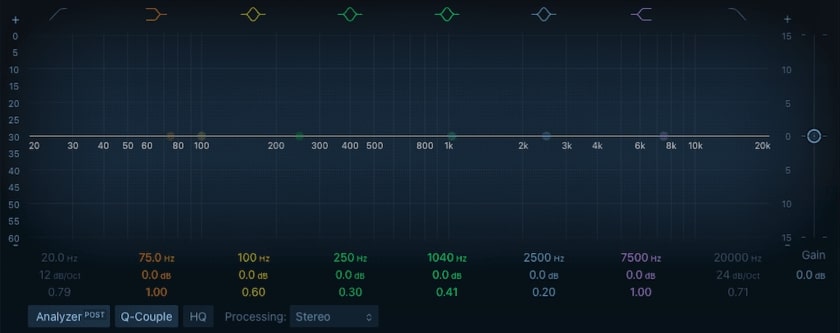
Generally, the EQ frequency spectrum will provide you with several filter dots, which will be placed in different frequency regions. These include the following:
- Low-End (20Hz – 250Hz)
- Low-Mids (250Hz – 500Hz)
- Mids (500Hz – 2kHz)
- High-Mids (2kHz – 4kHz)
- High-End (4kHz and beyond)
When you initially approach using EQ on dialogue, applying a High Pass Filter is an essential start. This type of filter deals with the low-end frequencies where rumble noise or plosives can occur.
High Pass Filters also have different slope options. This indicates how steep the filter slope is for either more subtle or aggressive filtering. The two most common slope types are -12dB/octave and -24dB/octave. The lower the number, the steeper the slope. For dialogue, setting a high pass filter at around 80Hz with a -12dB slope is a good starting point for handling low-end rumble.
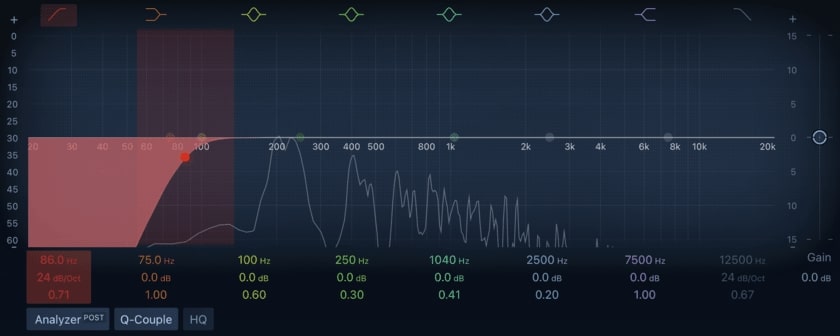
For handling plosives, the “p” sounds in vocals, setting a high pass filter up to 120Hz with a -24dB slope will significantly reduce this, but be careful not to cut too much as this can affect the voice’s natural low-end.
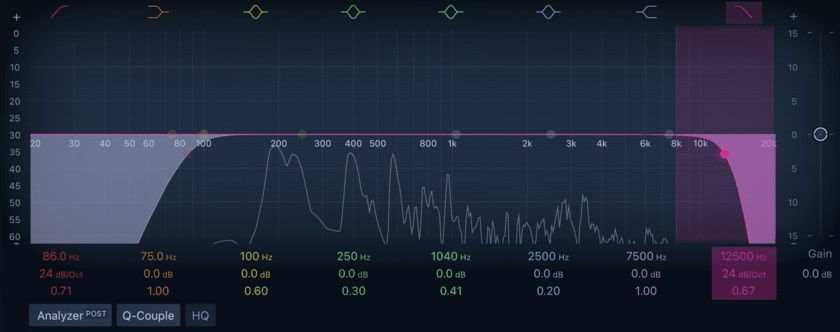
The next filter you may need to apply is a Low Pass Filter. This type of filter deals with high-end frequencies where harsher sounds tend to appear, as well as unnecessary audio information that isn’t warranted. Setting a low pass filter at around 12kHz is fine, but be sure not to set this too far towards the high-mids, as this can affect the raw tone of the dialogue.
Here’s a great video from Tom Efinger explaining the core basics of dialogue EQ.
Bell-Shape Filters and Notch Filtering
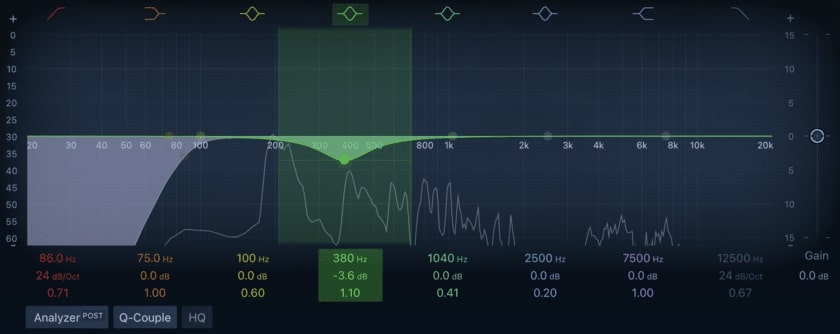
Once you have applied the high and low pass filters, you can get more precise by using bell-shaped filters. This is where we take one of the filter dots to drag down and attenuate any audio signal. The wider the bell shape, the more natural the effect will be. We can also use these to raise the gain if areas need enhancing.
For dialogue, use this bell-shape filter in the low-mid region. This particular region tends to make the audio signal sound muddy or thick. This can be due to room resonance.
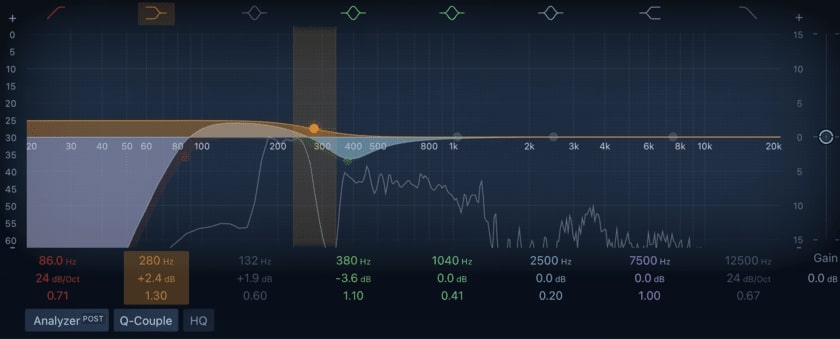
We can fix this by dragging the low-mid filter dot down to around -5dB and sweeping it around the low-mid region, between 250Hz to 500Hz while listening to the audio to find the sweet spot to clear up the muddiness. We can do the opposite here by raising it ever so slightly to provide more body to the bass.
We can use bell-shaped filters more aggressively by increasing the Q factor, which will narrow the bell shape. This is great for isolating room resonance in specific frequency areas and decreasing them with a more surgical approach. We can do this by dragging the filter dot upward to increase the gain and then sweeping through the frequency spectrum to locate the problem areas. Once we find them, simply drag this down to reduce the gain more substantially.
In The Mix has an insightful video that explores dialogue EQ, with demonstrations of each frequency region and key techniques to deal with unwanted resonances as a consequence of the type of room you record in.
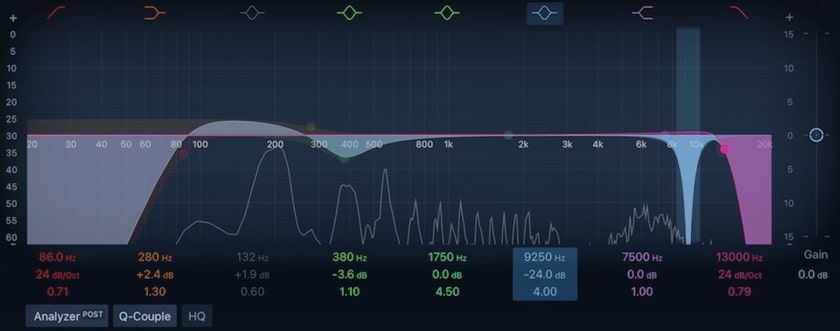
Equalizers can also completely remove specific frequencies from dialogue audio by using notch filtering. This can also be beneficial for tackling room resonance, as well as sibilance — the “s” sounds found in vocals. In this case, you’d want to focus on the high-end region. Additionally, increasing the Q factor on a notch filter can remove more precise frequency information.
Low-Shelf and High-Shelf
Sometimes, the lower end of the signal may sound too thin. However, using a bell shape to boost this area may expose unwanted nearby high frequencies, which can contribute to the muddiness. If you only want to enhance some low-end without raising the nearby higher frequencies, using a low-shelf shape will wager better results.
A general shelf filter almost resembles a “shelf” where it flattens out at a certain dB level, different from the pass filters that are continuous slopes up or down. A low-shelf favors lower frequencies that need boosting while attenuating higher frequencies nearby. You can change the steepness of the shelf by increasing the Q factor of the slope. This will have a more aggressive effect. Be careful with this — a subtle approach here tends to be more sufficient.
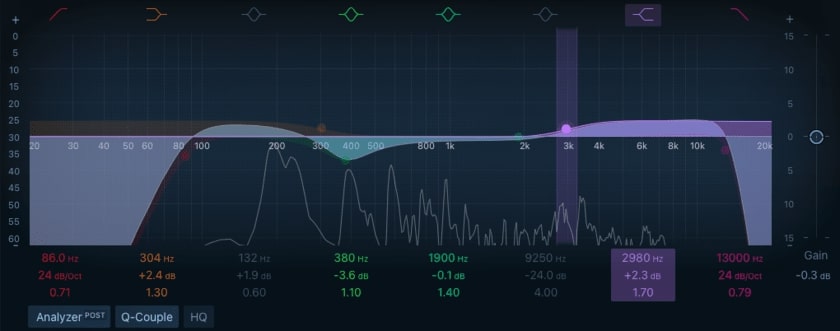
Other than low-shelf filters, using a high-shelf in the high-mid regions can be beneficial for saving dull-sounding dialogue. However, cranking up this area can bring out harshness that will hinder the overall sound. Don’t get too excited!
Trust Your Ears
It’s important to remember to not overdo the EQ process as this can affect the overall natural tone of the voice. Trust your ears to help when adjusting frequency bands. A good technique to use is to look away from the parametric EQ graph and truly listen.
While EQ can effectively touch up your dialogue, recording in the right conditions in a controlled environment will make the EQ process much smoother. Eliminating noise with EQ is difficult as it can affect the natural tone of the voice.
Fortunately, some plug-ins exclusively deal with this, but taking the necessary precautions will ensure that the EQ process is primarily for strengthening the quality of the human voice.
Cover image via Freepik.
Looking for filmmaking tips and tricks? Check out our YouTube channel for tutorials like this . . .