Instagram Reels can be great sources of creative inspiration. Here’s how you can recreate those effects.
Recently, while browsing Instagram, I came across a very intriguing reel. Sometimes the algorithm can present you with nothing more than influencer rubbish, and other times, depending on your interaction history, you may get something more tailored to your tastes.
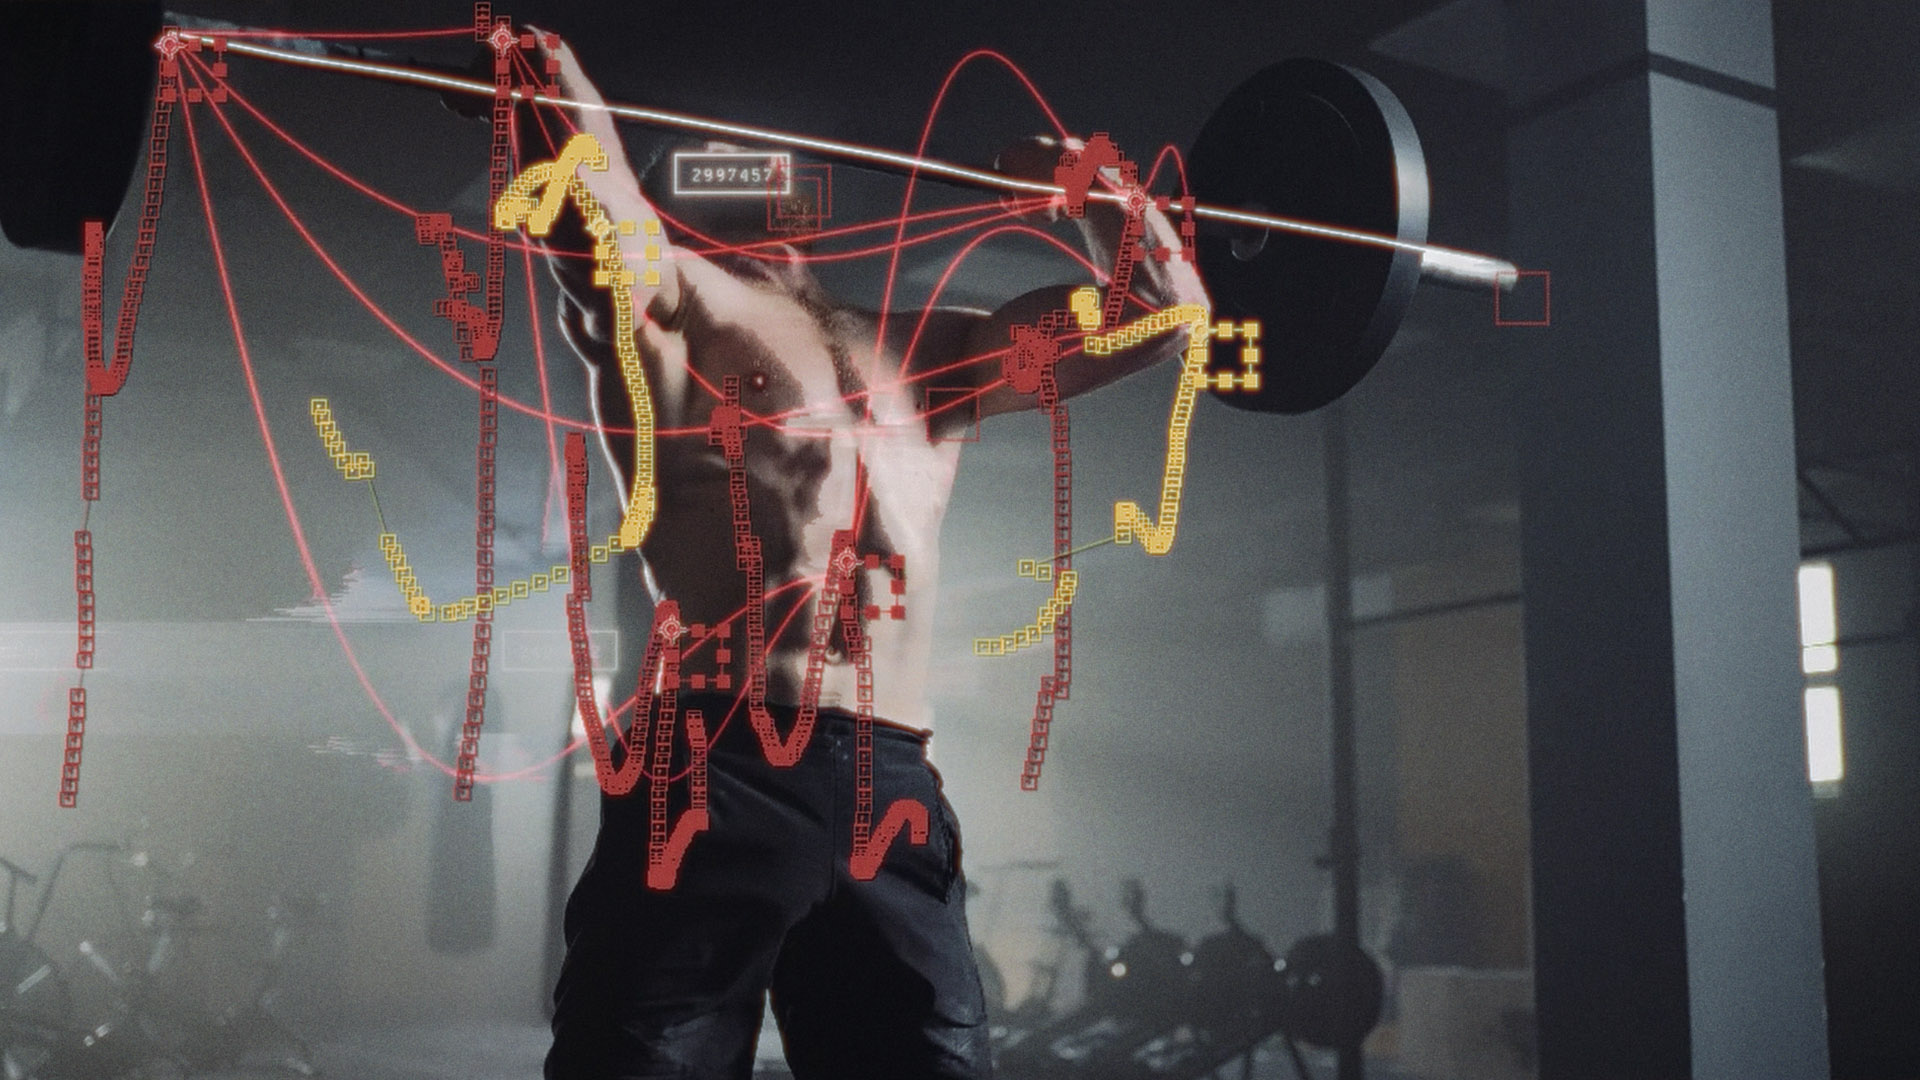
So, what is it? Well, I’m not too sure. But my favorite cinematographer, Emmanuel Lubezki, who is a back-to-back-to-back Oscar winner, liked the post too. It’s almost as if there is a collection of data points scrambling around the image, presenting movement lines in a split second, with numerical data related to the movement within that area flickering on-screen, too.
It’s like the AI CCTV footage we see where pedestrians are scanned, and their facial features are recognized — mixed with LSD. Whatever it is, and however you want to describe it, it’s very cool. And I wanted to replicate the effect — for whatever reason.
Decoding the Creative Process
However, to the dismay of the hundreds of Instagram commenters asking “How did you do this?” it seems the Instagram creator is quite reluctant to share his method. So that’s where we come in. Initially, as decoded by some on Reddit, it’s created through software called Touch Designer. The software looks like it has a steep learning curve and also a steep entry price ($300).
A Step-by-Step Guide to Replication
So, I’ll show how to do this in After Effects today, using a few plug-ins. First, you will want to select a clip with a lot of interactive movement. You can browse the Videvo library to find your perfect clip for this. I’ve downloaded this clip of a weightlifter, and as he is doing a compound movement, there is a ton of interconnecting movement between his joints, perfect for this effect.
Tracking and Creating Movement
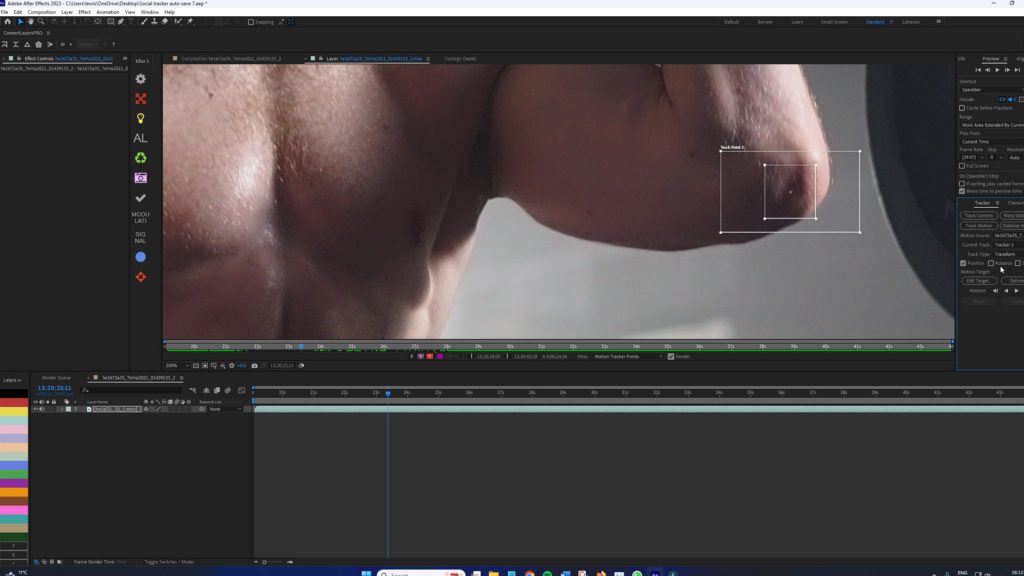
First, identify the individual components that would work well together, and then head to the tracking tab. You’re going to want to track the motion of that area. Once complete, create a new null layer, and properly name the null so it doesn’t get lost.
Do this as many times as you can in order to create a good-looking network of movement analysis. After tracking 14 areas of connectivity and applying them to individual nulls, I’m now ready to move to the next step.
Enhancing with Premium Plug-Ins
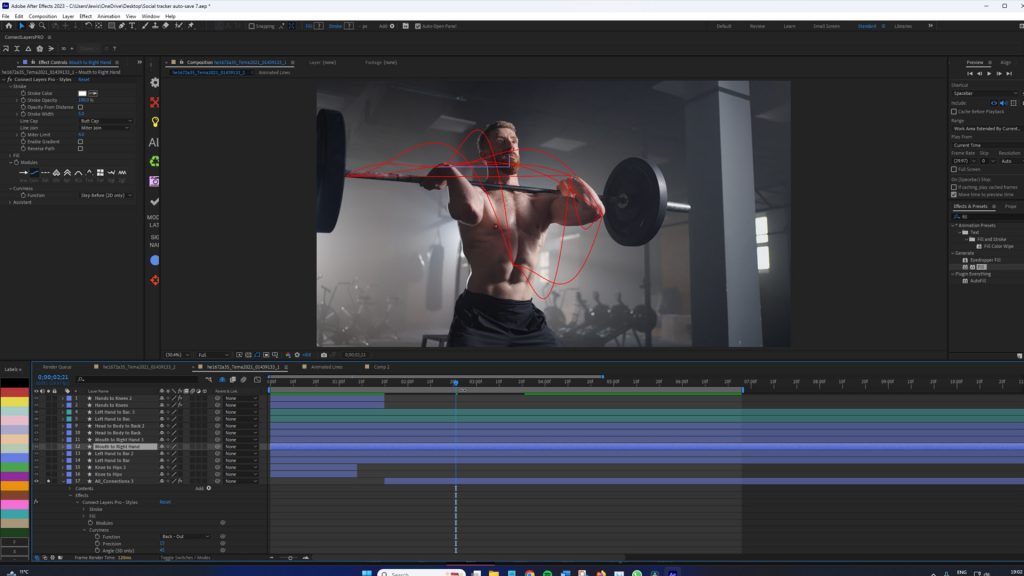
We’re now introducing our initial premium plug-in known as Connect Layers Pro.
Priced at $50, this plug-in empowers you to link your After Effects layers using lines dynamically. Easily generate ropes, spanning trees, and triangulations with just one click!
With our null layers, we now need to select corresponding pairs, triplets, or even multiple connection points to connect. As long as it makes logical sense.
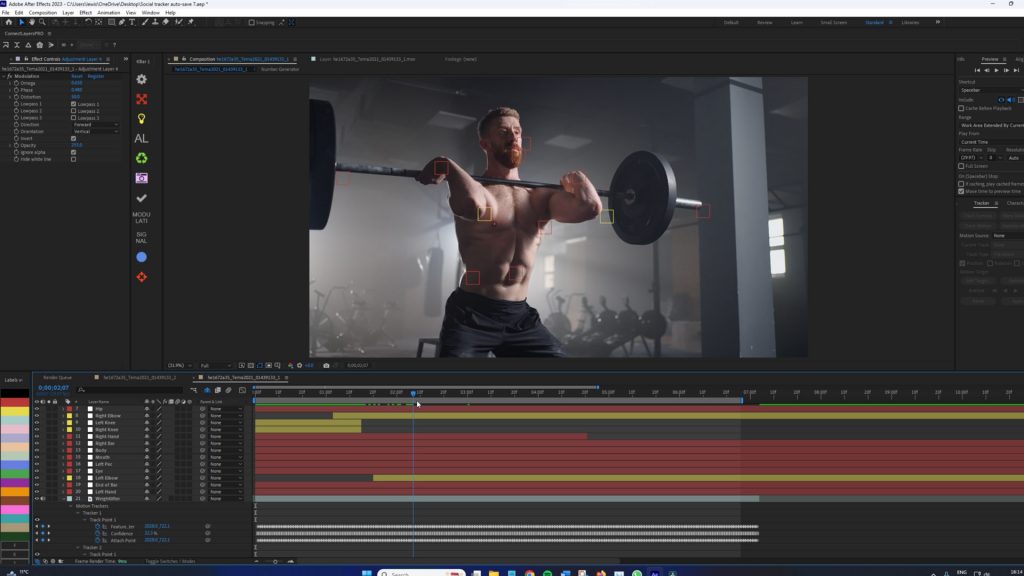
For example, connecting the elbows to the wrists, the hands to the bar, and the head to the lower back and core. Initially, we’re just going to create a simple chain.
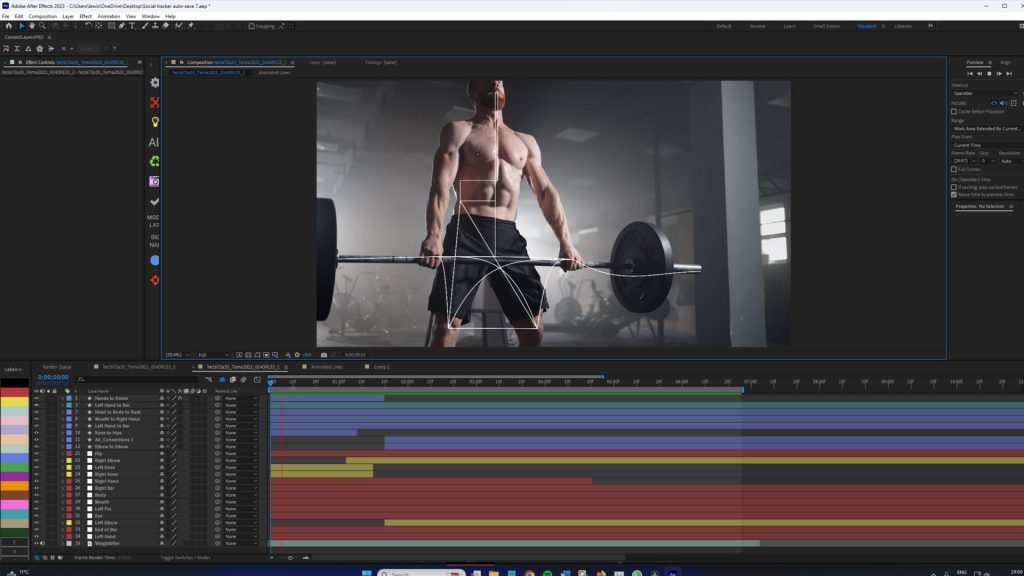
With your connections made, duplicate the layers, change the duplicated layer line type to curve, and use the Back Out preset. The duplicated layer will have a stretchable rope line attached to it. Add the fill effect on all layers to change the curvy lines to red. Next, you need to separate the duplicated layers and pair them with a connection module that is different from the duplicate. For example, I have the knee-to-knee layer here, and I will pair it to the mouth and lower back.
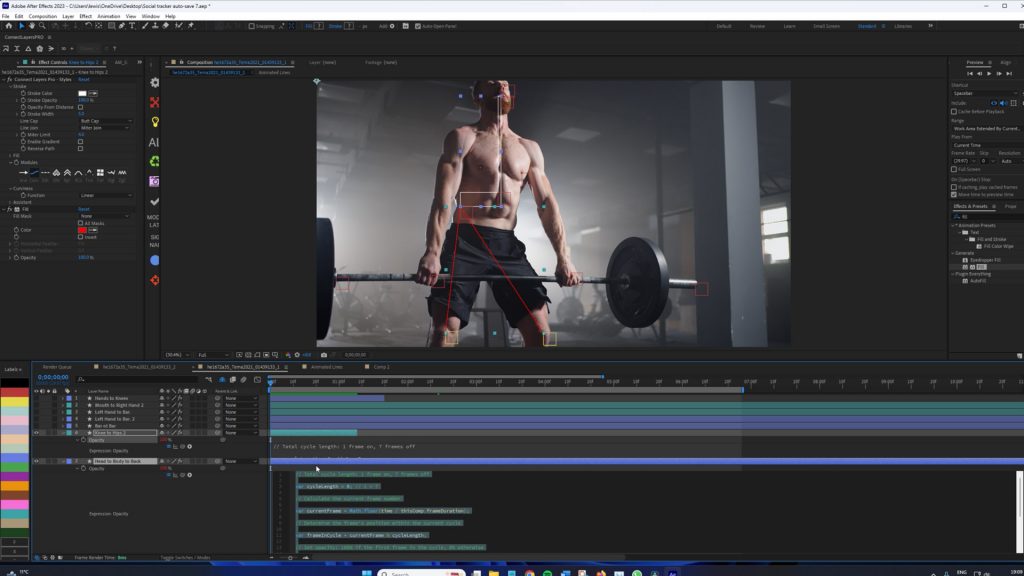
With the layers correctly positioned, I now want them to appear sequentially, one frame at a time, in the selected pairs. One straight line, and one curved line, each from different connection modules. To do this, you want to hit opacity, and hold alt while selecting the stopwatch to bring up the expression panel.
You can then paste this code into the panel. Of course, replace the code with the numerical values that makes sense to you.
// Total cycle length: 1 frame on, 7 frames off
var cycleLength = 8; // 1 + 7
// Calculate the current frame number
var currentFrame = Math.floor(time / thisComp.frameDuration);
// Determine the frame’s position within the current cycle
var frameInCycle = currentFrame % cycleLength;
// Set opacity: 100% if the first frame in the cycle, 0% otherwise
if (frameInCycle == 0) {
100; // visible for 1 frame
} else {
0; // invisible for the next 7 frames
}
In my case, I have 14 layers, 7 of which are duplicated, I want the paired layers to last just one frame, and then vanish for the next 6 — this to occur for every paired connection module. In turn, it will create a sequential loop across all layers with each pair just lasting one frame, 7 frames in total. Again, this will differ depending on how many loops. This expression will do that. It’s important to trim the layers above to start one frame forward to keep the loop working. It will look like this when complete.
Finalizing Your Dynamic Visuals
Next, create a small rectangle, and then make a text layer with several random numbers, and ensure the text layer is inside the rectangle. Open the source text parameters and insert the following expression.
seed = Math.floor(time * thisComp.frameDuration * 1000); // Seed based on time
seedRandom(seed, true); // Seed the random function to change every frame
randomValue = Math.floor(random(1000, 9999999)); // Generates a random number between 1000 and 9999
randomValue.toString();
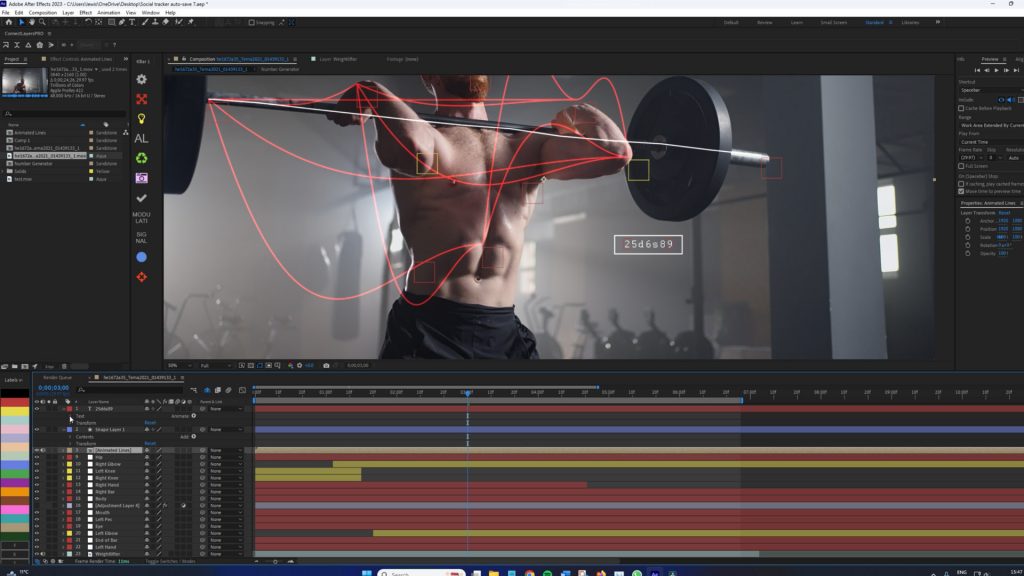
This will generate a continuous figure of numbers. Pre-compose the numbers and rectangles, and then duplicate the composition several times. You can then give the compositions different names relating to certain connections in the primary composition; now, offset each composition so the number sequence starts at a different point.
Then, move the composition to the related connection point. Parent the pre-composed rectangle and numbers to the null object of that region, and now the rectangle filled with generating numbers will move with that area.
Adding the Finishing Touches
At this point, we could consider the effect complete, as it bears a number of similarities to the original Instagram reel. However, there are a few more things we can consider. The first is to add a series of glitch effects to the video. As to what glitch, that is at your discretion. I have added Pixel Sorter and a few frames of Modulation.
But one thing that I feel looks really good is when we also see the tracking path of the null object. To render this information out, we’re going to need to use another third-party plug-in. Do not fret, however, as it is only a $12 plug-in called Cyclops.
When installed, you can open up the extension, select your null objects, and then select render. It will then deliver a composition version with detailed After Effects information.
Well, there you have it, folks — I think I lost my mind creating this one. It’s quite the journey from scrolling past endless feeds to creating something that might just stop others in their tracks. Remember, while the tools and techniques might seem daunting at first, every viral reel started as a simple idea in someone’s mind. So, dive in, experiment, and let your creativity run wild. Even if you don’t get exactly close to the original concept, you’ve now added something slightly unique to your toolkit.
Looking for filmmaking tips and tricks? Check out our YouTube channel for tutorials like this . . .