Shooting videos with the perfect lighting is a skill that takes years to master. You will hear many seasoned videographers talk about the exhaustive efforts they had to put in to get better at lighting.
While all of this can certainly be intimidating, the good thing is that you can light your shots in a better way by practicing some general techniques. Some of the most high-profile filmmakers use these techniques to obtain the best possible lighting for their footage. To know what these techniques are and how you can incorporate them in your work, keep reading along!
Why is Good Lighting Crucial?
Budding videographers follow this absurd new trend of neglecting lighting setups, thinking that they would adjust all of it at once in the post-processing phase. Post-processing has made our lives easy and is capable of transforming raw footage into cinematic videos. However, nothing can beat the quality of a video recorded with professional lighting setups and thoughtful placement of the cameras.
The most important reason you need to focus on lighting before the camera starts rolling is that the camera lens sees the subject differently than the human eye. So even when you feel that the subject is well illuminated, the footage recorded by your camera might show abnormal brightness or dull points in the frame.
Cameras do not necessarily require brighter lights to bring the subject into focus. Instead, it is more important to place the source of light in the right direction so that the illumination of the frame is ideal. All of this requires a lot of preparation, without which you will never get your desired footage. Hence, it is essential to adjust the lighting so that the camera records what you want it to record.

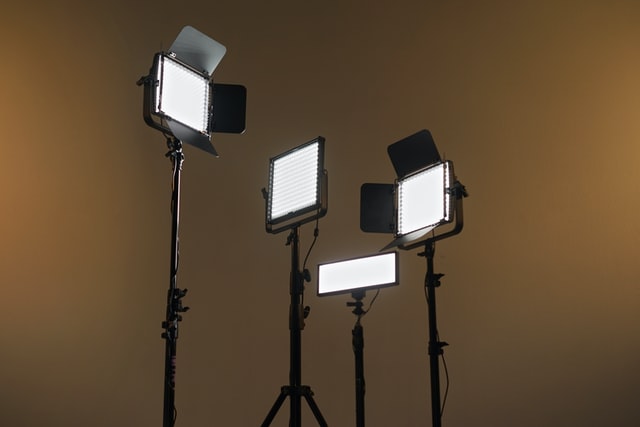
Continuous Lights vs Other Lights
Continuous lights have to be used more often than not to adjust the brightness while shooting. Continuous lights are considered better than several other types of lights like spotlights, flashlights, and strobes. These lights do not flicker or cut the light intensity at any point, thereby maintaining consistency in every frame.
While selecting a continuous light source, you should ensure that the lamp or the light panel offers a wide color temperature range. This will allow you to switch between warm and cool light color options as and when required.
Secondly, you should always purchase modifiers with the continuous light source that you select. These modifiers will help you to soften the brightness and the texture of the light, depending on the kind of atmosphere you want for each scene.
Lastly, it would be better if you check your continuous light source for any flickering problems. Light sources that show a lot of fluctuations will disrupt the entire light setup of the frame.

Tips to Improve Lighting For Your Videos
1. Pay attention to the Subject and Background
The most basic principle for the adjustment of lights during shooting is to start with the subject. Naturally, it is the subject that has to remain in focus throughout the film. Therefore, the initial lighting adjustments should be such that the ambient light enhances the focus already created by your digital camera.
It does not mean that the lights should be adjusted for the subject alone and not the background. To create a better contrast between the subject and the background, it is crucial to improve the depth of field. Digital cameras alone cannot provide sufficient depth without the assistance of proper lighting measures. So, it is crucial to light up the subject and the background individually for better results.
2. Use Natural Light Whenever Possible
Using natural light to your advantage is a skill that every videographer must master. You might not get the luxury of using continuous lights every time you shoot. So, being prepared and knowing how to shoot a scene with natural light is very important.
For doing that, you can search for a window or even a door from which sunlight can travel inside. Then, place your subject in a way that the light equally illuminates the entire face, even if it is not as bright as you would want. Once this is achieved, the shooting modes of your digital camera and the parameters like ISO settings will handle everything efficiently.
If you are planning an outdoor shoot, it is vital to know the sun’s position at different times for conducting the shoot correctly. The golden period for shooting under the sun is early morning, around 9 a.m. In the evening, it’s around 6 and 7 p.m. At all other times, the angles at which sunlight falls on the face are not ideal and can distort the exposure balance.
Outdoor shoots with optimal lighting can provide you with the best footage without worrying about other preparations.
3. Use Shadow Side Shooting
Shooting ‘shadow side’ basically means to keep your camera on the opposite side of the source of light. This way, the camera records the subject in a perfectly balanced frame with optimum lighting. Almost every cinematic shot with close-ups is recorded with the shadow side method.
Apart from giving a cinematic look, the shadow side method helps you shoot easily when you do not have enough lamps, flash, strobes, etc.
4. Positioning of the Light
The position of the source of light is also very crucial to ensure that the illumination is balanced. To do so, it is recommended that you allow the beam of light to fall at an angle of 45° to the subject. This way, no aspect of the subject will have abnormally high exposure, and you will get much better footage.
Tilting the camera further is only recommended if you purposely want the light to fall on a particular point of the subject’s body. Otherwise, the 45° rule works perfectly in almost all settings.
5. Using Fog and Haze for Better Lighting
Using elements like fog and haze will allow you to use lights more creatively. Artificial fog or haze can be created with things like dry ice. Adjusting light through the fog will help you shoot unique scenes with more depth. Filmmakers generally use these tricks to add some cinematic elements to the footage even before editing. Thus, you can play with lights and shoot some extraordinary scenes.

Best Continuous Lights
1. Rotolight NEO II
The color temperature range that this light allows is just exceptional. With a range of about 3150-6300K, you get all the warm and cool color lights ejected in the form of a powerful beam. This improves its versatility, allowing you to use the same light for both indoor and outdoor shoots. Another good thing about the Rotolight NEO II is its strong battery. It lasts long after charging, and the light does not fluctuate at any point. Other features like Bluetooth connectivity and some additional creative effects make it a perfect continuous light lamp.
2. Profoto C1 Plus
The Profoto C1 Plus is the new-age continuous light solution that is designed for smartphone-based video shoots. It has a unique design to distribute light evenly. It is very handy and can be carried anywhere you want. The company also provides plenty of accessories so that you can utilize the full potential of the Profoto C1 Plus while shooting.
3. Lume Cube 2.0
The Lume Cube 2.0 is a small-sized continuous light source with a strong battery and powerful light output. In addition, it is a mountable lamp that provides a wide beam angle with much better light intensity and texture. Even its predecessor, the Lume Cube, was a great overall product and this particular model is the best successor that users could have asked for.
Conclusion
So, these were some of the best professional lighting tips for videographers. You will have to practice these techniques regularly before you can master them completely. But, ifou follow these tips correctly, you will surely end up cinematic recording footage without relying much on post-processing and video editing.