Knowing how to set your audio levels before you hit record makes all the difference in capturing professional-sounding audio.
Audio has a vast dynamic range, from subtle and quiet sounds to loud and explosive sounds. To become a master in recording audio, you need to know the fundamentals of setting appropriate levels before hitting the record button. This will be a game changer when capturing your own audio. In this guide, we break down how to properly set your levels for perfect-sounding audio.
What Is Audio Gain?
Before diving into this guide, we first need to understand audio gain.
When we set the levels on recording devices, we are essentially setting the “gain” levels. Gain can commonly be confused with volume, but they are two different things. So, what is gain?
Gain is the amplification applied to a signal to increase its input level. It’s the ratio of the output power to the input power which is measured in decibels, otherwise expressed as dB. Now, remember the input level for gain, as volume on the other hand dictates the loudness of the output.
Upon recording sounds, there will be a gain knob which is what is used to set the levels before recording. This process is also known as gain staging. The signal will be very quiet when the gain is set too low. On the contrary, if the gain is set too loud, the signal will be very loud, which will be overbearing for the amplifier in the microphone, causing clipping (which we don’t want).
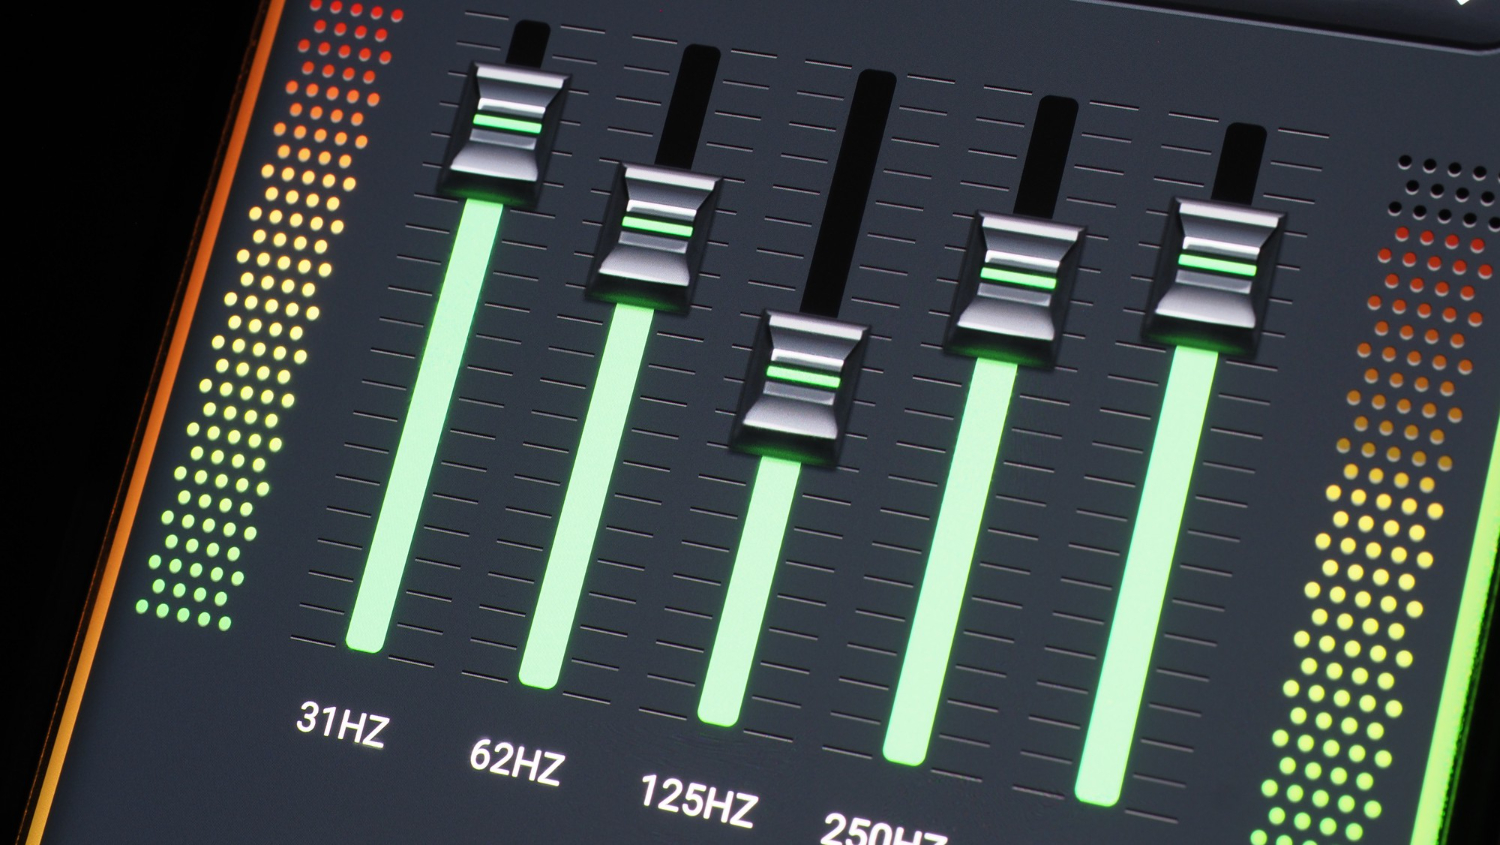
Understanding the level meter
Every recording device has a level meter. This is the display that we use to monitor the incoming signal, and your best friend when setting your levels.
Level meters use decibels as a unit of measurement, with -32 dB as the lowest value shown and -6dB as the highest value shown. There will be colors that are displayed depending on how strong the gain is.
In an ideal world, the level meter should be lighting up green consistently. As we all know, green usually means good! If your audio starts to peak in the amber region, this indicates that the audio is more on the loud side, however, it’s still more or less okay. Finally, if your audio is going into the red zone, this is a danger sign. And by danger, we mean distortion territory. This is to be avoided to maintain a clean signal.
Auditioning Audio
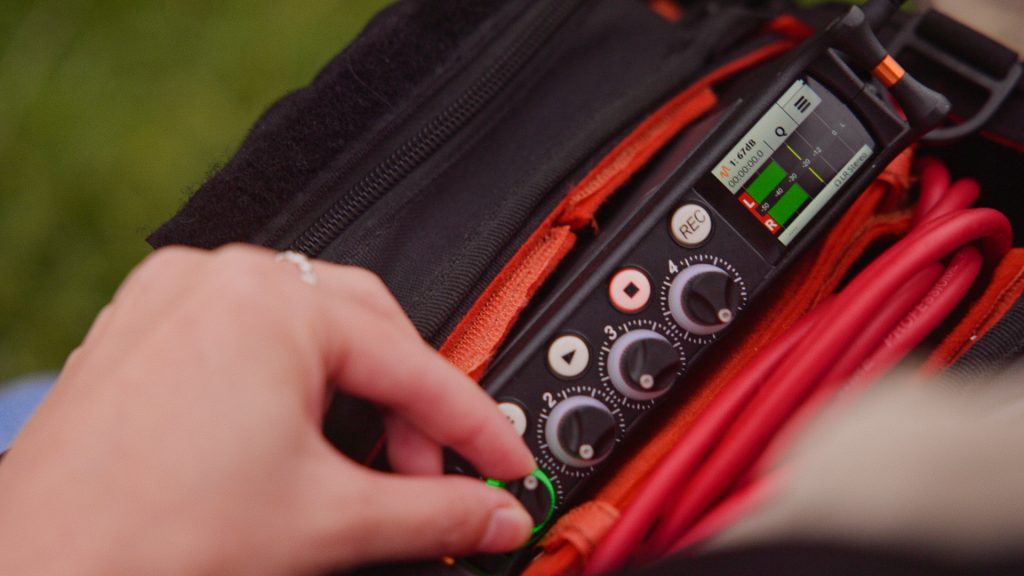
When you’re at your location or in the studio ready to record, we first need to audition the audio. This is the stage in which we adjust the gain knob on the recording device at the appropriate level whilst the sound is being heard.
With dialogue, allow the person to speak into the microphone. This is a chance to monitor the incoming signal and check whether it’s sitting in a comfortable place on the level meter, the signal isn’t peaking in the red zone, or isn’t too quiet. This is a very similar process to sound checking for live performances! More importantly, use headphones! Using just your eyes on the level meter is a no-go as you won’t be able to hear what the microphones are picking up. Trust your ears.
Prepare for spikes in the audio signal, which will more than likely be the culprit of the clipping. Get your talent to say their loudest lines and see where it’s peaking. Furthermore, once you have found the right spot, write it down! There’s nothing more annoying than forgetting those levels for specific sounds!! While this may vary each time, it’s always wise to know roughly where you’ll need to set the gain.
So, how do we know what level is appropriate? How many decibels should the signal be hitting?
Recommended Gain Levels
The general rule of thumb is that audio signals should be dancing around the -24dB and -12dB region. This gives a good amount of headroom (the room between the signal peaks and 0dB) for post-production editing or any sudden transient peaks.
Below are some recommendations. Take note that these are just recommendations. The best tool to use is your ears. Feel free to experiment to your taste.
- Recording Dialogue on set: between –16dB and -12dB. As mentioned previously, ask your actors to say their loudest lines to get an idea of where the audio will peak. Keeping this ideally below -6dB is a safe bet.
- Recording ADR: similar to recording on-set dialogue — have it sit between -16dB and -12dB, with peaks at around -6dB.
- Recording Foley: between -12dB and -6dB. As this is also in a more controlled environment, pushing the signal more towards -6dB is okay. If you plan on doing heavy audio editing, around -12dB to -10dB will be a good start.
- Recording Ambience: natural settings like a forest (quieter sounds), can be sitting between -50dB and -20dB. Ambience is much quieter than recording dialogue and sound effects, thus cranking up the gain where it’s peaking between -12dB and -10dB can introduce noise generated from the microphone itself (also known as self-noise). For noisier environments, the audio can peak up to -6dB, but monitor this carefully as uncontrolled environments may surprise you with surprise loud noises.
The Challenges of Setting Levels
Setting gain levels does come with some challenges. Much of this is due to working in uncontrolled environments like the outdoors. Knowing the characteristics of your location, whether there is any noise pollution that could hinder the recording is always good to take note of. When recording in a studio, you have more control of the sound environment; therefore, unexpected sounds are highly unlikely. Auditioning the sound will be a smooth process.
Another factor is using the wrong type of headphones. Ensure that when you are recording any type of sound, whether it’s for a film project, a YouTube video, or your own music, you are using a pair of studio headphones. These are specially made for monitoring sounds due to their flat frequency response, meaning no frequency range is artificially boosted or attenuated. Headphones that you use for pleasure listening would not be suitable for these situations as it won’t be an accurate representation of the sound.
Practice Makes Perfect
Getting to grips with setting audio levels does take time and practice. The more you do it, the quicker you’ll be able to set the gain level. Depending on the nature of the sound that you’re working with, you will learn how the sound behaves and be able to recognize an appropriate level right off the bat.
Cover image via Freepik.
Looking for filmmaking tips and tricks? Check out our YouTube channel for tutorials like this . . .