LUTs are trending in the world of photography for all the right reasons. With editing gaining the importance it deserves, photographers are now taking the post-processing stage of photography seriously. While editing used to be a tedious, time-consuming task, with the introduction of tools such as LUTs, it now becomes a lot more simplified.
Today, we will be listing out everything you need to know about LUTs – what exactly LUTs are and how to use LUTs to your benefit. So let’s get started right away.
What are LUTs?
Let’s start with understanding what the abbreviation LUT stands for – LUT simply means Look Up Table. While this may seem to be a complex concept in the process of editing, trust us, it’s not. LUTs are color-coded math equations that you can use to alter the color of your photographs or video footage. This tool is the quickest way to edit imagery without worrying about compromising quality.

Why do you Need LUTs?
Your camera is in-built with color correction and replication software. Despite this, when you record in LOG, you notice that the output imagery is not up to the mark. With this shabby-looking imagery covered with a satin sheen all over, you may even start wondering if your capturing techniques are wrong. However, in reality, it’s not so. These images and videos are just fine – all they need are some post-processing touches, which is where LUTs come into the picture.
Lookup Tables save a lot of the time and effort you put into the process of editing. This tool helps you set a predetermined look for a specific visual effect. It also boosts the speed at which you can color grade. As you can directly apply it to your images and videos, you cut down on a lot of your editing time. LUTs also give you the creative freedom to create your own unique style of editing.
LUTs also help organize your post-processing workflow. Like other aspects of the editing process, you also need to know when exactly you need to incorporate LUTs. Once you learn the pattern and steps to be followed, it helps get the job done more efficiently.
Moreover, accurately color grading your imagery makes it even more interesting for the viewer to watch – and that’s the ultimate goal of every photographer and videographer. So if you end up color grading your imagery inaccurately, you may end up disappointing the viewers. LUTs offer the flexibility to implement different effects to different clips so that the end result is simply marvelous to look at.

Types of LUTs
Let’s understand the two LUT formats, each of which offers different features.
1D LUT Format
You can use 1D LUT to control a single parameter (gamma). The 1D LUT does not offer much flexibility with the other parameters, and adjustment to one parameter applies to other aspects such as colors, saturation, and contrast.
3D LUT Format
The second format is the 3D LUT, which has three axes that allow you to adjust every element individually. This format is a lot more flexible as it enables you to control hue, saturation, luminosity, gamma, and contrast separately. With this feature, your imagery gets a high-end, cinematic color grade.
You are free to choose the LUT format depending upon the purpose. However, thanks to the high-quality results it delivers, the 3D LUT format is more popular amongst photographers and videographers.

How to use LUTs?
While LUTS do have a complex technical side, you don’t really have to get into the details to use them in your post-processing workflow successfully. We have listed down a couple of simple steps to get started with using LUTs for your upcoming project. Read to find out more:
Step 1: Color Correct the Imagery
LUTs help with color grading, but not with color correction. Thus, you need to color correct your imagery before you start with the whole LUT application process. You need to adjust the imagery so that the color correction tools work effectively. Colour corrections need to be given importance, as LUTs assume baseline natural color. In case you miss out on color correction, the LUTs you choose to apply may not show desired results.
Step 2: Create and Place the Adjustment Layer
Firstly, import a video or an image and place it into your timeline. Only then can you move ahead to create an adjustment layer for your LUT. Now the question is – why do you need to create an adjustment layer? Why can you not apply your LUT directly?
Here’s the answer – creating an adjustment layer makes the whole process easier. It allows you to incorporate intricate grading customization, which helps edit your imagery in a much better manner.
To create an adjustment layer, all you have to do is follow this path:
- Right-click inside the project window
- Click on New Item
- Select Adjustment Layer
Once you are done with this, a new clip will pop-up in your project window. Simply drag and drop onto your video from here.

Step 3: Insert the LUT
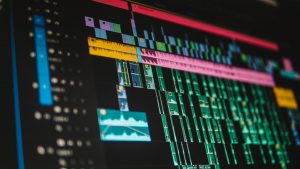
To get started with this step, you first need to open your Lumetri Color Panel. If you haven’t opened it already, simply go to Windows and select the Lumetri Color Panel. In this panel, you can see a drop-down menu featuring the Input LUT option. Next, you will see the Browse option. When you tap on Browse, you can instantly see 35 free LUTs right on your screen. You can now select the one that suits your imagery the best, and it will instantly apply to your imagery.
For easy access to the 35 LUTs, try adding them to the drop-down menu. With this, you will cut down a lot on browsing time.
Step 4: Adjust the Settings
You can now experiment with all the available LUTs to see which works best with your images or videos. Once you have selected the one you like, you can preview it. This will help you better understand how the imagery would appear once you apply the LUTs to it. At this stage, you can work on the changes you need to introduce to the video. So whether it’s the exposure that needs tuning or the highlights that need to be adjusted, you can do it right at this step.
When applying LUTs, keep in mind that every image and every clip of a given video has different requirements. Applying blanket LUTs, in this case, won’t make sense, and you would need to treat every image and clip individually when it comes to editing. The more intensive your color grading will be, the better the resultant imagery will be.
Summing Up
After reading about LUTs, we’re sure you are more than excited to try out this tool while editing images and videos. Do keep in mind that whenever you try something new, it may not seem easy. However, with a little practice, you’ll get better by the day. The same applies to LUTs, too! The more you try using the tool, the greater you will get at it.