If you’re looking for something interesting apart from your primary work commitments, selling stock footage online is a great option. The best part about selling footage online is that you can do this in your spare time outside of your other freelance commitments. It also allows you to experiment and flex your creative muscles, that otherwise might not be fully utilized with the day-to-day client work!

One really important aspect of making sure your videos sell is making sure you have crystal-clear footage quality. There is a lot of competition out there, and you need to make sure you are using the latest equipment. Another vital aspect to keep in mind is ensuring your content tells a strong story. For example, stock footage of people is a common and popular subject, because this content is more likely to tell a strong story. With that, don’t be afraid to experiement and find a niche topic! While there is no limit on experimentation – it could be anything, from animals grazing to humans having a walk or simply a stock video timelapse. The quality of the video and your creativity are decisive factors that would affect the saleability of your video footage.
Today, we will discuss how to prepare your footage to make it ready, just as required for selling online. So let’s have a look at these simple but highly effective tips:
Colour Grading Your Footage
Irrespective of the form of art, color is what strikes our eyes first. The same applies to videos too. To fine-tune your video footage and make it look professional, you need to master color grading. It is a process of enhancing the colors in a film in a digital manner. You are free to use your creative judgment and incorporate different color palettes in your videos with the help of color grading. These days, many video editing programs and apps help you get the job done effortlessly.
The whole objective of color grading is to take the footage from a log/flat profile, to a more polished version that is ready for the end-user. It is also an expression of your creativity, which allows you to modify videos as you wish to portray them. To get the hang of color grading, you need to be well-versed with a couple of tools related to it. Once you know what these terms mean, you can adjust them accordingly to gain the desired results. Let’s understand them better:
Brightness and Contrast
Brightness and contrast are dependent on each other. So if you alter the brightness, the contrast of the footage would change too. Brightness is often confused with exposure, but it is important to note that both these terms are not the same.
Exposure (Gain)
The exposure tool comes in extremely handy, especially in case of underexposed and overexposed footage. With this tool, you can quickly fix the video and bring it to the proper exposure level.
White Balance
With white balance settings, you can make the image appear cooler or warmer, as required.
Bluish footage depicts a cooler setting, whereas the warmer one gives out a sunset-like look. But you don’t want your footage to look heavily edited – and this is where white balance helps. It brings a natural look to your footage, making it all the more appealing.

Three-way Colour Corrector
A three-way corrector is a single tool that helps to adjust four different elements – saturation, hue, brightness, and contrast of any given scene. The single-interface corrector ensures you don’t have to alter each of these elements individually.
The Fast Color Corrector
The Fast Color Corrector is similar to the three-way Corrector but is much simpler and easier to use. With this tool, you can quickly fix the saturation and tint of the video. In video editing software you may see this displayed as a color wheel where you can vary color channels with Lift, Gamma, Gain and Saturation.
The Unsharp Mask and Sharpening Tools
To make your footage look sharper and more accurate, you can use this tool. However, it is essential to note that this tool does not correct out-of-focus shots but is suitable for sharpening edges. Also, overusing this tool will end up making the video look weird. Therefore, we recommend moderate usage of this tool.
Curves
Among all the tools mentioned above, Curves is a slightly complex one. Curves are extremely handy when you wish to alter the brightness of your scene completely. As the name suggests, you’d have to bend curves and drag points to achieve the desired effect. The tools feature two curves – the horizontal curve decreases contrast, while the vertical one increases it. You can play around with the curves until you nail the effect you wish to apply on the video footage.
Color Match
Color Match is very convenient, especially when you have a reference shot for a particular scene. With the help of this tool, you can make your footage appear just like the source video.
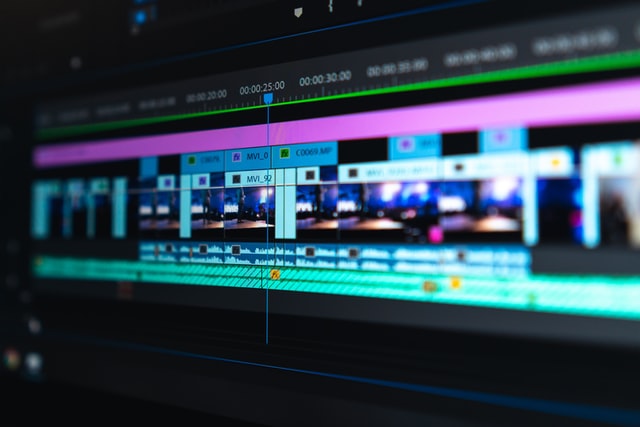
Exporting Your Footage For Uploading
Once you have edited your footage, it is now ready to be exported. Follow this simple guide for best practice.
Before Recording
Source encoding is a crucial step, as it affects the quality of the transcoded media. Some other important aspects you need to keep in mind are the quality of video and audio. When it comes to video, you should use the frame size of the largest anticipated rendition. For maximum audio compatibility, pick stereo audio. At the same time, ensure that the audio levels are consistent across the footage. Multiple video and audio streams are not a great idea. Also, the raw source needs to be compressed before you upload the content.

While Recording
As you record your footage, you need to capture it at a constant frame rate, as it would help avoid stuttering during playback. Camera shake can ruin all your capturing efforts, so ensure you have a steady stabilizer in hand. Noisy and dark backgrounds are a big no. Each of these factors affects the compression of the video, which ultimately lowers the quality.
Exporting
Once you have recorded the video keeping all essential aspects in mind, you can export the video. While rendering your videos from a video maker, select the H.264 codec option or a container other than Flash or SWF. Also, stay consistent with the frame rate and upload a high-quality file without worrying about the file size. Also, always keep a copy of your native file if you wish to edit or re-encode them.
Uploading and Transcoding
After you have encoded your video, it is now time to upload. You can easily upload your video using the ‘upload’ option in video production software or upload a batch of videos as well. Next comes transcoding, which takes quite some time.

The ideal duration required for the transcoding process is thrice that of your video duration. Also, you might want your video to be compatible with different devices such as desktops, smartphones, and TVs. In that case, you need to start with a video file that plays optimally in all these three environments.
Summing Up
Editing and publishing stock video footage might seem a bit tedious, but it is only a matter of time. Once you get the hang of the entire process, you’ll be able to publish your videos in no time.