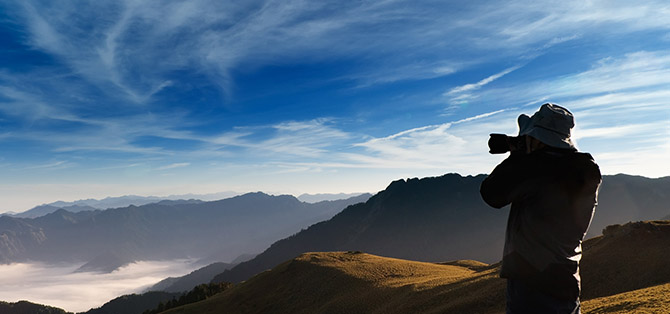
In most cases, the most exciting time to shoot stock video is when you’re out of your home country and traveling – seeing new things, going to places you’ve never been and know little about. Discovery is fascinating and so are the experiences you inevitably have when traveling.
Unfortunately, traveling is probably the most risky part of your kit’s life and presents a vast amount of potential problems. With so much to go wrong, it’s always a good idea to be prepared. In this article, I will detail my top tips for avoiding insurance claim paperwork and keeping your kit happy.
Planning:
 Â
Â
Before you even think about packing, you’ll want to get online and do some serious reading. These are a few of the details you are looking to obtain:
- What type of environment will I be filming in/traveling through?
- Which of the elements could potentially threaten my gear? (heat, cold, dust, water, etc)
- Will my airline let me take my camera and kitbag in the cabin?
- What’s the security like where I’m staying? Do they have lockers/a secure room?
- Is there free power available for re-charging? Â Have I got adapters?
- Is my insurance plan watertight? Must cover accidental/water damage and ideally theft.
- Have I got at least six months left before my Passport expires?
- Have I written down serial numbers of my gear? Serial numbers help verify that equipment is yours/existed.
These are a few of the things you will want to consider. Use common sense! If you are going somewhere that’s notorious for hurricanes and torrential rain, then you’re going to have to pack accordingly – and quite possibly purchase additional protective gear.
Protecting:

AÂ lot of the time, you’re going to be fine using your camera as it is, but occasionally the situation is going to be a bit more demanding. Â A good investment for any videographer who is going to be traveling is a dry bag. They cost less than $10 and with free shipping, I for one am not going to argue, check out this one:
https://www.amazon.co.uk/VicTsing-Camera-Waterproof-Underwater-Housing
Although this case is designed to be fully submersible, I’d suggest testing it using something a little less expensive than your pride and joy. If you want to film extensively underwater, then you should google specialist cases. There are many for big brands like Canon, but not such a wide range for the less well known brands. Â They are not only useful underwater – If it’s raining, stick it on. If you’re in a stand storm, stick it on. You get the idea.
You can also get smaller waterproof pouches. These are ideal for phones, batteries, etc. I find them handy to have at my disposal and it’s a lot easier to feel at ease without the niggle in the back of your mind that your new smartphone is potentially seconds away from getting soaked!
For protecting your lens when you’re shooting, I personally find it beneficial to use a UV filter. As well as reducing glare and reflections whilst shooting outdoors, it also serves as a great lens protector.
Sometimes you’ll want to transport your camera body without a lens on it (especially if you’re packing your kit into a tight space). So make sure you’ve got a body cap as well as lens back and front caps. Always have enough caps for ALL of your lenses to be covered at both ends, at one time with your DSLR sensor capped also (if possible bring a spare!)
Heat:

If you are going to be operating in high temperatures, there are a few things you can do to minimize the hardship on your camera.
Firstly, try to avoid exposing the camera body to direct sunlight for extended periods of time. When you’re not shooting, keep it in it’s bag (or in the shade). If you need fast access, set it to aperture priority so that you don’t have to work as hard to get your shots quickly. You can also try keeping the camera on in standby mode if it’s faster to load than from off.
Don’t leave it in an enclosed space like a box which is receiving direct sunlight, this includes bags. Another example is a car, if you leave your camera in a car, you are leaving your camera in an oven.
You should also ensure that you are writing onto fast media, the slower the memory card, the more effort that’s required on the cameras end. When you are shooting with a slow card, the data is written to a buffer before it’s written to the card. Ideally, your buffer will never fill up because your fast card is receiving the data like a champ.
Overshooting can cause overheating. Machinegun photographers are bad for this, as are videographers who just keep their cameras rolling because they have lots of SD cards and batteries — there’s no need, and it can be bad for your gear.
Cold:
 Â
Â
Cold isn’t as bad as you might expect. Due to the low moisture content of cold air, you’re less likely to encounter condensation. The main problem when shooting in the cold is ( wait for it) … Battery power. The science behind how batteries operate means that when exposed to very low temperatures, they actually lose power. What’s the best way to reduce this you may ask? Keep them warm!
If you aren’t in the process of shooting something, then your batteries probably don’t have to be in your camera. Put them into one of your inside pockets, close to your skin and let them share your body warmth. You scratch their back, they’ll scratch yours — by giving you more power!
The obvious fool-proof solution to this power problem is to just bring a ton of batteries, and keep them as warm as possible for as long as possible. Branded batteries are expensive, but can endure many more re-charging cycles than third party batteries and last a bit longer. I’d suggest having a few cheap and cheerful batteries to supplement your current supply though. They don’t last as long but get you out of a tight spot. If you want to be really hardcore, get a box that can hold heat well, get a pocket handwarmer of some sort and just stick it in there with the batteries. If you are buying a handwarmer for this soul purpose, buy another one too — you’ll just end up taking it away from the batteries and using it for yourself otherwise!
So, you’ve just got back and you’re ready to DIT your super awesome snow stock and upload it to Videvo! Now it’s time to think about condensation. When you bring your cold camera and lens inside, the warm moisture in the air will begin to condense on the cold surfaces. The best way to combat moisture buildup upon re-entry to your warm refuge is to let the camera cool down slowly. Don’t walk inside and stick it by the radiator! Firstly, put the camera into a plastic bag (ideally while still outside) and then place it on a cool windowsill or that cold drafty place by the back door. This will let your device slowly acclimatize without any damage. The reason for the bag is simple: moisture from warm air inside = bad. Bag = barrier for inside moisture and is therefore good.
Dust:

If you are shooting in a dusty environment, like a safari trip or the desert, you’re going to encounter a much higher concentration of dust than you’re used to. .
When shooting in a dusty environment, use an optical flat to protect your lens. A UV filter will keep it shielded from any dust coming your way. Filters are cheaper than lenses, a scratched filter isn’t the end of the world.
Clean your gear every day! If you don’t do this, there’s a much higher chance of problems occurring in the future.
Space blankets are a very good idea when shooting in hot environments. They have the ability to both contain and shield heat; which means you can cover your camera with one while it’s not in use — perfect!
Bags:

Â
I am a huge fan of Lowepro. Their bags are well constructed and long lasting, as well as built with people like us in mind!
Here are my favorite roller bags:
The Pro Roller Lite 250AW is a fantastic new design. It features an extremely deep and spacious main compartment, customizable via the adjustable padded dividers. This bag can fit an incredible amount of stuff.
The best part is that it’s been designed to meet carry-on luggage specs, so as long as you aren’t packing it full of bricks — you can take it on the plane with you! (weigh it before you leave the house)

The Pro Runner x450 AW is the higher-end version of the Roller Lite. It’s a fantastic bag and lets you take a vast amount of kit with you in a very secure fashion. You can read all of the specs on the website, but the main reason I prefer this bag to the roller lite is the back straps. When this bag is full to the brim, it’s not feasible to carry it on your back; but if it isn’t full or you have some space taken up by lighter kit — then the back straps can be extremely useful.

Roller bags are very useful for transporting, but for working you usually want to opt for something a little smaller and more convenient.
My favorite run and gun bag has to be the Fastpack AW series. Size requirements vary from individual to individual, but I like the 350. It’s got plenty of space for a DSLR or two as well as plenty of lenses, a laptop, audio gear and more. It’s built in all weather cover means that rain or shine, this bag will serve you well.
Wet:

Water is pretty high up the public enemy list for cameras; it can look awesome through the viewfinder but not so awesome when it’s all over your circuitry.
If you are in a humid environment, there will of course be lots of moisture in the air. Try and keep your camera in your bag until you need it. Just like with hot environements, stick it on standby and aperture priority – this will mean that the time it takes you to get it out of your bag won’t impact the time it takes you to get the shot quite as much.
Change lenses only if you need to. Far better to have one lens per body and keep it that way until you are out of danger. But not everyone has spare camera bodies. If you only have one body, try and change lenses at night — the water content of the air will be far less.
Wipe down your kit whenever you are able, use a very absorbent towel (ESPECIALLY IF YOU ARE NEAR TO SALT WATER). A lot of water damage happens from water condensing on the camera and slowly working it’s way in.
It’s a good idea to wrap newspaper around your lenses and bodies before putting them back in your bag if you’re in a wet/humid environment. silica gel pellets are fantastic for these types of environment as well, stock up and spread them around your kit bag.
Sounds small, but careful with your lens caps. Don’t breathe on them, dry your hands before touching them. If you put on a cap with moisture in it, you’re doomed to a foggy lens.
Your kit bag itself will usually end up getting a bit of moisture in it. You can flush it out by simply emptying it, opening up all compartments and leaving it in the sun for a few hours.
Water Damage Control:
If your camera gets wet for any reason, TURN IT OFF! Immediately afterwards, remove both the battery and the memory card and keep the doors open.
Move the camera to a well ventilated, dry and secure area and leave it there as long as possible — I would suggest a week. The reason behind this, is that you don’t want any water anywhere when you start pushing current through those circuits again… If water is in the wrong place when the camera gets fired up, it could easily cause a highly problematic short circuit or worse deep within the cameras electronics. Depending on how wet your camera was in the first place, it may be un-recoverable. Water tends to have a high mineral content, and even when the camera is dried out, these minerals will remain and may still wreck the circuitry. The best fix is always prevention, so look after your camera and keep it dry!
A Few Extra Tips
– When taking your camera from the air-conditioned environment, give it a few minutes to acclimatize to the new temperature before operating it. If you don’t do this, condensation can form within the camera and can cause harm.
– When packing, ensure lenses and camera bodies do not have too much freedom of movement; they should fit snugly and not be able to move around easily at all.
– Try not to change how you organise your gear. Spend a big chunk of time with all of your gear and your bag(s), work out the optimum storage formula and stick to it. The only reason you should need to re-organize your bag is if your kit changes. It’s always an advantage to know exactly where everything is, especially with a topic such as videography; if you’re not careful you can miss your chance for that perfect shot.
– Don’t look like a photographer if you can help it. It’s always a good idea to maintain a low profile when you’re traveling. Someone wearing a flashy bag with a shiny camera dangling from their neck supporting a lens as long as an elephants trunk is going to draw attention. You really don’t want to make yourself an attractive target for thieves. It’s also easy to get mistaken for a journalist looking to capture events which should not be occurring, this can lead to authorities aggressively enforcing laws that both do and don’t exist purely because they see you as a potential threat. Better to slip past without drawing attention.
– Keep your gear as close to you as possible, at all times. If it’s not close to you, it needs to be locked up in a vault with a security detail. If the vault and security detail aren’t feasible, then locked away and placed in a counterintuitive part of the room. If I’m leaving my kit bag locked up in my hotel room, I’ll have the kit bag on my bed and then all of the expensive contents of the bag on the bottom of my wardrobe with some clothes dropped on top. That way even if someone breaks into my room, they might not clear me out. If you have your gear with you but are resting/sending emails off your laptop — wrap a strap around your foot/arm. This will make it harder for someone to simply snatch and run. They’ll now have to tug pretty hard too.
– Most camera stores & the internet sell small silicon packs which are ideal for placing around your camera bag. A couple of these will handle any moisture that could collect there.
That’s all for this article, hopefully some of these tips will help you on your next shooting adventure!
Thanks for reading.
Harry
Videvo.net