What is chroma key?
Chroma keying, green screen, and chroma compositing are all words for the same thing; which is separating and layering different videos or images to create a final composition that is made up of these media. Phew, if that sounds a little complicated don’t worry, this article will explain the ins and outs of green screen using Premiere Pro.
This postproduction technique separates a subject from a background using color hues, usually green or blue. The subject can then be placed into a scene of your choosing which can be a still image, stock footage, recorded video clip, or CGI environment.
Why use green screen in your videos?
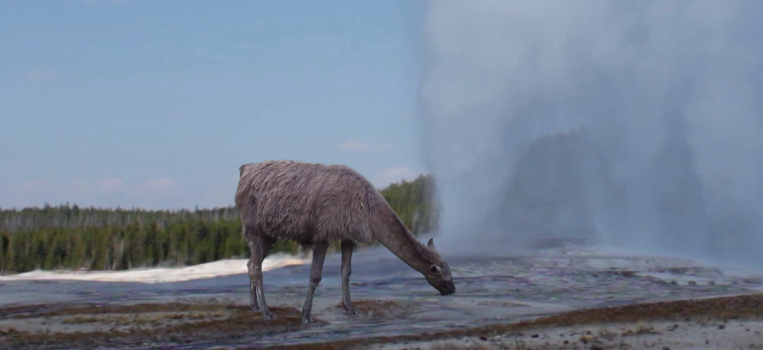
Chroma keying can be used to place your subject in any environment you like. If you want to place an alpaca right beside Old Faithful you can do so without getting wet, scorching your trainers, or paying for those extortionate alpaca rental fees. It can be used to create compositions that would impossible or prohibitively expensive to capture on camera.

This is a still from a composition of our stock footage Alpaca on Green Screen and Old Faithful Eruption, Yellowstone
You can dramatically cut production costs by shooting on location as little as possible; location shoots are a lot more complicated and time-consuming than going to a dedicated studio or sound stage. Problems such as power requirements, lighting changes, environmental difficulties, background noise, or some combination of all of these are common on location and can be eliminated by shooting in a controlled environment and digitally adding the background in post.
In addition to these, it might be impossible to shoot on location in these days of lockdowns, travel restrictions, and social distancing brought on by COVID-19.
How to do it
Using Premiere Pro for chroma compositing is easier than you might think and boils down to the following steps:
- Shoot some footage with a green/blue background
- Import footage into Premiere Pro
- Key out the background using the inbuilt tools
- Insert your new scene
- Colour grade
- Export
The remainder of this article will take a more detailed look at some of these steps and give you all the tools you need to start editing green screen footage.
Shooting your Subject
When shooting your subject in front of the green screen your goal should be to get as close to a completely uniform, smooth, and vivid background as possible.

Light the subject and green screen separately and maintain a distance between the subject and the screen. Place and focus these lights so they illuminate the screen as evenly as possible and avoid casting a shadow on the screen.
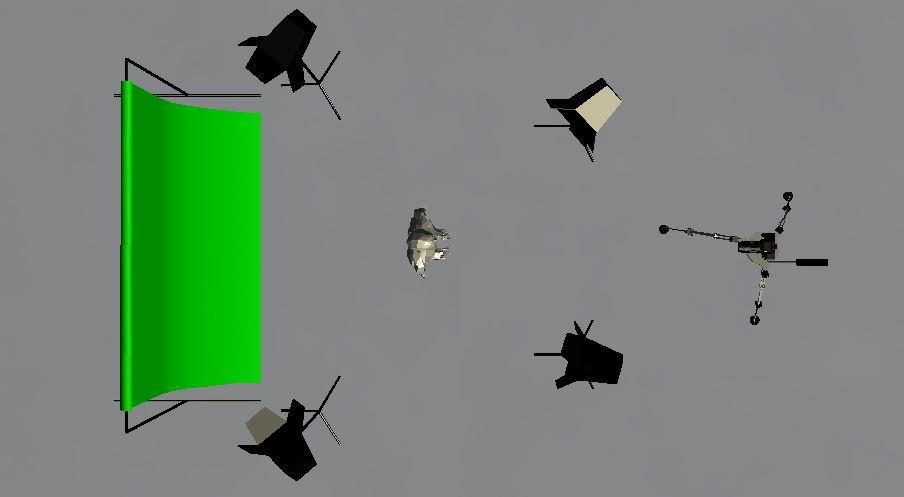
Using diffused lights on the screen and ensuring the screen is unwrinkled will also make your life much easier later on.
Importing footage to Premiere Pro
There are many ways to import footage to Premiere Pro, the most common being to use File > Import and navigating to the file you want to import.
Another method is to use Premiere Pro’s media player to preview the footage before it is imported into the project.
Key out the green screen using in-built tools
There are some tools in Premiere Pro for editing green screen footage but for keying out the background I would recommend the Ultra key tool which can be found by searching for “key” in the effects tab under video effects.
Key effects make areas of the clip transparent based on the brightness or color of pixels in the image. The Ultra key effect does an excellent job making any colored background transparent which is why it is my go-to chroma keyer in Premiere.
Tip: Ctrl+drag the mouse over the color you would like to key out. This takes an average of a 5×5 pixel square and generally yields better results than clicking a single pixel.
The Ultra Key effect also offers additional controls to refine the result including a limited number of presets; aggressive, relaxed, and custom which control the amount of transparency. It is possible to further refine the result using Matte Cleanup which reduces the size and softens the edges of transparent areas. This can be accessed while in the effects workspace via Effect Controls > Ultra Key > Matte Cleanup.
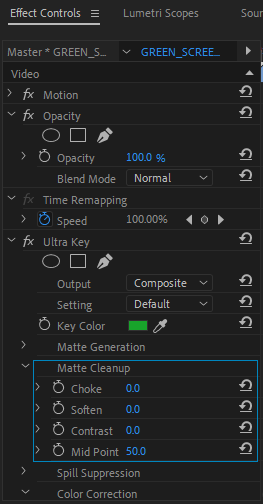
Spill Suppression is another useful tool that is used to clean up green screen keys around lighter colors, especially on hair where there may be a reflection of the green screen on the subject. This can be accessed while in the effects workspace via Effect Controls > Ultra Key > Spill Suppression.

Using the output menu to compare the composite image, the alpha channel or the color channel is helpful to gauge the results of the key controls.
If you are going to apply the same keying effect over several similar clips then save your effect settings as a preset by right-clicking Ultra Key > Save Preset. This can dramatically improve your workflow, providing more consistent results in a reduced time.

Insert your new scene
Inserting a new background is as easy as importing the green screen clip and can be done using the media player or import. Just place the background on a video channel below the keyed clip in the project timeline so that the transparent areas of the clip reveal the new background.
To make the scenes look like they fit together it is a good idea to match the tones of the clips using, brightness, hue/saturation, contrast, and color grading controls. Again, saved presets can be used to streamline your workflow.We sincerely hope that this article took some of the mystery out of chroma key editing using Premiere.
So get your camera, or grab some of our excellent (if we do say so ourselves) green screen footage and get creative. If you want to know more hints and tips why not check out our help section and if you have any requests for further articles don’t be afraid to reach out. You can also explore some of our green screen clips directly in the gallery below!


