Filming on location can be one of the most exciting, testing and rewarding aspects of filmmaking. In documentaries/TV, filming outside of a comfortable studio environment inevitably brings with it many challenges – juggling time pressures and permissions of locations, battling the stubborn public who can’t help but wave at the camera (!!), working with the light available and supplementing it if necessary and lugging your kit from base to base. The very nature of this often high stress environment breeds capability and efficiency – working in an environment that won’t give you the time, forcing you to think creatively, to find innovative solutions and learning to make uncontrollable factors work for you.
So, here are our 5 top tips for Filming on Location…
# 1 – Travel Light 
It’s not always possible, but when it is, streamline your kit – what is absolutely necessary and what can you go without? Yes, you “might just need” this or that piece of equipment and in any other circumstance I’d agree, it always pays to be prepared, but believe me when your director is pulling you from pillar to post because you’re running out of time, you’ll be thankful you left that extra bit of kit home! If you’re lucky allocating a base is always handy, you can drop most of your gear here in a secure location (preferably locked!) and return to it as and when you need it.
If you’re working without a Sound Man: Sound Equipment (including a boom & mic, a set of radio mics, headphones and 2 XLR cables) And finally, if indoors, a small lighting kit (perhaps a couple of dedos or LED LitePanels)
Even when traveling light there’s a lot to lug around. So make things easy for yourself and be selective. You won’t regret it.

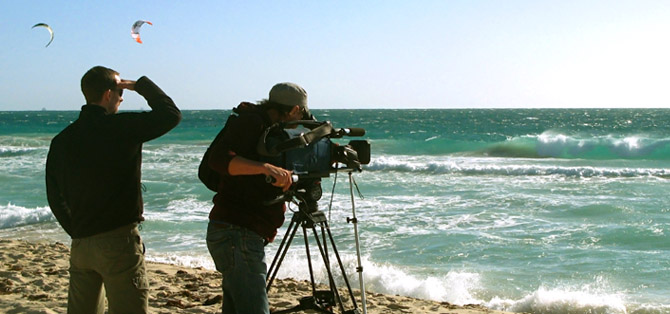
You’re ‘runnin-and-gunnin’ and traveling light. You’ve left that bulky tripod behind and are going handheld. You’re thinking on your feet, acting on instinct, one eye welded to the viewfinder, the other open surveying the action around you – A one man crew on a mission – you versus the world! Sometimes it’s just going to be faster to ditch the sticks and get on with the job.
So what are the best ways to get good, steady, handheld?
Stability – Get a solid footing, firmly spread your feet and legs apart and stand your ground. It is especially important when your attention is tunnel-visioned down a lens and not where your feet are planted. A solid base will result in a solid shot.
Shoulder it – Get that camera up on your shoulder! That is where it is designed to be. Just like when the camera is locked onto the tripod through the baseplate, the camera’s centre of balance will be distributed down through your body. With your shoulder… well, shouldering the majority of its weight the camera will become an extension of your body, operating and framing being achieved with a lighter and more precise touch
Don’t Go Long – Avoid longer lenses, they accentuate even the slightest movement and result in a wobbly, sea- sick inducing experience for the audience. This might be the style of your film or doco, in which case go for it, but if rock steady is what you’re after, you can’t go wrong with some wide angles. You can read our more in depth blog specifically about handheld, here.

#3 – A Good Kit Bag

When there’s water on the lens, when the battery goes dead, when the card runs out or it begins to rain… where do you turn? To your old-faithful Camera Kit Bag. This is your field survival kit, it will keep you “fully operational” (just like the Death Star). So fill it with some essentials – these might include:
– Lens cleaning fluid
– 1-inch brush Multitool
– LED Torch
– Camera Tape
– Dust Off
– Compressed Air
– Spare Batteries
– Spare Tapes/Cards
– A rain cover
A small umbrella Kit bags will vary depending on the job but just make sure you have one and that you’ve covered any potential disasters that might stand between you and that red carpet!
#4 – Working with the Light

If you’re indoors, you have the ability to control the light to some degree – switching off practicals, closing curtains and setting up some lamps of your own, but when you’re outside, it’s a whole different ball game. It becomes a case of making the best of the situation you are in and this is where working with the light and not against it, becomes vitally important.
Whenever possible avoid shooting into the sun – i.e. with the sun behind the object you’re filming. The camera is not as versatile as the human eye and cannot handle the extreme contrast levels that hard backlight from sunlight produces. Therefore filming a tree, or building, or car (or whatever) against the light will generally result in a severely underexposed or overexposed image (this might be what you’re looking for, particularly on Drama, choosing to shoot into the Sun results in more interesting shadows and shaping… but that’s all irrelevant if you’re trying to interview someone and the sky looks blown out!)
#5 – Visas and Permits

The very first lesson I was taught on Day 1 as a Camera Assistant was to never assume anything! EVER! And when it comes to Filming Permits the same rule applies. As Brits we say “It’s better to be safe than sorry” (with a cynically patronising smile). Filming Permits not only protect onscreen talent/contributors and property owners but the Film Production as well, and without the correct Realease Forms a project will not secure distribution, so make sure you have some ready.
When we were filming in Ethiopia, despite going through all the correct channels to get a Visa/Permit to film in the country, we were stopped at customs and our camera was impounded! Even after doing everything correctly, we still hit problems – so it always pays to be extra careful and diligent when filming abroad (after spending a day driving round Addis Ababa, we managed to convince the officials there that we did have the correct paper work and were allowed to continue making our film!)
Check out our blog post on Top 5 Filming Permits for more info and sample release forms.
So there you have it. 5 Top Tips for filming on Location:
- Travel Light
- Filming Without a Tripod
- A Good Kit Bag
- Working With the Light
- Visas and Permits
About the Authors:

Elliot and Zander Weaver run The Reel Deal Filmschool: an online resources for filmmakers of all skill levels. Having worked as freelance camera operators in TV for many years and produced & directed several TV documentaries of their own, they want to share the tips and tricks they have picked up along the way.
With their production company, Elliander Pictures, they have produced numerous shorts, music videos and commercials and are now in pre-production on their first feature film, COSMOS. With the hope of encouraging more filmmakers to make their first movie, Elliot and Zander are charting the process of making the film “from script to screen” on their blog. For more blogs, tutorials and behind the scenes, visit: https://reeldealfilmschool.wordpress.com also, Follow them on Twitter