DIY filmmaking is all about being creative and solving problems. Here are 3 production tips you can use in your next project.
Every day, a new gadget comes out that promises to improve your filmmaking and give you those Hollywood-style camera moves that you’ve always wanted — usually a slider, a gimbal, or a new drone. Let’s break down some ways you can get the same shots without breaking the bank — and with items you may already have.
Dolly Moves
The quickest way to add production value to your work is with simple dolly camera moves. This could be moving side to side or pushing in/out of the scene. On large productions, the dolly itself requires a dedicated crew to set up and operate, and (let’s be honest) we don’t really have those kinds of resources.
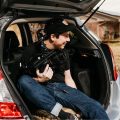
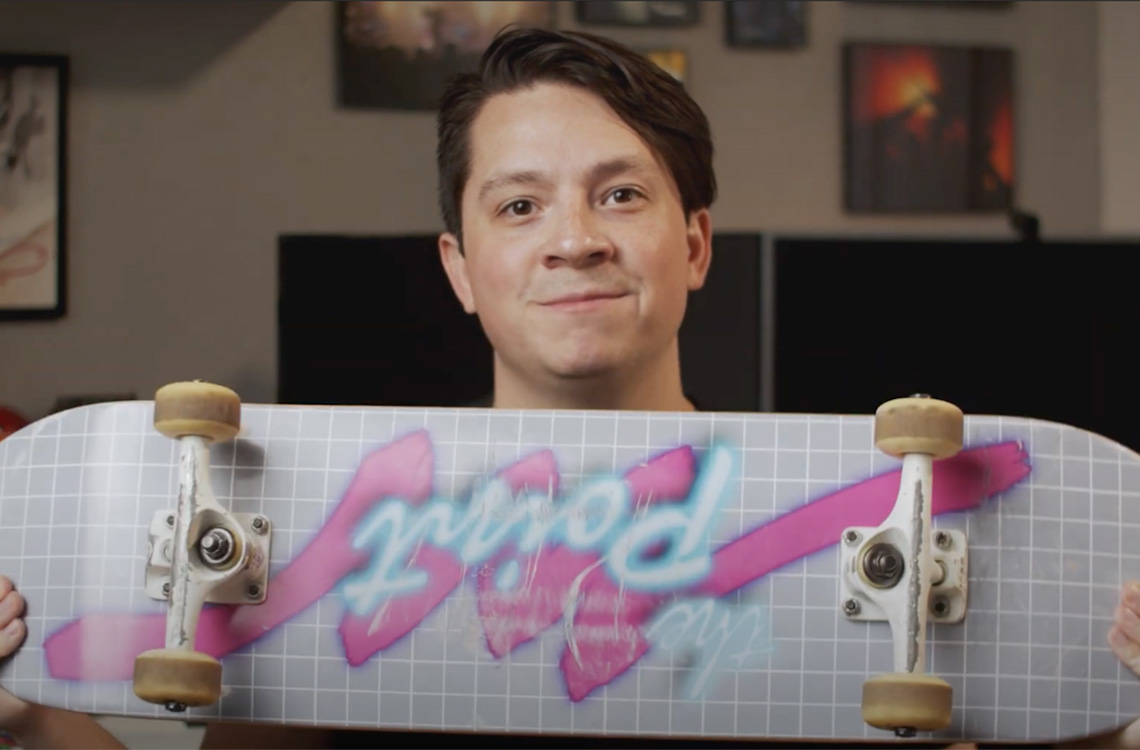
In recent years, gimbals have flooded the market to make this kind of shot much easier for camera operators, but they still don’t replicate the same kind of fluidity that a traditional dolly can achieve. My quick solution is the trusty skateboard. Whenever I have a project that I know I probably want to add some dolly moves to, I pack a skateboard into my car with the rest of my gear.


A skateboard functions similarly to a traditional dolly. They’re fairly stable (if you’re comfortable on one), you can fully operate the camera while using it, and they offer almost unlimited movement to your shot (given you have enough space).
Many consumer-quality dollies use urethane skateboard wheels in their construction, so you’re not too far off just using a skateboard itself. These wheels will accommodate almost any solid surface reasonably well, and small cracks or pebbles won’t send the rider flying. But, If you’re not comfortable riding and operating once yourself, your chances are also high that someone in your crew or a friend will be able to operate for you.
For my own shoots when I have a small crew, I hop on the skateboard myself and have someone essentially operate me as the dolly. This allows me to focus solely on the camera work and not worry about managing the skateboard, stopping, or pushing.
Operating by yourself is still an option, though, and it allows you to get really creative with your movement. In my own work, it has allowed me to get some really unique tracking shots with little effort (and without worrying about dolly track).


Another tip is to keep a small piece of wood handy for uneven or sketchy terrain. A plank somewhere between 3-6 feet can give you a smooth surface to roll on, even if you’re shooting in the grass or on gravel.

Car Shots
Shooting scenes that take place inside the interior of a car can be challenging. For one, you don’t have much control over the lighting if you’re driving around town and the scenery is constantly changing. One road may have a lot of ambient light, while a left turn takes you into complete darkness.
Secondly, noise levels are a challenge. The constant rumble of the road or the car’s engine can be very annoying to contend with while trying to record dialogue. Additionally, no matter how large the vehicle is that you’re shooting in, space is an issue. Try fitting a camera operator, a director, and a sound engineer into a backseat while still getting the camera angles you’d like.

Believe it or not, you can pull off a car scene right in your driveway using only a projector and a screen. There’s no need to cram everyone into a vehicle, mount the camera outside, or worry about randos honking while you’re rolling. The trick is to position the project screen on the outside window of the car that you’ll be shooting toward. On the screen, you’ll want to roll either background video or B-roll of scenery passing by — nature footage is perfect for this. If done right, the video background will appear as if your characters are actually driving past the scenery, leaving you to focus on getting the shots or performances you want. (Looping video is a great way to save yourself the pain of resetting the video over and over.)

What I like the most about this DIY trick is that it solves all the issues with actually driving and shooting. You can control the scene how you want, dial in the lighting, and immediately make changes as needed. You’re not cramming 2-4 people into a moving car, and the audio will be clean, void of any rumbles or bumps.


To really sell the driving and simulate car movement, move some lighting back and forth across your subjects. This will create the appearance of the car passing nearby street lights, rather than sitting stationary.
Drone Shots

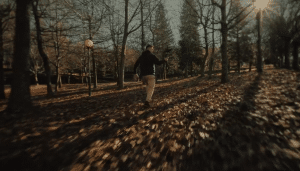
Drones can yield some really great-looking shots (especially when shooting nature video), and they’re a blast to operate, but sometimes, they don’t make practical sense to own. With a true DIY mentality, you can get shots similar to a low-flying drone with something I like to call . . . camera-on-a-stick.
Just like it sounds, you’ll mount your camera onto an available monopod, light stand, or C-stand. This does come with some risk, obviously, but is generally safe if done correctly, and with a lighter camera like a DSLR or mirrorless system.

Take the beefiest and sturdiest light stand you own and simply screw the camera into the 1/4 20″ thread at the top like you would a tripod plate. Remember to lift with your legs, raise the camera stand up above your head and capture the scene. This can be a little tricky since you can’t monitor your shot and camera shake can come into play. For this reason, I recommend using a wide-angle lens, somewhere between 14-24mm to account for this.

With a little stabilization and reframing in post, you can get shots that resemble what a low-flying drone could capture . . . all without FAA regulation and a $1,500 price tag.
DIY Mentality
The main takeaway here is that filmmaking is about creative problem-solving. Taking a DIY approach to your scenes and setups can make filmmaking a lot of fun — and save you money in the process!
Looking for more DIY filmmaking tips? We’ve got you covered.